Cornhole, the beloved outdoor game, offers endless entertainment for family gatherings, backyard parties, and tailgating. If you’re a DIY enthusiast seeking a personal touch, crafting your own cornhole boards can be a fulfilling project. In this comprehensive guide, we’ll walk you through the process of building custom DIY cornhole boards.

Step 1: Gather Your Materials
Before you start building your cornhole boards, it’s essential to gather all the necessary materials. For this project, you’ll need plywood for the surface, 2x4s for the frame, screws, and wood glue. You can purchase pre-cut wood at most hardware stores, but if you’re cutting your own, make sure to understand the evolution of lumber sizes, as 2x4s are smaller now than they used to be.
Here’s a full list of what you’ll need:
- One sheet of 2’ x 4’ plywood (1/2-inch thick)
- Four 2×4 boards for the frame
- Measuring tape
- Jigsaw or hole saw (for cutting the hole)
- Drill and screws
- Wood glue
- Sandpaper
- Paint or stain (depending on your preference)
Once you’ve gathered everything, you’re ready to start building!

Step 2: Building the Frame
Start by building the frame for your cornhole boards. Cut your 2x4s to create two 48-inch pieces and two 21-inch pieces for each board. These will form the rectangular frame that will support the plywood surface. Once cut, arrange the pieces into a rectangle and secure them together with screws and wood glue for extra stability.
When cutting and assembling the frame, be sure to use accurate measurements and secure the boards tightly. You can use clamps to hold the pieces in place while drilling. If you’re not familiar with working with wood, you might encounter a few challenges, especially with finishing. Consider learning about the challenges of using lacquer if you want a smooth, professional finish for your boards.
Once the frame is built, it’s time to move on to attaching the plywood.

Step 3: Attaching the Plywood Surface
With the frame built, it’s time to attach the plywood surface. Place the 2’ x 4’ plywood on top of the frame you’ve just constructed. Make sure the edges line up properly, then secure the plywood to the frame using wood screws. Be sure to space the screws evenly, about 6 to 8 inches apart, to ensure the surface is securely fastened.
Once the plywood is attached, you’ll need to cut the hole in the board. The regulation size for a cornhole hole is 6 inches in diameter, and it should be centered 9 inches from the top of the board. Use a measuring tape to mark this location, then use a jigsaw or hole saw to carefully cut out the circle.
After cutting the hole, sand the edges of the plywood and hole to remove any rough spots. If you’re planning to finish the boards with paint or stain, sanding the entire surface will help the finish adhere better.
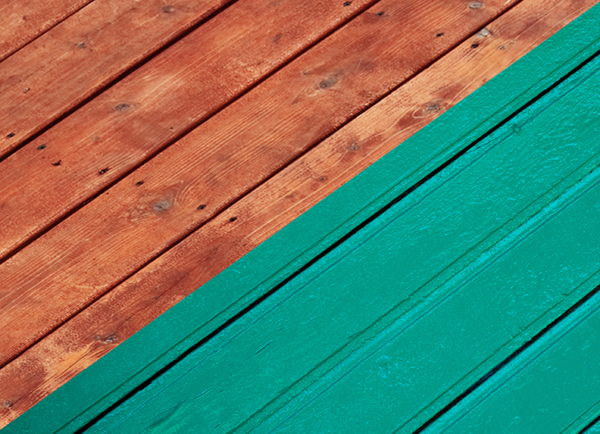
Speaking of finishes, deciding between stain or paint is an important choice. Staining will give your boards a natural wood look, while painting offers more color options and creativity. Each option has its pros and cons, so choose what best fits your style and durability needs.

Step 4: Creating the Legs
To make your cornhole boards stand at the proper height, you’ll need to create foldable legs. For regulation boards, the back of the board should be raised 12 inches off the ground.
- Cut the Legs: Cut four pieces of 2×4 to 12 inches each. These will serve as the legs for your two boards.
- Round the Top of the Legs: To allow the legs to rotate smoothly, you’ll need to round off one end of each leg. Use a jigsaw or a sander to gently round one end, ensuring it can pivot when attached.
- Attach the Legs: Drill a hole through the top rounded end of each leg, and then drill matching holes on the corners of the frame at the back of the board. Insert a bolt through both holes and secure it with a washer and wingnut, allowing the legs to fold up when not in use.
Once the legs are attached, make sure the board stands at the correct height (12 inches) at the back and slopes downward smoothly to the front. Now your cornhole boards are nearly complete and ready for the final touches!


Step 5: Finishing Touches—Paint or Stain Your Cornhole Boards
Now that your cornhole boards are built and assembled, it’s time for the fun part: finishing! This is where you can get creative and personalize your boards with a finish that suits your style.
- Choose Between Paint or Stain: You’ll need to decide whether to paint or stain your boards. Staining will give your cornhole boards a natural, rustic wood appearance, while paint offers endless possibilities for color and design. Paint can also add an extra layer of protection against weather, making it ideal for outdoor use.
- Prep the Surface: Before you start painting or staining, ensure the surface is smooth. Sand the entire board with fine-grit sandpaper to create an even finish. Wipe away any dust to prepare for the stain or paint.
- Apply the Finish: If you’re staining, apply one or two coats of wood stain, allowing each coat to dry thoroughly. If you’re painting, consider using a primer first, followed by 2-3 coats of paint. You can get creative with designs, such as team colors, stripes, or even logos.
- Seal for Durability: Once the paint or stain has dried, apply a clear sealant or polyurethane coat to protect your boards from wear and tear. This is especially important if the boards will be used outdoors. A protective seal ensures your boards last longer and stay looking great.
With the final finish applied, your custom cornhole boards are complete and ready for a game with family and friends!

As an Amazon Associate we earn from qualifying purchases through some links in our articles.