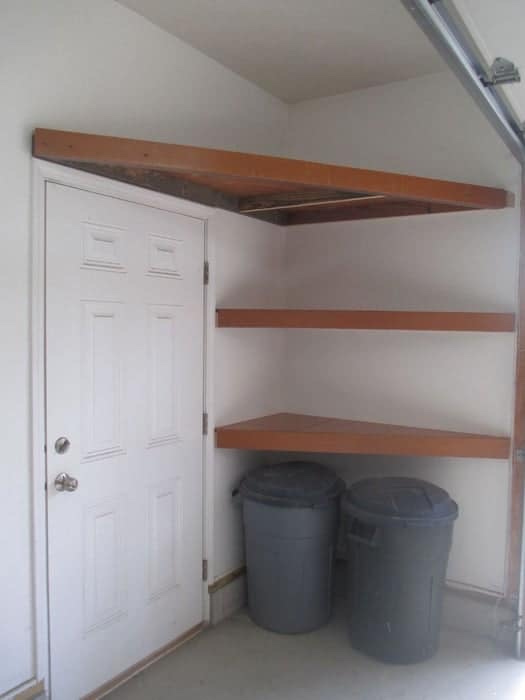
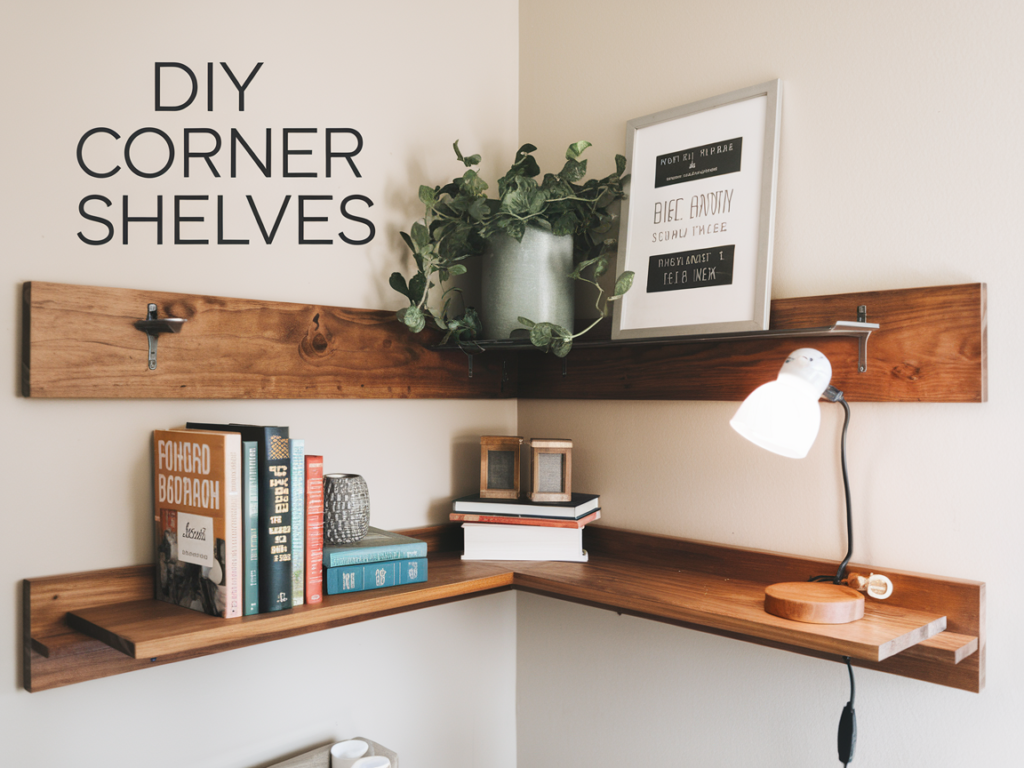
Transforming those overlooked corners into functional and stylish storage solutions is easier than you might think. With a little creativity and some basic tools, you can craft custom corner shelves that not only maximize space but also enhance the aesthetics of your home. Here’s a simple DIY guide to creating corner shelves for any corner area of your home. One of the most important things you will see do this is some strong shelving brackets if you choose to use them.
Materials You’ll Need:
- Wood boards (size and type of your choice)
- Brackets or L-shaped brackets
- Screws
- Screwdriver or drill
- Level
- Measuring tape
- Paint or stain (optional)
- Mounting hardware (anchors and screws)
Step-by-Step Guide:
1. Measure and Plan: Measure the dimensions of the corner where you want to install the shelves. Decide on the size and shape of the shelves you want. Triangular shelves are a popular choice for corner spaces, but you can also opt for rectangular or hexagonal designs.
2. Choose Your Wood: Select wood boards that match the style of your room. You can use plywood, reclaimed wood, or finished boards from your local hardware store. Consider sanding and staining the wood for a polished look, or paint it to match your decor.
3. Cut the Boards: Cut the wood boards to the desired lengths for your shelves. If you’re making triangular shelves, cut one board to match the depth of the corner and two additional boards to create the front edges of the triangle.
4. Attach Brackets: Attach L-shaped brackets or decorative brackets to the wall where you want to install the shelves. Use a level to ensure they are straight and even.
5. Mount the Shelves: Place the cut wood boards on top of the brackets. Use screws to secure the boards to the brackets from the underside of the shelf. Make sure the shelves are level before tightening the screws.
6. Finishing Touches: If desired, you can paint or stain the shelves to match your decor. Consider adding a clear coat of sealant to protect the wood and enhance its longevity.
7. Arrange and Decorate: Once the shelves are securely in place, arrange your items on them. Use the corner shelves to display books, decorative items, plants, or anything else that adds charm to your space.
Tips for Success:
- Use anchors if you’re attaching the shelves to drywall or plaster walls to ensure they are securely mounted.
- If you’re not comfortable cutting wood, many hardware stores offer wood cutting services.
- Consider installing multiple corner shelves at different heights to create an appealing visual display.
- Experiment with different bracket styles for added visual interest.

How to Choose the Best Materials for DIY Corner Shelves
When building DIY corner shelves, choosing the right materials is crucial for durability, style, and functionality. The best option depends on the weight capacity, aesthetic preference, and budget for your project.
Wood Options for Strength and Style
For a classic, sturdy look, solid wood is a top choice. Hardwoods like oak and maple provide high durability, while pine and plywood offer a more budget-friendly option that’s still easy to work with. If you prefer a modern aesthetic, MDF (Medium-Density Fiberboard) is a smooth, paintable option that works well for minimalist designs.
Floating vs. Bracketed Shelves: Which is Better?
- Floating shelves create a sleek, seamless look by concealing the mounting hardware, making them ideal for a modern or minimalist space.
- Bracketed shelves offer a more traditional and rustic appearance, plus they provide additional support for heavier items.
Considering Weight Capacity & Load-Bearing Strength
If your shelves will hold heavy items like books or kitchenware, you’ll need reinforced brackets or thick wooden boards to prevent sagging over time. Wall anchors and proper stud placement are key for ensuring your shelves stay secure.


Creative Design Ideas for DIY Corner Shelves
A well-designed corner shelf isn’t just about function—it’s an opportunity to enhance the look of your space. Here are some creative ideas to make your shelves stand out.
1. Floating Triangle Shelves for a Modern Look
Floating corner shelves in a triangular shape can add a sleek and contemporary feel to a room. Painted in neutral colors, they blend seamlessly with walls, while a stained wood finish gives a warm, rustic touch.
2. Stacked Cube Shelves for Extra Storage
For a more geometric and modular look, stacking cube-shaped shelves in a corner maximizes storage while making a bold statement. These work well in home offices, living rooms, or even kitchens for organizing cookbooks and spices.
3. Live Edge Wood Shelves for a Natural Feel
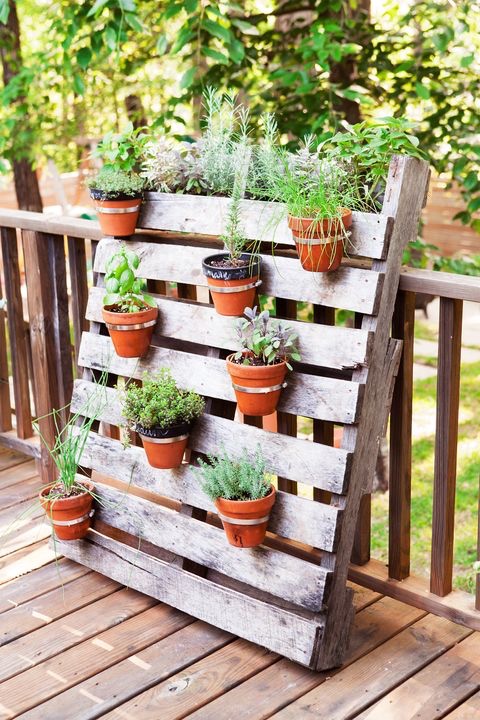
A live edge wood shelf brings organic beauty to any space, especially in rustic or farmhouse-style homes. Using reclaimed wood or natural slabs, these shelves showcase unique wood grain patterns and add character to otherwise empty corners.
4. Corner Ladder Shelves for a Functional Accent Piece
Instead of traditional mounted shelves, a corner ladder shelf provides tiered storage without drilling into walls. These freestanding units are great for renters or those who like to change décor frequently.
Best Placement Ideas for DIY Corner Shelves
Where you install your corner shelves can determine how much functionality and style they bring to your space. Different rooms have different storage needs, and choosing the right placement ensures they serve both practical and aesthetic purposes.
Living Room Display Shelves
Corner shelves in the living room can showcase framed photos, small plants, and decorative pieces while using vertical space efficiently. For a sleek look, opt for floating shelves, while industrial pipe-style brackets add a modern, urban feel.
Kitchen Storage & Spice Racks
Kitchens often lack efficient storage, and corner shelves can help organize spices, cooking oils, or coffee mugs. Open shelving in a kitchen also gives easy access to everyday items while keeping countertops clutter-free.
Bathroom Shelves for Extra Organization
Small bathrooms benefit from corner shelving above toilets or vanities to hold toiletries, rolled towels, or decorative jars. Using water-resistant wood or coated MDF prevents damage from humidity and splashes.
Bedroom & Closet Shelf Solutions
In bedrooms, corner shelves work well as nightstands, plant holders, or even mini bookshelves. Inside closets, they help maximize vertical storage for shoes, folded clothes, or accessories.
By strategically placing your DIY corner shelves, you can maximize storage while elevating the overall design of your home.
Crafting your own corner shelves allows you to utilize previously unused spaces while adding a touch of personal style to your home. Whether you’re a seasoned DIY enthusiast or just starting out, creating corner shelves is a satisfying project that enhances both functionality and decor. With a few basic tools and some creativity, you’ll have custom corner shelves that make the most of your home’s corners.
As an Amazon Associate we earn from qualifying purchases through some links in our articles.