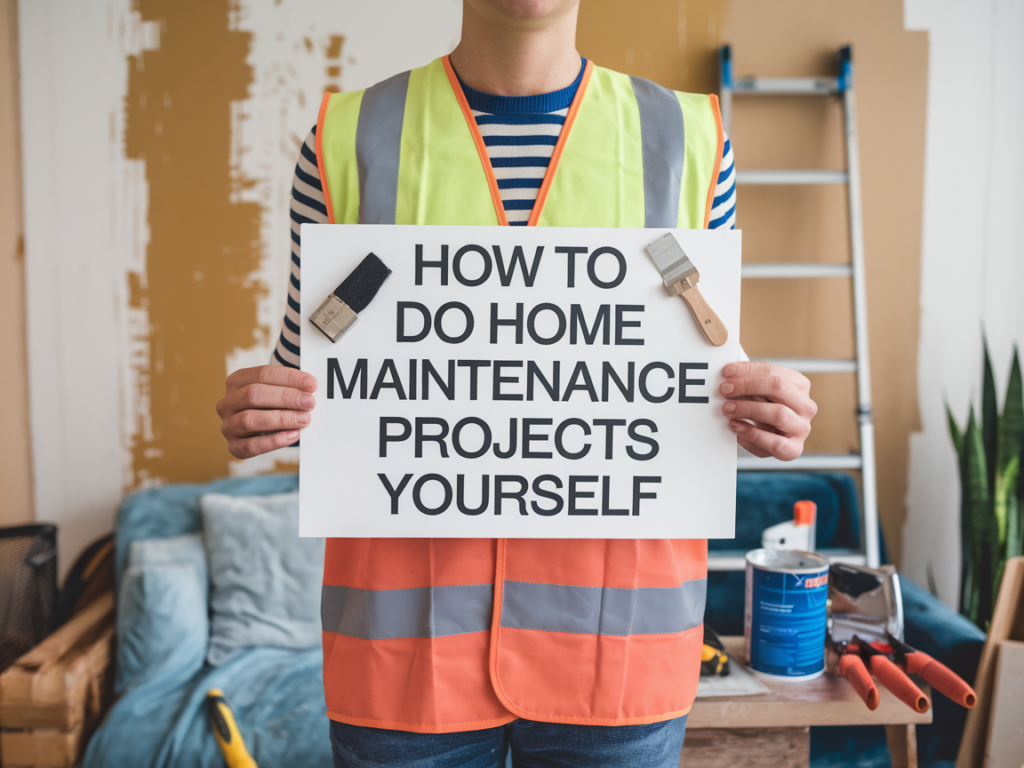
8 Essential Tasks Every Homeowner Should Know
Owning a home is exciting—until you realize it comes with a to-do list you can’t ignore. Sure, picking out paint colors and arranging furniture is the fun part, but behind the scenes, your house needs attention to keep everything running smoothly. Whether you’re a first-time homeowner or someone who’s owned multiple homes, there are a few key tasks you absolutely need to master.
As someone who’s faced clogged gutters, frozen pipes, and a refrigerator that gave up because I didn’t clean its coils (lesson learned!), I can promise you this list is both practical and necessary. Let’s dive into the 8 essential tasks every homeowner should know—trust me, your future self will thank you.
Change Your HVAC Filters
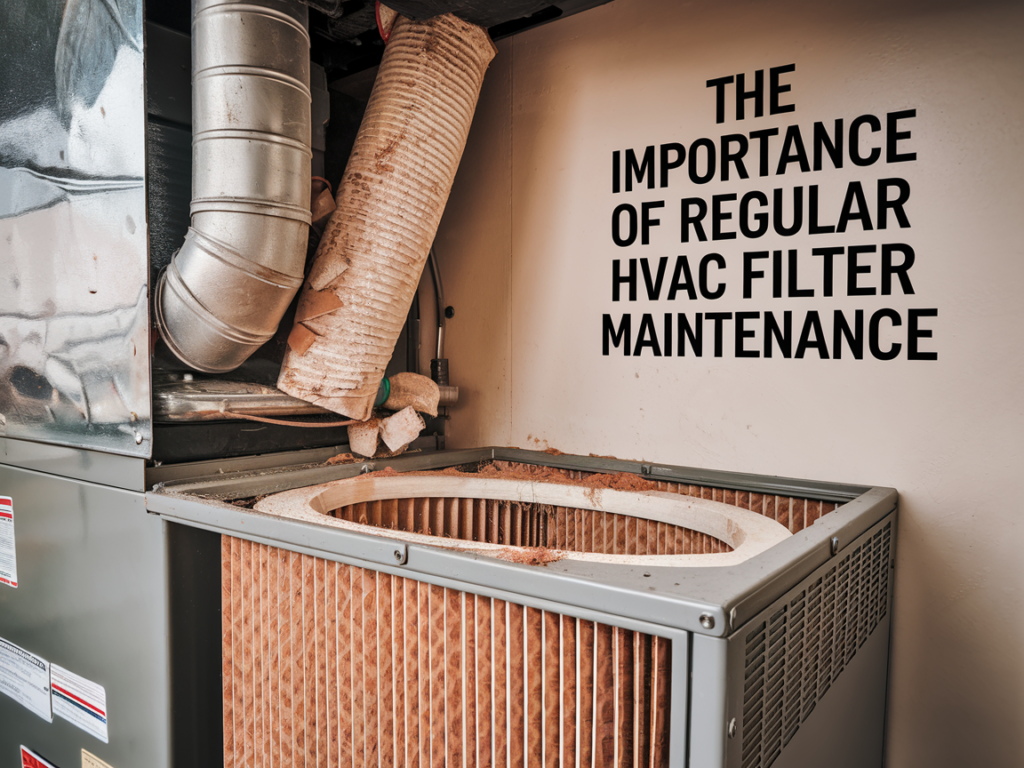
Let’s start with an easy one that makes a big difference: changing your HVAC filters. Your HVAC system is basically the lungs of your house, and if the filter is clogged with dust and pet hair, it’s like trying to breathe through a straw.
Changing your filter every 1–3 months keeps your air clean, reduces allergens, and helps your system run more efficiently (which saves you money on energy bills). Skip this step, and you’re looking at higher utility costs or, worse, an HVAC system that gives out when you need it most—like during a heatwave or a deep freeze.
Pro Tip: Set a Reminder
It’s easy to forget this task, so set a reminder on your phone or tie it to a specific date, like the first of the month. And if you’re trying to build a habit of regular home maintenance, check out Developing a Home Maintenance Plan for DIY Projects.
Neglecting your HVAC filter might not seem like a big deal now, but trust me, when your system goes kaput in the middle of summer, you’ll wish you’d swapped that filter sooner. Let’s move on to the next task that every homeowner should know: keeping those gutters clean.
Clean Gutters and Downspouts
Cleaning your gutters and downspouts is one of those tasks that no one looks forward to—but ignoring it can lead to some seriously expensive problems. When your gutters are clogged with leaves, dirt, and debris, water doesn’t drain properly. Instead, it spills over the edges, potentially damaging your roof, siding, foundation, and even your landscaping.
I learned this the hard way when I put off gutter cleaning for “just one more week” and ended up with a mini waterfall cascading down my front porch during a storm. Lesson learned: keeping your gutters clean is way easier than fixing water damage.
How to Clean Your Gutters
- Frequency: Clean gutters at least twice a year, usually in the spring and fall. If you have a lot of trees nearby, you might need to check them more often.
- Safety First: Use a sturdy ladder, gloves, and a bucket to remove debris. Or, if you’re not a fan of heights, consider hiring a pro.
- Check Downspouts: Make sure downspouts aren’t clogged and that they direct water at least 6–10 feet away from your home’s foundation.
Prevent Future Clogs
If you’re tired of constant cleanings, consider installing gutter guards to reduce the amount of debris that gets in. It’s an upfront investment, but it saves you time (and headaches) in the long run.
For a bigger picture on seasonal home maintenance and why tasks like this are so crucial, check out A First-Time Buyer’s Guide to Home Maintenance.
Up next: one small but critical task that could save your life—checking your smoke detectors.

Check and Test Your Smoke Detectors
This is one of those tasks that’s easy to forget—until it’s too late. Smoke detectors are your first line of defense in a fire, so making sure they work properly isn’t just a good idea; it’s a lifesaver.
Why It’s Important
Smoke detectors can mean the difference between safely evacuating your home and tragedy. According to the National Fire Protection Association, almost three out of five home fire deaths occur in houses with no smoke alarms or non-functional ones.
How to Test and Maintain Smoke Detectors
- Test Monthly: Press the test button on each smoke detector to make sure it’s working. You’ll hear an ear-piercing beep if it’s functioning properly (don’t worry, it’s over in a second).
- Change Batteries Annually: Even if the detector hasn’t beeped at you yet, replace the batteries at least once a year. I do it every fall when the clocks change—it’s an easy way to remember.
- Replace Every 10 Years: Smoke detectors have a lifespan, and after 10 years, they should be replaced entirely. Check the date printed on the back of your detector to see how much time you’ve got left.
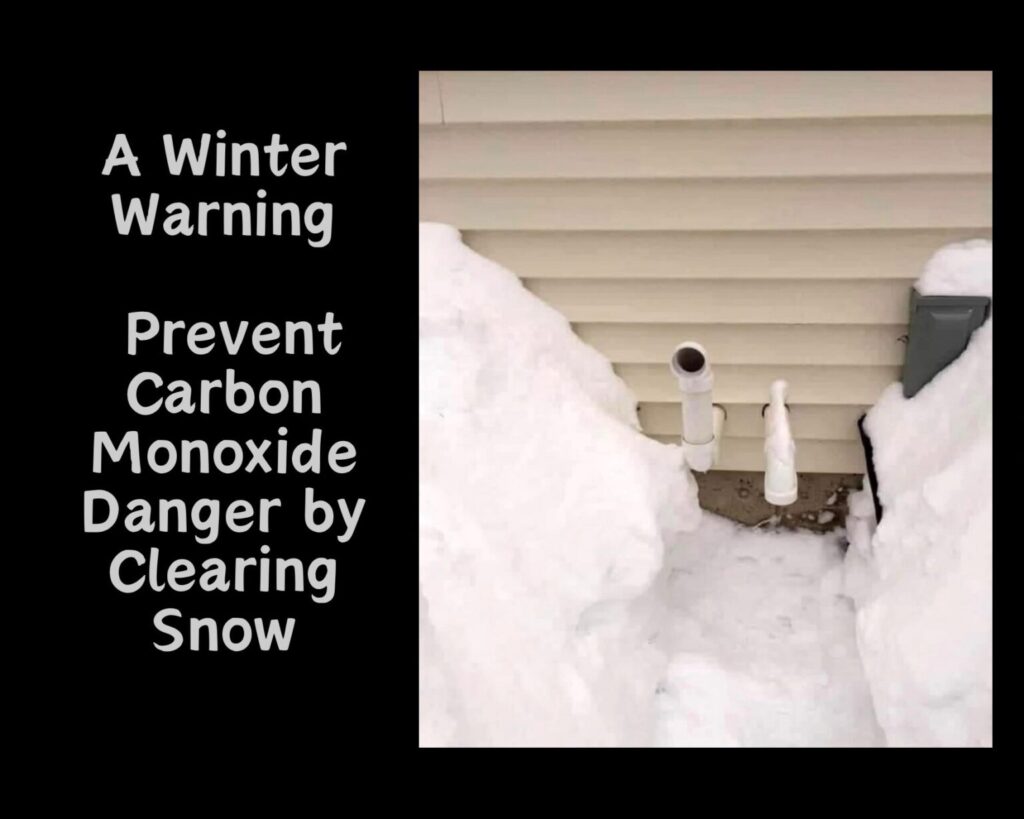
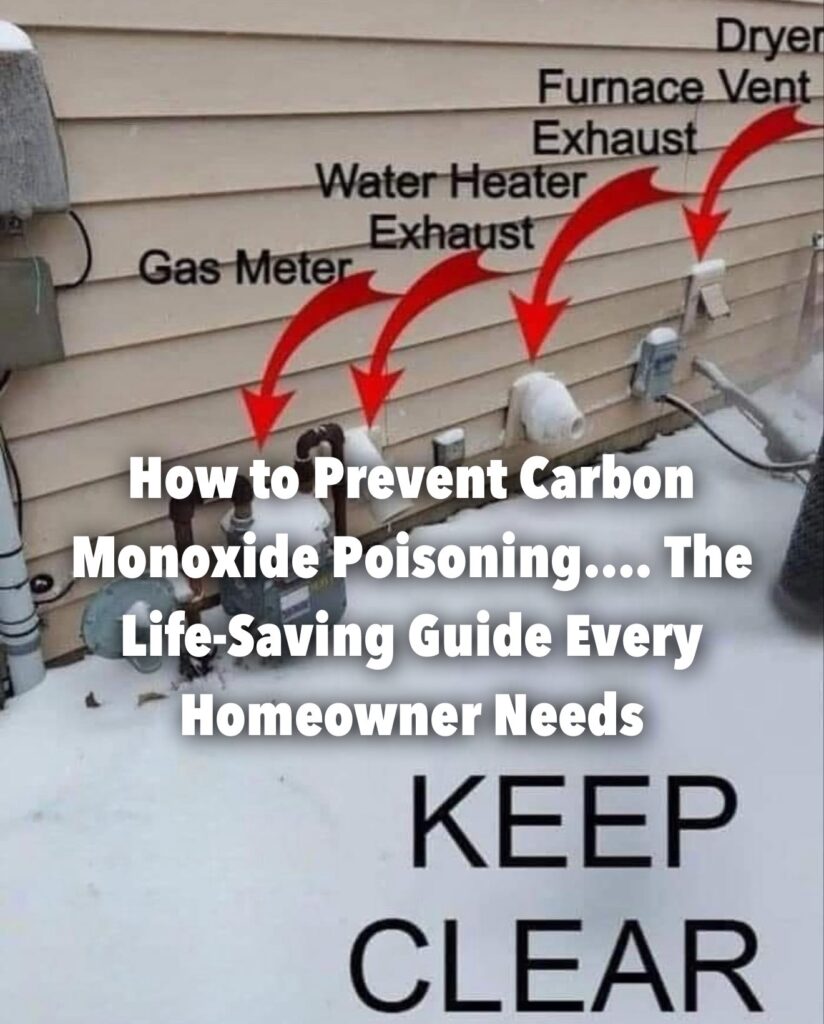
Bonus Tip: Don’t Forget Carbon Monoxide Detectors
While you’re at it, test your carbon monoxide detectors too. This invisible gas is no joke, and CO detectors are a must if you use gas appliances.
Trust me, this is one of those tasks you’ll never regret staying on top of. If you’re looking for more advice on essential homeowner responsibilities, check out A First-Time Buyer’s Guide to Home Maintenance.
Let’s move on to a task that’s less about tools and more about building a strong community: knowing your neighbors.
Know Your Neighbors
You might not think of this as a “home maintenance task,” but knowing your neighbors is just as important as keeping up with gutters and smoke detectors. Why? Because a good relationship with the folks next door can make all the difference when life throws you a curveball.
Why It Matters
- Neighborhood Watch: Your neighbors are your first line of defense when you’re away. They’ll notice if someone shady is hanging around your house or if packages are piling up on your porch.
- Emergency Help: Whether it’s borrowing a ladder or helping with a burst pipe at midnight, good neighbors can save the day. I’ll never forget the time my neighbor turned off my water main when a pipe burst while I was at work. Talk about a lifesaver.
- Community Support: From sharing tips about local contractors to organizing block parties, neighbors can make your neighborhood feel like a true community.
How to Build Strong Neighborly Relationships
- Introduce yourself! A simple wave or a quick “hi” goes a long way.
- Help out when you can, whether it’s lending tools or offering to watch their house while they’re on vacation.
- Stay connected by swapping phone numbers or joining local Facebook groups.
And if you’re wondering how long you might be living next to these folks, the average homeowner in the U.S. stays in their home for about 8 years. That’s a long time to spend side-eyeing someone over the fence, so you might as well make friends!
For tips on building and maintaining your home to keep it comfortable and safe, check out Developing a Home Maintenance Plan for DIY Projects.
Now that we’ve got the social side of homeownership covered, let’s move on to the cold, hard truth of why you need to clean your refrigerator coils.

Clean Your Refrigerator Coils
Here’s a task that often gets overlooked until your fridge suddenly stops cooling, and you’re faced with spoiled groceries and a repair bill that makes you cringe. Cleaning your refrigerator coils isn’t glamorous, but it’s an easy way to keep your fridge running efficiently and extend its lifespan.
Why It’s Important
The coils at the back (or sometimes underneath) your refrigerator are what help keep it cool. When they get clogged with dust, dirt, and pet hair, the fridge has to work harder to maintain the right temperature. This not only increases your energy bill but also risks burning out the compressor.
How to Clean Refrigerator Coils
- Unplug the Fridge: Safety first! Always unplug your fridge before you start cleaning.
- Locate the Coils: Depending on your model, the coils will be at the back or under the fridge. Check your owner’s manual if you’re not sure.
- Vacuum the Coils: Use the brush attachment on your vacuum cleaner to remove as much dust and debris as possible.
- Use a Coil Cleaning Brush: For stubborn debris, grab a coil cleaning brush (available at most hardware stores) to get into the nooks and crannies.
- Plug It Back In: Once the coils are clean, plug the fridge back in and enjoy knowing your fridge is now working as efficiently as possible.
How Often Should You Do This?
Twice a year is ideal, but if you have pets that shed a lot, you may want to do it more frequently. It’s a small effort compared to the hassle and expense of dealing with a broken fridge.
For more tools that make maintenance jobs like this easier, check out Top Tools for Every DIY Enthusiast.
Next up: a winter-specific task that can save you from a very wet and expensive disaster—dealing with frozen pipes.
Be Prepared for Frozen Pipes
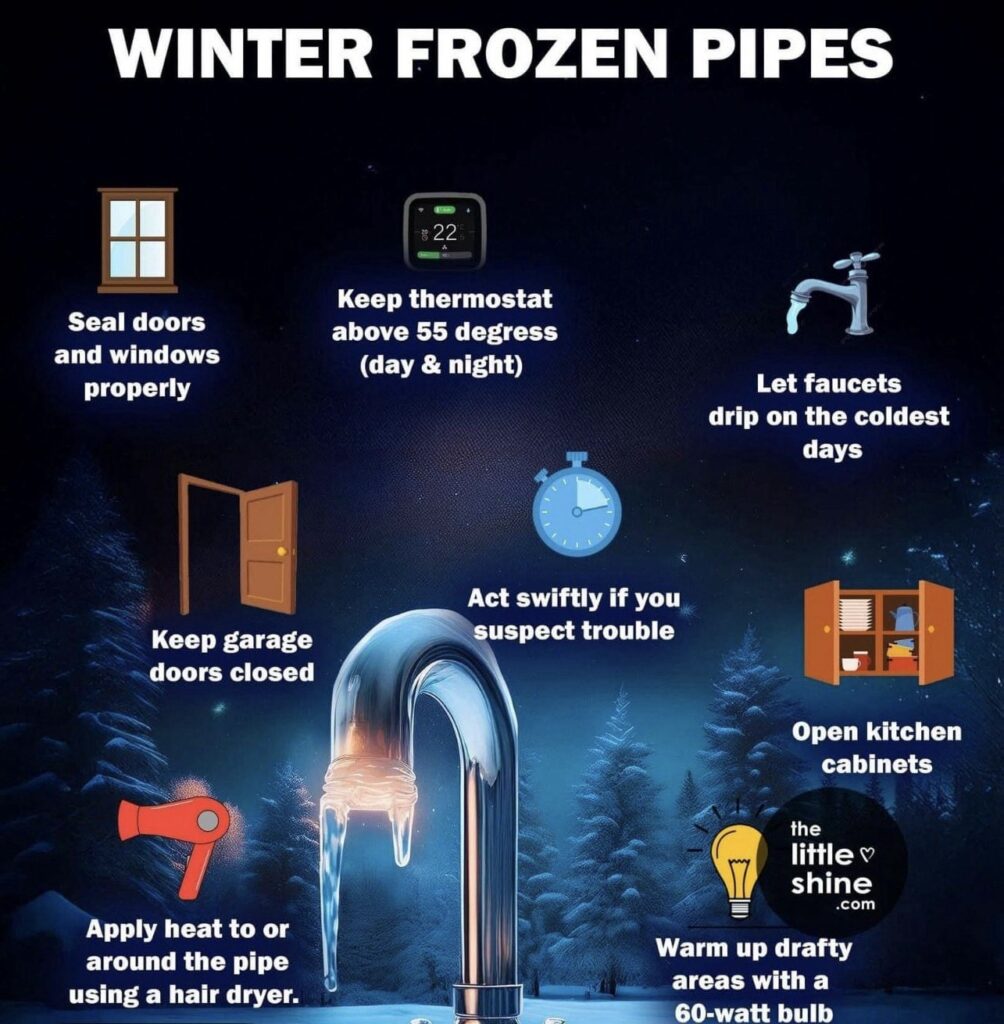
If you’ve ever woken up on a frigid winter morning to find no water coming out of the faucet, you’ve likely dealt with frozen pipes. Trust me, it’s one of the least fun surprises of homeownership—especially if those frozen pipes burst and flood your home. The good news? With a little preparation, you can prevent frozen pipes from becoming a full-blown disaster.
How to Prevent Frozen Pipes
- Insulate Exposed Pipes: Pipes in unheated areas like basements, crawl spaces, and garages are most vulnerable. Wrap them with foam pipe insulation or heat tape to keep them warm.
- Let Faucets Drip: On extremely cold nights, leave a slow drip running in faucets connected to pipes that might freeze. Moving water is less likely to freeze.
- Seal Drafty Areas: Use caulk or weatherstripping to seal gaps and cracks near pipes, especially around windows, doors, and vents.
- Keep the Heat On: Even if you’re leaving town, set your thermostat to at least 55°F to prevent pipes from freezing while you’re away.
What to Do If Pipes Freeze
Sometimes, despite your best efforts, pipes freeze anyway. Don’t panic—here’s what to do:
- Turn Off the Water: Shut off the main water supply to avoid flooding if the pipe bursts.
- Slowly Thaw the Pipe: Use a hairdryer or space heater to warm the frozen section of the pipe. Never use an open flame.
- Check for Leaks: Once the water is flowing again, check the pipe for cracks or leaks.
For more tips on dealing with frozen pipes and avoiding damage, check out What to Do with Frozen Pipes: Tips to Prevent Damage.
Frozen pipes aren’t just inconvenient—they can cost thousands of dollars to repair if they burst. Being prepared now can save you a world of stress later. Next, let’s take a step back and think about the big picture: how long you’ll likely own your home and why that matters.

Understand How Long You’ll Own Your Home
Did you know the average American stays in their home for about 8 years? It’s an important number to keep in mind because it can influence how you approach maintenance, renovations, and overall planning for your home. Whether you’re a first-time homeowner or planning to stay in your forever home, thinking long-term can save you headaches (and money).
Why It’s Important to Plan Around Your Ownership Timeline
- Resale Value: If you know you’ll likely move within the next decade, focus on maintenance and upgrades that will boost your home’s resale value, like updating kitchens, bathrooms, or improving curb appeal.
- Preventative Maintenance: Regular upkeep (like cleaning gutters or HVAC filters) doesn’t just keep your home livable—it also prevents costly repairs down the road, which can scare off potential buyers.
- Budgeting for Big Projects: Knowing how long you plan to stay can help you decide whether to tackle major projects like a roof replacement or siding repairs. If you’re selling soon, you may prioritize cosmetic updates instead.
First-Time Buyers: Plan for the Long Haul
For first-time homeowners, the best advice is to invest in maintenance skills early. The more you learn now, the better prepared you’ll be for bigger responsibilities later. Check out DIY Projects That Can Increase the Value of Your Home for ideas that combine practicality with resale appeal.
Remember, your home is one of the biggest investments you’ll ever make, and how you care for it now will impact its value down the road. Next up, let’s cover a critical skill every homeowner needs to master: basic home repairs.

Learn Basic Home Repair Skills
If you’re a homeowner, knowing how to handle basic repairs is practically a survival skill. Sure, you could call a pro every time something breaks, but do you really want to pay someone $150 to fix a leaky faucet you could handle yourself in under 30 minutes? Learning a few simple home repair skills not only saves money but also gives you a huge confidence boost when you realize, “Hey, I’ve got this!”

Must-Know Home Repairs Every Homeowner Should Master
- Fixing a Leaky Faucet: That constant drip isn’t just annoying—it’s wasting water and increasing your bill. Learn how to replace a washer or tighten parts to stop the leak.
- Patching Drywall: Whether it’s a doorknob-sized hole or a nail pop, knowing how to patch and sand drywall will come in handy more often than you think.
- Turning Off the Water Main: In case of a plumbing emergency (like a burst pipe), you’ll need to know how to shut off the water main immediately. Locate the valve now—before disaster strikes.
- Unclogging a Drain: Skip the expensive plumber and grab a drain snake or plunger. Trust me, this is easier than it looks.
Tools You Should Have on Hand
Every homeowner needs a solid toolkit. Stock up on essentials like:
- A hammer.
- Screwdrivers (flathead and Phillips).
- Adjustable wrench.
- Pliers.
- Utility knife.
- Drill.
For more suggestions, check out Top Tools for Every DIY Enthusiast. Having the right tools can make even the toughest jobs manageable.
Why Learning Repairs Saves You More Than Just Money
Being able to handle these small fixes yourself not only reduces repair bills but also means you’re not waiting around for someone else to show up. Plus, let’s be honest—there’s nothing more satisfying than fixing something yourself and knowing you just saved $200 (and maybe earned bragging rights).
With these skills under your belt, you’ll be ready to tackle whatever your house throws at you. Now, let’s wrap things up with a bonus tip that could save you from panic over mysterious cracks.
Bonus Task: Check for Settlement Cracks
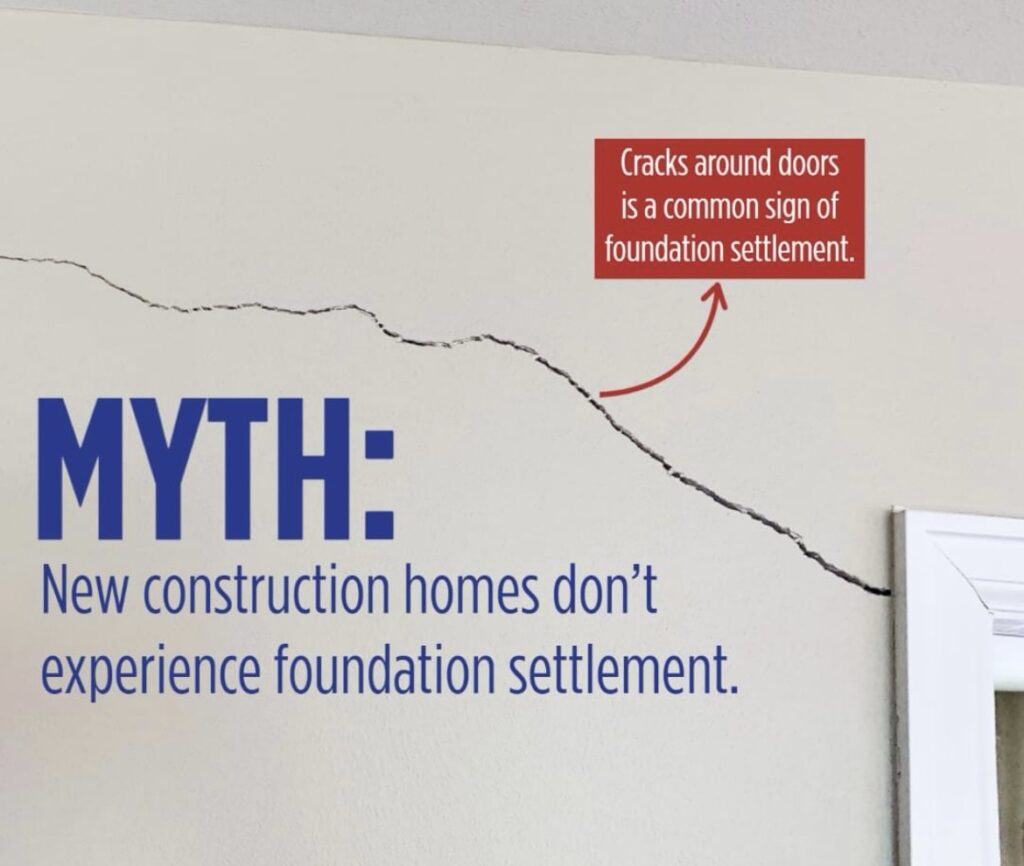
You might notice small cracks in your walls or foundation and immediately think, Great, my house is falling apart. Relax—most of the time, these cracks are completely normal. Homes settle over time, especially within the first few years after construction. But knowing what’s normal and what’s not is a critical skill every homeowner should have.
What Are Settlement Cracks?
- Normal Cracks: Small, hairline cracks are usually harmless and result from the house adjusting to the soil beneath it. These typically appear in drywall, around door frames, or near windows.
- Warning Signs: Larger cracks wider than 1/4 inch, cracks that run diagonally, or cracks in your foundation could signal a bigger issue, like structural damage or shifting soil.
How to Handle Settlement Cracks
- Repair Cosmetic Cracks: For small, harmless cracks, use drywall compound or caulk to fill them in and repaint the surface.
- Monitor Problem Areas: Keep an eye on cracks that seem to get wider over time or are paired with sticking doors, uneven floors, or water leaks.
- Call a Pro If Necessary: If you’re unsure whether a crack is a big deal, consult a structural engineer or foundation specialist for peace of mind.
Why This Matters
Catching structural issues early can save you thousands in repairs. Even if the cracks turn out to be harmless, it’s better to check and be safe than ignore something that could turn into a major headache later.
For a deeper dive into settlement cracks and what they mean for your home, check out Debunking the Myth: New Construction Homes and Settlement Cracks.
Now that you’ve mastered the essential tasks every homeowner should know, let’s wrap things up with a quick recap.

Master These Tasks, Master Homeownership!
Owning a home isn’t just about paying the mortgage or decorating it like your favorite HGTV show—it’s about rolling up your sleeves and learning how to care for it. From changing HVAC filters to cleaning gutters, tackling frozen pipes, and even making friends with your neighbors, these tasks aren’t just helpful—they’re essential.
Here’s the good news: you don’t have to be a DIY pro or have a degree in home maintenance to keep your house running smoothly. It’s all about staying proactive, tackling small problems before they turn into big ones, and learning as you go. With the right tools (and maybe a little humor), you can handle just about anything your home throws at you.
To recap, here are the 8 tasks every homeowner should know:
- Change your HVAC filters.
- Clean your gutters and downspouts.
- Test and check your smoke detectors.
- Get to know your neighbors.
- Clean your refrigerator coils.
- Be prepared for frozen pipes.
- Understand how long you’ll own your home.
- Learn basic home repair skills.
And don’t forget that bonus task—checking for settlement cracks.
For even more helpful advice and tips on keeping your home in tip-top shape, check out these resources:
- A First-Time Buyer’s Guide to Home Maintenance
- Developing a Home Maintenance Plan for DIY Projects
- DIY Projects That Can Increase the Value of Your Home
Homeownership is a learning curve, but with these essential tasks under your belt, you’ll feel more confident and prepared to handle anything. So roll up your sleeves, grab those tools, and show your house who’s boss!

As an Amazon Associate we earn from qualifying purchases through some links in our articles.