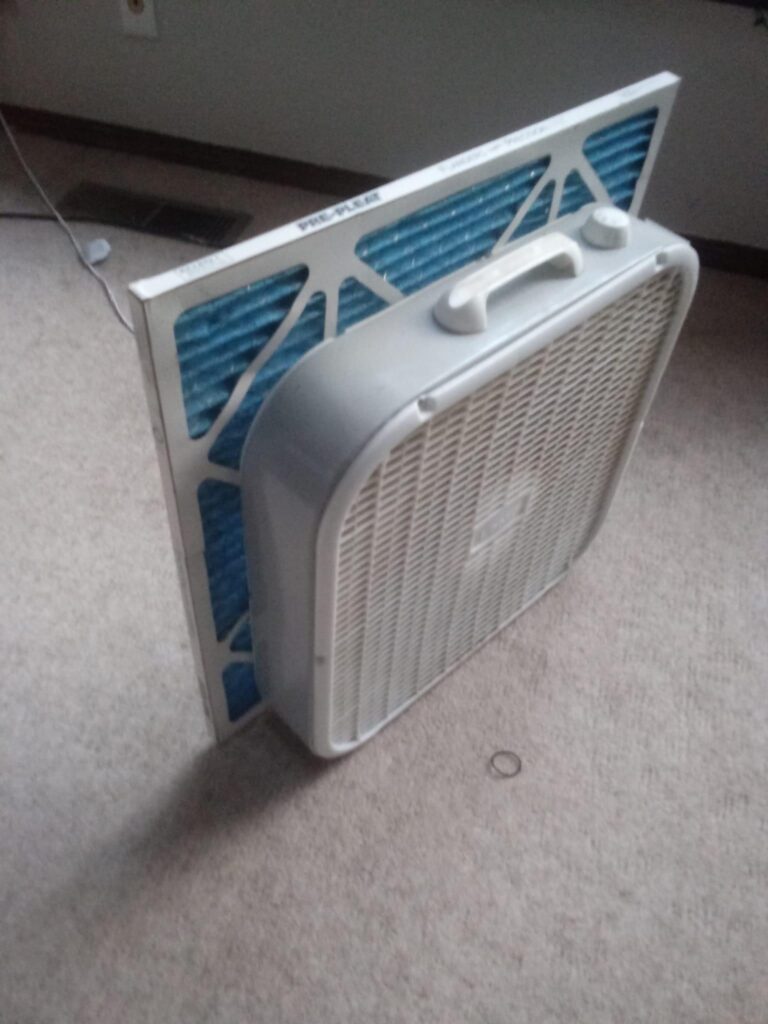
Imagine walking into a space that’s not only visually pleasing but also smells as fresh as a summer breeze. With our DIY air filter fan project, you can transform any room into an oasis of clean, invigorating air. In this step-by-step guide, we’ll show you how to create your own budget-friendly air freshener using a box fan and an air filter. Get ready to breathe easy and live clean with this innovative and effective DIY solution.

Materials You’ll Need:
- Box Fan
- Air Filter (20x20x1 size recommended)
- Zip Ties or Tape
- Screwdriver (if needed for attaching filter)
Step 1: Gathering Your Supplies:
Before you embark on your DIY air freshener adventure, make sure you have all your materials ready. You can find box fans and air filters at your local hardware store or online.
Want some good big filters that will last you a long time? Click here to buy them on Amazon!
Step 2: Preparing the Box Fan:
- Position the box fan so that the backside with the grille is facing you.
- If your box fan has a detachable grille, remove it to access the fan blades.
- Don’t have a box fan? Click here to buy one from Amazon shipped to your door!
Step 3: Attaching the Air Filter:
- Carefully place the air filter over the back of the box fan. Ensure that the airflow arrows on the filter are facing the fan.
- Secure the air filter in place using zip ties or tape. Make sure the filter is snug and won’t fall off during operation.
- If your box fan has a removable grille, you can also attach the filter to the grille and then reattach the grille to the fan.
Step 4: Power Up Your DIY Air Freshener:
- Plug in the box fan and turn it on. You’ll immediately notice the fresh, filtered air circulating in the room.
- Feel free to adjust the fan speed based on your preference. A lower setting may provide a gentle, constant flow of fresh air, while a higher setting can quickly freshen up a room.
Additional Tips:
- For enhanced fragrance, you can add a few drops of your favorite essential oil to the air filter before attaching it to the fan.
- Regularly check and replace the air filter to ensure optimal performance. Depending on usage, filters should typically be replaced every 3-6 months.
Benefits of Your DIY Air Filter Fan:
- Improved Air Quality: The air filter captures dust, allergens, and particles, helping to improve the quality of the air you breathe.
- Budget-Friendly Solution: Compared to expensive air purifiers, this DIY project is cost-effective and efficient.
- Easy to Customize: You can choose air filters with specific features, such as odor reduction or allergen control, based on your needs.
Fresh Air, Fresh Perspective
By creating your DIY air filter fan, you’re not only enhancing the air quality in your space but also adding a touch of ingenuity to your daily life. With just a few simple steps and minimal materials, you can enjoy the benefits of fresh, filtered air without breaking the bank. Breathe easy, live clean, and revel in the satisfaction of knowing you’ve created a healthier environment for yourself and your loved ones. Whether it’s your living room, bedroom, or home office, your DIY air freshener will infuse your space with the invigorating essence of clean, revitalized air.
As an Amazon Associate we earn from qualifying purchases through some links in our articles.


