Frozen pipes are a nightmare scenario for any homeowner, but when those pipes are underground, the challenge becomes even trickier. Knowing how to thaw frozen pipes underground can save you from the chaos of burst pipes and costly repairs. The key is acting fast, using safe methods, and understanding the dos and don’ts of handling frozen pipes.
In this guide, we’ll walk you through everything from spotting frozen underground pipes to thawing them safely, and even how to prevent the issue from happening again. Because let’s face it—nobody has time for surprise plumbing disasters when it’s already freezing outside!

Can Pipes Freeze Underground?
Yes, even underground pipes can freeze, especially during prolonged cold spells. While the earth provides some insulation, it’s not foolproof. Pipes that are shallow, poorly insulated, or located in areas with extreme temperatures are particularly at risk.
Why Do Pipes Freeze Underground?
- Shallow Installation: If pipes are not buried deep enough, they’re more exposed to freezing temperatures.
- Standing Water: Stagnant water in pipes has no movement to prevent freezing.
- Inadequate Insulation: Pipes without proper insulation are far more vulnerable, even underground.
Freezing isn’t just a minor inconvenience—it can lead to burst pipes and significant water damage. To better understand how to protect your home from frozen pipes in general, check out What to Do with Frozen Pipes for practical advice.
Knowing the conditions that cause freezing is the first step in preventing it. Keep reading to learn how to identify frozen underground pipes before they become a bigger issue.

Signs of Frozen Underground Pipes
If you suspect frozen pipes underground, there are a few telltale signs to look for before calling in reinforcements. Recognizing these symptoms early can save you from the nightmare of burst pipes and flooded yards.
How to Spot Frozen Underground Pipes:
- No Water Flow: If you turn on a faucet and water barely trickles or doesn’t flow at all, the issue could stem from frozen underground pipes.
- Unusual Noises: Listen for gurgling, whistling, or banging sounds when you attempt to use the water. These noises often signal air or pressure buildup in the system.
- Frost or Ice Nearby: Check exposed pipes leading to underground lines. Frost or ice on these sections can indicate freezing farther down.
- Unpleasant Odors: A frozen drainpipe might block water flow, causing sewage odors to back up into your home. For more on these issues, visit Clogged Sewer Vent Pipe Symptoms for additional guidance.
If you notice any of these signs, it’s time to act fast. Ignoring the problem could lead to costly damage and hours of cleanup. In the next section, we’ll cover safe and effective ways to thaw those frozen underground pipes.


How to Thaw Frozen Pipes Underground
Thawing frozen underground pipes may sound daunting, but with the right approach, it’s manageable. The goal is to apply heat gradually and safely while avoiding damage to the pipe or surrounding areas.
Step-by-Step Guide to Thaw Frozen Pipes Underground:
- Locate the Frozen Section: Start by identifying where the pipe might be frozen. Focus on areas where pipes are exposed or shallow, like near the foundation or entry points into your home.
- Use Heat Tape or Heated Blankets: Wrap accessible parts of the pipe with heat tape or insulated blankets designed for thawing. These tools provide consistent, safe heat.
- Hot Water Recirculation: If possible, connect a hose to the frozen line and circulate warm water through it. This method works well for drainpipes or water supply lines.
- Apply Warm Towels: For sections closer to the surface, soak towels in warm (not boiling) water and wrap them around the pipe.
- Professional Pipe Thawing Tools: In tougher cases, consider renting or hiring equipment like pipe-thawing machines, which send safe electrical currents through the pipe to melt the ice.
What Not to Do:
- Avoid Open Flames: Using a blowtorch or other high-heat source can damage the pipe and create fire hazards.
- Don’t Use Boiling Water Directly: This can shock the pipe, causing cracks or bursts.
For additional tips and advice from other homeowners, visit Frozen Underground Plastic Water Pipe Forum to learn what worked for others.
Taking the right steps can make all the difference in safely thawing your pipes and preventing further damage. But what if you’re tempted to let them thaw naturally? Let’s discuss that next.

Will Frozen Pipes Thaw on Their Own?
Yes, frozen pipes underground can thaw on their own—if you’re willing to wait and gamble with the possibility of a burst. But before you leave it up to nature, consider the risks. While waiting might seem like the easiest option, it’s often the riskiest one.
What Happens When You Wait for Pipes to Thaw Naturally?
- Extended Freezing Increases Pressure: The longer the pipe stays frozen, the more pressure builds up, making it more likely to burst.
- Unpredictable Timing: Depending on the weather, natural thawing can take hours or even days, leaving your water supply inaccessible.
- Risk of Further Damage: If the ice expands or the pipe cracks during the freeze-thaw cycle, you could end up with leaks or a burst pipe.
When It’s Safe to Wait:
- If the temperatures are steadily rising, natural thawing might be a low-risk option.
- Keep faucets open so pressure doesn’t build up, and monitor the situation closely.
Still, in most cases, taking action to thaw the pipe yourself is safer and faster. For more proactive tips on handling frozen pipes, check out What to Do with Frozen Pipes for a comprehensive guide.
If you decide to intervene, make sure you’re following safe practices—because there are definitely a few things you shouldn’t do. Let’s cover those next.
What Not to Do If Your Pipes Freeze
When faced with frozen underground pipes, it’s tempting to try anything to get your water flowing again. But some methods can cause more harm than good. Avoid these common mistakes to save yourself from unnecessary damage and costly repairs.
What You Should Never Do:
- Use Open Flames: A blowtorch or open flame may seem like a quick fix, but it’s a fire hazard and can damage your pipes.
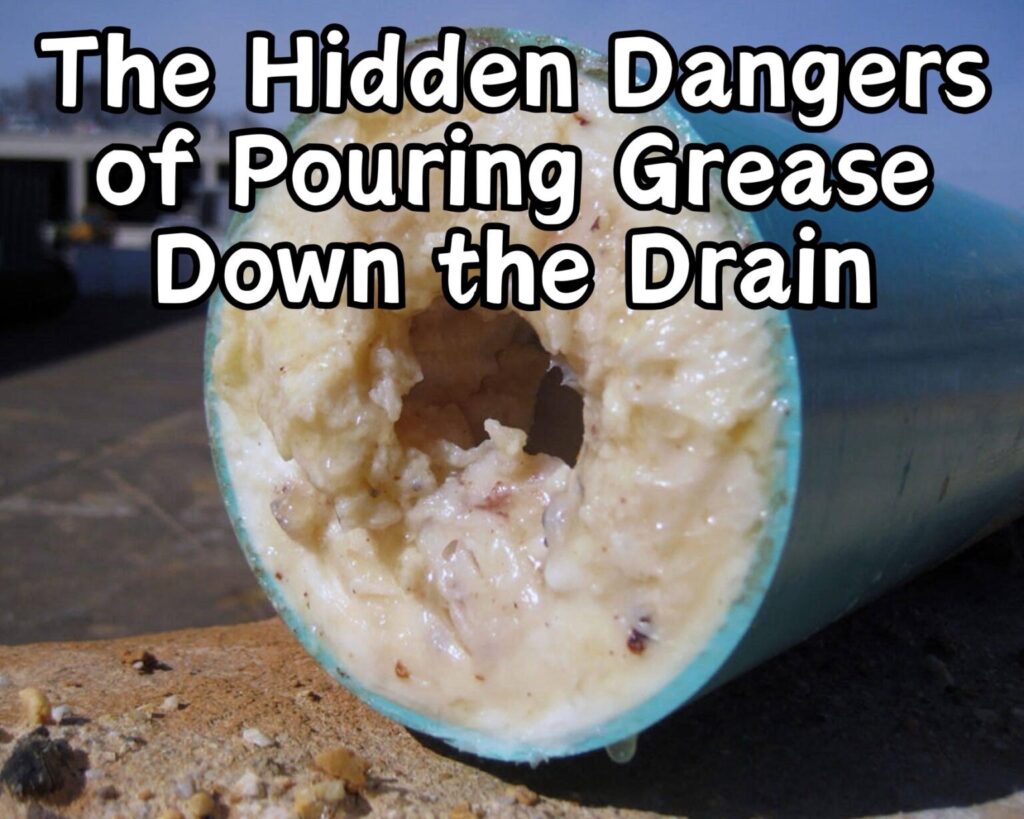
- Pour Boiling Water Down the Drain: While it might sound logical, pouring boiling water can crack frozen pipes or weaken joints, making matters worse. Learn more about the dangers of bad plumbing habits at Hidden Dangers of Pouring Grease Down the Drain.
- Ignore the Problem: Waiting too long to address frozen pipes can lead to bursts, flooding, and extensive property damage.
- Overheat the Pipe: Applying too much heat too quickly (like with a high-powered space heater) can stress the pipe material and cause leaks.
Play It Safe:
Stick to gradual, controlled heat sources like heat tape, warm towels, or a hair dryer. Keep the faucet open to release pressure and monitor the process closely.
By avoiding these mistakes, you’ll thaw your frozen pipes safely and minimize the risk of further damage. Speaking of damage control, let’s talk about whether you should shut off your water if your pipes freeze.
Should You Shut Off Water If Pipes Freeze?
Yes, shutting off your water when pipes freeze is often a smart move—especially if you suspect the pipe is at risk of bursting. Turning off the water supply can prevent catastrophic flooding and minimize damage if the worst happens.
When to Shut Off the Water:
- Visible Signs of Damage: If you see cracks or leaks forming on the pipe, shut off the main water valve immediately.
- Persistent Freezing: If the pipe remains frozen despite your efforts to thaw it, shutting off the water can help relieve pressure.
- Unmonitored Thawing: If you’re leaving the house or can’t monitor the thawing process, turning off the water as a precaution is a good idea.
How to Shut Off Your Water:
- Locate the main water valve, often found near your water meter or in a utility area.
- Turn the valve clockwise until it’s completely closed.
- Open the faucets connected to the frozen pipe to relieve any remaining pressure.
Knowing when to act decisively can save you from a major plumbing disaster. If you’re unsure of how to handle frozen pipes or want to be better prepared, visit DIY Plumbing Repairs Made Easy for more handy tips.
Next, let’s look at ways to prevent underground pipes from freezing in the first place. Prevention, after all, is always better than repair!
Preventing Underground Pipes from Freezing
The best way to deal with frozen pipes is to ensure they never freeze in the first place. Taking preventative steps can save you time, money, and the headache of thawing pipes during a cold snap.
Tips for Preventing Underground Pipes from Freezing:
- Bury Pipes Deep Enough: Ensure pipes are buried below the frost line in your area. This depth varies depending on your region but typically ranges between 3 and 6 feet.
- Insulate Pipes Properly: Wrap pipes with foam insulation or heat tape to protect them from freezing temperatures.
- Seal Drafts: Check for and seal any gaps or cracks around foundations, crawl spaces, or pipe entry points where cold air can seep in.
- Keep Water Flowing: On extremely cold days, let faucets connected to underground pipes drip slightly to keep water moving and prevent freezing.
- Maintain Consistent Heat: If pipes are near your home’s foundation or exposed to cold air, keep the thermostat set above 55°F, even when you’re away.
Winterizing Your Entire Home:
Preventing frozen pipes is part of a larger strategy to keep your home safe during winter. For more proactive advice, check out Essential Home Maintenance Tips for New Homeowners to prepare your home for the cold months.
By taking these precautions, you can keep your underground pipes flowing smoothly no matter how low the temperatures drop. But what happens if all else fails? Let’s explore when it’s time to call in the professionals.
When to Call a Professional
Sometimes, even your best DIY efforts won’t be enough to tackle frozen underground pipes. Knowing when to throw in the towel and call a professional can save you from unnecessary stress and expensive repairs down the road.
When It’s Time to Call an Expert:
- No Water Flow After Thawing Attempts: If you’ve tried safe DIY methods like heat tape or warm towels and still have no water, it’s time for a plumber.
- Visible Damage: Cracks, leaks, or pooling water are clear signs that the pipe has burst or been compromised.
- Persistent Freezing: If the same pipes freeze every winter, there may be an underlying issue with insulation or pipe depth that needs a professional fix.
- Inaccessible Pipes: If the frozen section is too deep or hard to reach, specialized equipment may be required to safely thaw it.
What to Expect from a Professional:
A plumber can use advanced tools like pipe-thawing machines or underground line locators to resolve the issue quickly and safely. They can also assess your plumbing system and suggest long-term fixes to prevent future freezing.
If you’re comfortable tackling smaller issues yourself, check out DIY Plumbing Repairs Made Easy for tips on handling everyday plumbing problems. But when it comes to frozen underground pipes, don’t hesitate to call in the pros when needed.
Frozen underground pipes can feel like a homeowner’s worst nightmare, but with the right knowledge and tools, you can tackle the issue effectively. From learning how to thaw frozen pipes underground to taking proactive steps to prevent freezing, you’re now equipped to handle the challenges of winter plumbing like a pro.
The key is quick action and safe practices. Whether you’re applying heat, keeping faucets open, or shutting off water as a precaution, every step you take can minimize the risk of damage. Remember, some situations require professional help—don’t hesitate to call in the experts if your DIY efforts fall short.
Prevention is always better than repair. Insulating pipes, sealing drafts, and keeping water flowing are just a few ways to stay ahead of the cold. For more tips on keeping your home in top shape this winter, visit Essential Home Maintenance Tips for New Homeowners or learn about handling related issues like Clogged Sewer Vent Pipe Symptoms.
With these strategies in your arsenal, you can rest a little easier this winter knowing your pipes—and your home—are protected from the cold. Stay warm, stay safe, and let’s keep that water flowing!
As an Amazon Associate we earn from qualifying purchases through some links in our articles.