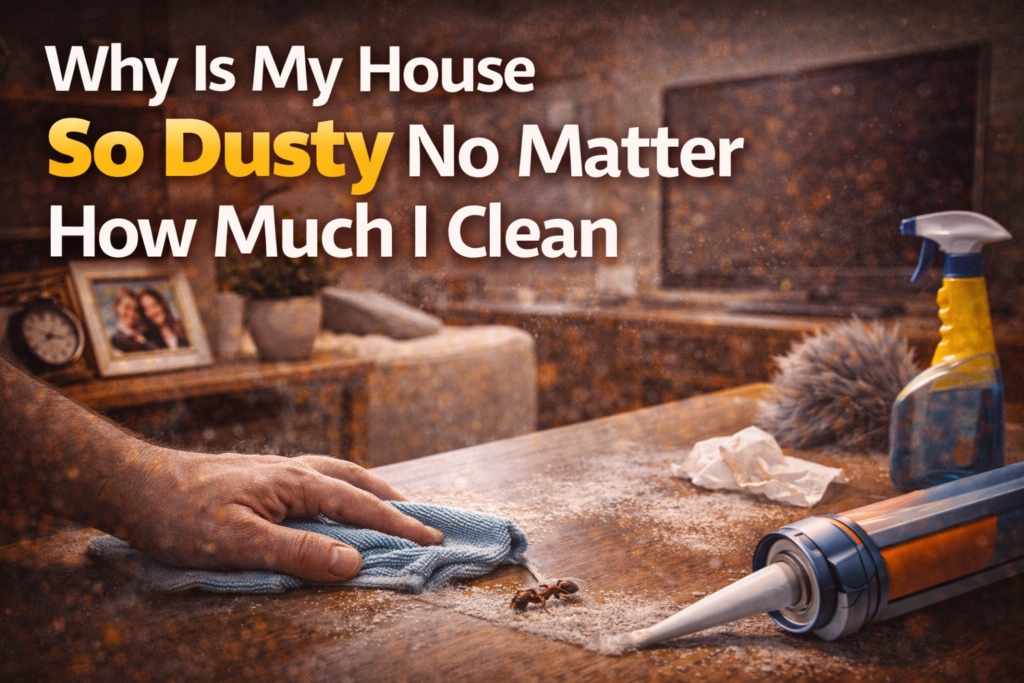
You dust the shelves on Saturday. By Tuesday there’s a visible film again. You vacuum, wipe down surfaces, wash the bedding — and within days everything is coated again. It feels endless and frankly a little defeating. You start wondering if something is wrong with your house.
Something probably is. A house that accumulates dust faster than normal isn’t just an inconvenience — it’s a sign that your home’s air filtration and sealing aren’t doing their job. The dust you see on surfaces was airborne first, and the reason it’s airborne in such quantities usually comes down to a handful of fixable mechanical and structural problems.
This article covers the real causes of excessive household dust — not just “dust more often” advice — and the specific fixes that actually reduce how fast your home gets dusty.


Where Household Dust Actually Comes From
Before getting into fixes it’s worth understanding what household dust actually is, because most people assume it’s primarily dirt tracked in from outside. It’s not. Studies of household dust composition consistently find that the largest components are dead skin cells shed by the people and pets living in the home, fabric fibers from clothing, upholstery, and carpet, pollen and outdoor particulates that enter through gaps and open doors, pet dander, and dust mite waste and body parts.
Some of these sources — skin cells, fabric fibers — are unavoidable byproducts of normal living. But the rate at which they accumulate on surfaces is heavily influenced by how well your home’s air handling system captures and filters particles before they settle. A home with good filtration circulates air through a filter frequently enough that particles get captured before they land. A home with poor filtration or leaking ductwork recirculates dirty air and lets unfiltered outdoor air in, and particles settle on every surface.
This is why the fix for an excessively dusty house is almost always an HVAC and air sealing problem rather than a cleaning problem.


The HVAC Filter — The Most Common Culprit
Your HVAC system’s air filter is the primary line of defense against airborne particles in your home. Every time the system runs, air is pulled through the filter before being heated or cooled and circulated back through the house. A clean, properly rated filter captures dust, pollen, pet dander, and other particles. A clogged filter can’t capture anything effectively — air flows around it or barely through it, and particles that should be captured get recirculated instead.
Most homeowners change their HVAC filter far less often than they should. The standard recommendation is every 90 days for a basic filter in a home with no pets and no allergy sufferers. In a home with pets, multiple occupants, or anyone with allergies, every 30-45 days is more appropriate. If you have multiple pets or live in a particularly dusty area, monthly changes may be needed.
Pull your filter out right now and look at it. If it’s gray or dark and visibly loaded with material, it’s been overdue for a change for a while. A clogged filter isn’t just failing to capture new dust — it’s also restricting airflow through your system, making your HVAC work harder and less efficiently.
Filter maintenance: Our article on the importance of regular HVAC filter maintenance covers filter ratings, how to choose the right filter for your system, and how often to change it based on your household. Also consider the activated carbon air vent filters we’ve covered — they add an extra layer of particle capture at the vent level.
Filter Rating Matters as Much as Replacement Frequency
HVAC filters are rated on a MERV scale from 1 to 16 — the higher the number, the smaller the particles it captures. A MERV 1-4 filter is basically a mesh that catches large debris and protects the HVAC equipment — it does almost nothing for indoor air quality. MERV 8-11 captures dust, pollen, mold spores, and pet dander effectively. MERV 13 captures finer particles including some bacteria and smoke.
Most homes with excessive dust problems are running MERV 4 or lower filters — the cheap fiberglass ones that come in bulk packs. Upgrading to a MERV 8 or MERV 11 filter makes a noticeable difference in how quickly dust accumulates on surfaces, because the filter is now capturing particles that previously settled out of the air onto your furniture.
One caution: very high MERV filters (13 and above) can restrict airflow in systems not designed for them, causing the HVAC to work harder and potentially damaging the equipment. Check your system’s manual or ask an HVAC technician before jumping to the highest rating available.
Leaking Ductwork — The Hidden Dust Generator
This is the cause of excessive dust that most homeowners never consider and that makes a dramatic difference when fixed. Your ductwork — the network of metal or flexible tubes that distribute conditioned air through your home — runs through attics, crawl spaces, and wall cavities. In most homes, especially those more than fifteen or twenty years old, duct connections develop leaks at joints, connections, and where ducts meet the boots at your vents.
When your HVAC system runs, the return side of the system creates negative pressure — it’s pulling air back to the air handler to be filtered and reconditioned. If there are leaks in the return ductwork, the system pulls unfiltered air directly from the attic or crawl space — spaces full of insulation fibers, dust, pollen, mold spores, and whatever else has accumulated up there over years. That unfiltered air bypasses the filter entirely and gets blown directly into your living spaces.
This is why some homes are dramatically dustier than others of the same size and occupancy. A home with significant duct leakage is essentially pumping attic air into the living space every time the HVAC runs.
How to Check for Duct Leakage
A few signs suggest duct leakage is contributing to your dust problem. If some rooms are significantly dustier than others despite similar use, the duct serving the dustier room may have a leak. If you can access your attic or crawl space and see flexible ductwork, check the connections at both ends — where the flex duct connects to the main trunk line and where it connects to the ceiling boot. These connections frequently come loose or develop gaps over time.
You can also do a simple pressure test: on a day when the HVAC is running, hold a lit incense stick near duct connections in the attic or near the air handler. If smoke is pulled toward a connection point, air is leaking in there.
Sealing Duct Leaks
Accessible duct leaks can be sealed with mastic sealant — a thick paste that’s brushed onto connections and joints and dries to a permanent, flexible seal. Despite its name, don’t use standard duct tape on ductwork — it fails within a few years due to temperature cycling. Real duct sealing uses mastic or foil-backed tape specifically rated for HVAC applications.
For duct leaks in accessible attic or crawl space runs, this is a manageable DIY project. For leaks in wall cavities or inaccessible locations, a professional duct sealing service — some use an aerosol sealant that’s injected into the duct system and seals leaks from the inside — is the practical option.
Energy savings too. Sealing duct leaks typically reduces heating and cooling costs by 10-30% in homes with significant leakage. The dust reduction is a bonus on top of meaningful utility bill savings. It’s one of the highest-return home improvements available in older homes.


Gaps in Weatherstripping and the Building Envelope
Every gap in your home’s exterior — around windows, doors, utility penetrations, and where different construction materials meet — is a point where outside air enters. Outside air carries pollen, dust, smoke particles, and whatever particulates are in your local environment. The more gaps, the more outside air infiltration, and the more particles are continuously introduced into your home.
This is particularly significant in homes near agricultural areas, construction sites, unpaved roads, or in regions with high pollen seasons. But even in suburban homes with none of these factors, air infiltration through gaps in the building envelope contributes meaningfully to indoor dust levels.
The fix is the same weatherstripping and caulking work that improves energy efficiency and keeps insects out — work we’ve covered extensively in our guides on stopping drafts and bugs with weather stripping and sealing windows against Asian lady beetles. The same silicone caulk on window frame gaps and foam weatherstrip tape on door and sash seams that keeps insects out also reduces the unfiltered outside air entering your home.
Pay particular attention to the attic hatch or pull-down attic stairs — these are frequently unsealed and represent a large opening directly to the dusty attic space above. A well-fitted gasket or weatherstrip around the attic hatch perimeter makes a noticeable difference in both dust and heating costs.


The HVAC System Itself — Dirty Coils and Blower
Even with regular filter changes, the internal components of your HVAC system accumulate dust over time. The evaporator coil, blower fan, and supply plenum all collect dust that can be dislodged and blown into living spaces when the system runs — particularly when it first starts up after a period of sitting idle.
Annual HVAC servicing includes cleaning these components and is worth doing both for dust control and system longevity. Between professional service visits, keeping the area around the air handler clean and ensuring nothing is blocking the return air vents helps maintain airflow efficiency.
Return air vents — the larger grilles that pull air back to the air handler — should never be blocked by furniture, curtains, or stored items. Blocked return vents create pressure imbalances that force the system to pull more air from gaps and leaks in the building envelope, worsening both dust and energy efficiency.
For the full HVAC maintenance picture: Our article on the ultimate guide to HVAC maintenance covers everything from filter changes to coil cleaning to annual service schedules — all the things that keep your system running efficiently and your air cleaner.
Carpets, Upholstery, and Fabric — The Dust Reservoirs
Carpets are dust reservoirs. They hold vastly more dust, skin cells, pet dander, and particulates than hard flooring, and every time someone walks across a carpeted floor they disturb and re-aerosolize particles that then settle on surfaces throughout the room. This is why rooms with carpet consistently accumulate more surface dust than rooms with hardwood or tile.
If heavy carpeting throughout your home coincides with your dust problem, this is a contributing factor that’s worth acknowledging. Transitioning high-traffic areas to hard flooring reduces the reservoir effect significantly. If replacing carpet isn’t practical, frequent vacuuming with a vacuum that has a HEPA filter prevents the worst of the re-aerosolization — a vacuum without proper filtration just blows fine particles back into the air from its exhaust.
Upholstered furniture, fabric window treatments, and bedding accumulate and release dust in the same way as carpet. Washing bedding weekly on a hot cycle, washing curtains seasonally, and vacuuming upholstered furniture regularly with a HEPA vacuum removes accumulated particles before they get disturbed and redistributed through the air.
Dust Mites and Their Contribution
Dust mites are microscopic arachnids that live in bedding, upholstery, and carpet and feed on shed skin cells. Their waste products and body fragments are a significant component of household dust and a major allergen for many people. A typical mattress can harbor millions of dust mites. Their contribution to dust levels in bedrooms specifically is substantial.
Dust mite covers — tightly woven encasements for mattresses, box springs, and pillows — reduce the population by denying them access to their food source and containing the waste products they produce. Combined with weekly hot-water washing of bedding, dust mite covers make a meaningful difference in bedroom dust levels and allergy symptoms.

Pets — A Significant and Often Underestimated Source
Pets shed hair and dander continuously. A single dog or cat can shed enough material to visibly accelerate dust accumulation throughout an entire home. Multiple pets multiply the effect. Pet hair and dander are also among the most potent allergens in household dust, making this a health issue as well as a housekeeping one.
Grooming pets regularly — brushing outside when possible — reduces the amount of loose hair and dander released into the home. Keeping pets off upholstered furniture and bedding reduces the density of accumulation in the areas where people spend the most time. Washing pet bedding weekly removes accumulated dander before it becomes airborne.
For homes with multiple pets and significant dust problems, running an air purifier in the main living areas continuously provides meaningful particle reduction. A purifier with a true HEPA filter captures particles as small as 0.3 microns — including pet dander, dust mite fragments, and pollen — and removes them from circulation rather than just filtering them when the HVAC runs.


Renovation and Construction Dust
If your dust problem appeared suddenly or worsened dramatically after renovation work — drywall repair, sanding, demolition, or any work that disturbs building materials — construction dust is almost certainly the cause. Drywall dust in particular is extremely fine, travels throughout an entire home through the HVAC system, and settles into every surface and crevice.
Construction dust left in ductwork after renovation work is a persistent problem because every time the HVAC runs it recirculates the settled dust. After any significant renovation, having the ducts professionally cleaned removes the accumulated material and prevents months of continued redistribution.
For smaller DIY projects that generate dust — sanding, drilling, cutting drywall — sealing off the work area with plastic sheeting and turning the HVAC off while working prevents the worst of the spread. Our article on DIY drywall repair covers dust containment as part of the repair process.
The Humidity Factor
Indoor humidity levels affect dust accumulation in ways most people don’t expect. Air that’s too dry — below about 30% relative humidity — allows particles to remain airborne longer because they’re lighter and don’t clump together and settle as quickly. Slightly higher humidity causes particles to absorb moisture, become heavier, and settle faster — which sounds counterproductive but actually makes them easier to vacuum up rather than staying suspended in the air you breathe.
Very low humidity in winter, when heating systems dry the air significantly, is associated with increased dust problems. A whole-house humidifier attached to the HVAC system or standalone room humidifiers in the most affected areas can help maintain humidity in the 35-50% range that’s optimal for both comfort and particle settlement.
For homes with the opposite problem — high humidity — dust mite populations explode above about 50% relative humidity because mites need moisture to survive. Understanding the causes of high humidity in your home and addressing them is covered in our article on understanding high humidity causes.


A Practical Action Plan for a Less Dusty Home
Rather than tackling everything at once, work through these in order of likely impact for most homes.
First: Check and replace your HVAC filter if it’s been more than 45 days. Upgrade to at least MERV 8 if you’re currently using a basic fiberglass filter. Set a recurring reminder to change it every 30-45 days going forward.
Second: Check accessible ductwork for obvious leaks — particularly flex duct connections in the attic at both the trunk line end and the boot end. Seal any gaps you find with mastic sealant or foil HVAC tape.
Third: Inspect and refresh weatherstripping on all exterior doors and caulk on window frames. Pay particular attention to the attic hatch — seal it with weatherstripping if it’s currently unsealed.
Fourth: If you have pets, establish a weekly grooming routine and wash pet bedding weekly. Consider a HEPA air purifier in the main living area and bedroom.
Fifth: Switch to a HEPA-filter vacuum if you don’t already have one. Vacuum carpeted areas twice weekly rather than once.
Most homeowners who work through this list notice a significant reduction in how quickly surfaces get dusty within a few weeks — not because they’re cleaning more but because less dust is being generated and circulated in the first place.

The Bottom Line
A house that’s always dusty isn’t a cleaning problem — it’s an air quality and building envelope problem. The dust accumulating on your surfaces was airborne first, and it’s airborne because your HVAC filter isn’t capturing it effectively, your ductwork is pulling unfiltered air from the attic, or gaps in your home’s exterior are continuously introducing outside particles.
Fix the filter, seal the duct leaks, close the gaps in weatherstripping and caulk, and deal with the in-home sources like pets and carpet. Do those things and the endless dusting cycle breaks — not because you’re cleaning more but because there’s genuinely less dust being produced and circulated in your home.
About the Author — Karen Bridges
Karen Bridges spent fifteen years as an indoor air quality consultant working with homeowners, schools, and commercial buildings across the midwest. She’s tested hundreds of homes for particulate levels and traced excessive dust problems to their root causes more times than she can count. She now writes about home air quality, HVAC maintenance, and building science for DIY audiences who want to understand why their home works the way it does — not just what to do about it.
As an Amazon Associate we earn from qualifying purchases through some links in our articles.