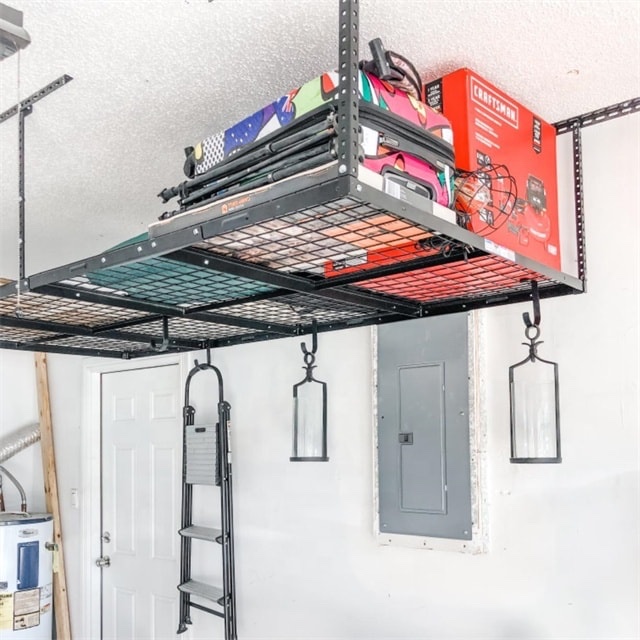
Is your home garage becoming a maze of belongings? If you’re tired of navigating around clutter on the floor, it’s time to utilize your ceiling space effectively! This step-by-step guide will walk you through the process of crafting a DIY overhead garage storage rack. By hanging your storage solutions from the ceiling, you’ll optimize your space and enjoy a well-organized garage.
What You’ll Need:
- Materials:
- Sturdy overhead storage rack kit
- Reliable ceiling anchors
- Heavy-duty hooks or hangers
- Tools:
- Measuring tape
- Level
- Cordless drill with appropriate bits
- Wrench or pliers
Liberate Your Vertical Space:
- Plan Your Layout: Begin by examining your garage’s ceiling area to determine the best placement for your storage rack. Accurate measurements will ensure a perfect fit.
- Select the Right Kit: Choose a top-quality overhead storage rack kit that suits your storage needs and can support the weight you intend to place on it. Kits usually come with all necessary hardware.
- Locate Ceiling Joists: Utilize a stud finder to pinpoint the ceiling joists where you intend to fasten the storage rack. Attaching the rack to these joists ensures its stability.
- Secure the Anchors: Attach the ceiling anchors to the joists according to your planned layout. Follow the manufacturer’s instructions closely to guarantee secure installation.
- Assemble the Rack: Assemble the storage rack components following the provided instructions. Verify that all parts are tightly connected.
- Hang the Rack: Enlist a helper or use a secure ladder to carefully lift the assembled rack and hook it onto the ceiling anchors. Ensure that the rack is level and firmly attached.
- Add Hooks or Hangers: Depending on your storage requirements, affix heavy-duty hooks or hangers to the rack. These accessories will hold your tools, gear, or other items.
- Test for Stability: Lightly test the rack’s stability by placing a few items on the hooks. Confirm that the rack remains steady and level under the load.
The Advantages of Overhead Storage:
- Space Optimization: Make the most of often-neglected ceiling space to store infrequently used items.
- Increased Floor Area: Elevating items overhead opens up precious floor space, making your garage more accessible and safer.
- Easy Access: Keep tools and equipment within reach while freeing up your work surfaces.
- Enhanced Organization: Clearing clutter from your work area promotes better organization and more efficient tasks.
- Customizable Storage: Tailor your overhead storage rack by adding hooks, baskets, or hangers to suit your specific storage needs.
Transform your garage from a chaotic mess into an organized haven by installing a DIY overhead garage storage rack. Armed with the right tools, materials, and a touch of patience, you can create an efficient storage solution that takes advantage of your ceiling space. Say farewell to rummaging through clutter and welcome a more functional and inviting workspace. With this DIY project, you’ll gain an improved home environment that truly works for you.
As an Amazon Associate we earn from qualifying purchases through some links in our articles.