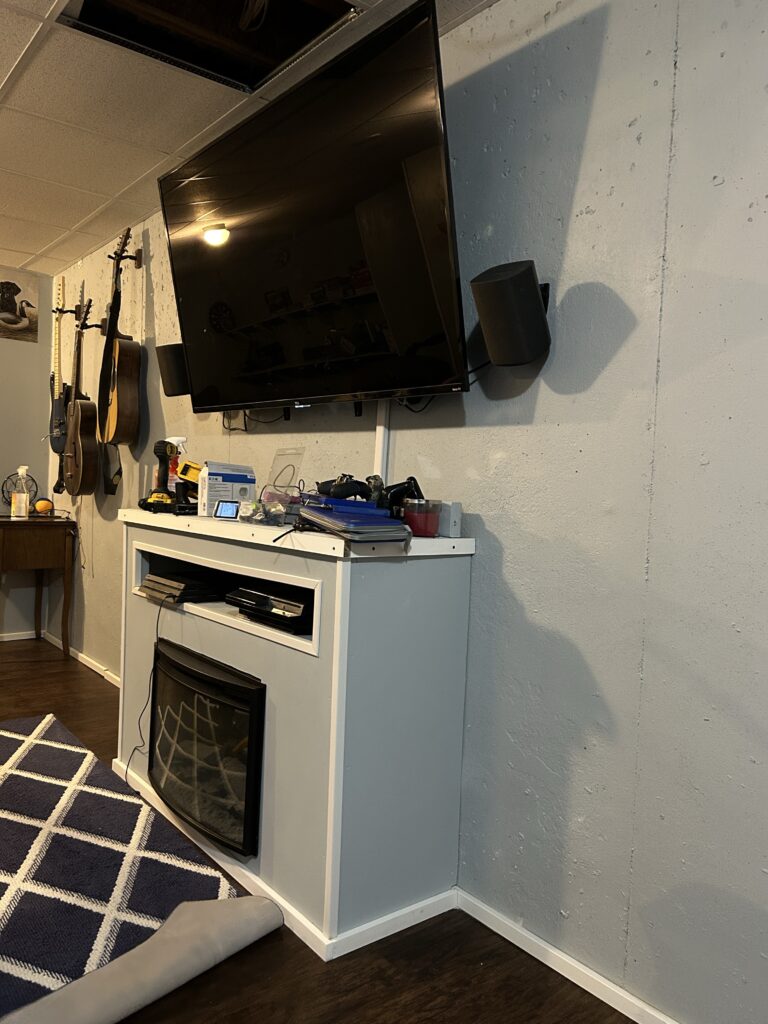
Creating a custom entertainment center can transform your living space, adding both functionality and a personal touch. In this article, we’ll explore how to build a beautiful, custom DIY entertainment center, perfect for housing an electric fireplace and your gaming consoles like PS4 and PS3. This project is ideal for those who love DIY and are eager to enhance their home theater experience.
Planning Your Custom Entertainment Center
Before diving into the construction, it’s essential to plan. Consider the size of your electric fireplace and the dimensions of the space where you’ll place the entertainment center. Think about additional features you might want, like extra shelving or specific areas for your gaming consoles. A well-thought-out plan ensures that the final product not only looks great but also meets all your functional needs.
Materials and Tools Needed
For this project, you’ll need:
- 2x4s for the frame
- Drywall, screws, drywall mud, and tape for finishing
- Paint for aesthetics
- Corner and flat base trim for detailing
- An oscillating saw and a miter saw for cutting
- Liquid nails for secure bonding
Ensure you have all these materials and tools on hand before you start building.
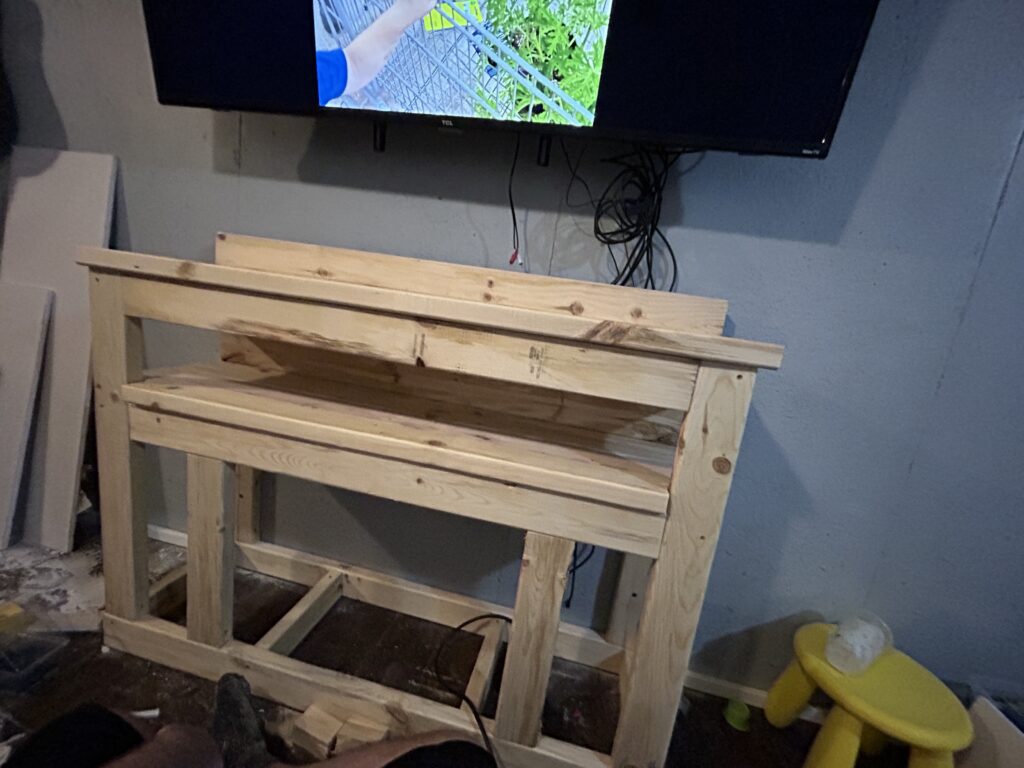
Building the Frame
Start by constructing the frame with 2x4s. This frame will serve as the skeleton of your entertainment center, so make sure it’s sturdy and well-aligned. The frame should be designed to snugly fit your electric fireplace and provide adequate support for the entire structure.
Adding Drywall and Finishing Touches
Once the frame is ready, it’s time to add the drywall. Cut the drywall to size using the oscillating saw, and attach it to the frame with screws. Use drywall mud and tape to cover the seams, creating a smooth surface. Once the mud dries, sand the surface for an even finish.
Painting and Adding Trim
Paint your entertainment center in a color that complements your room’s decor. After the paint dries, add the corner and flat base trim for a polished look. The trim not only enhances the aesthetic appeal but also gives a professional finish to your DIY project.
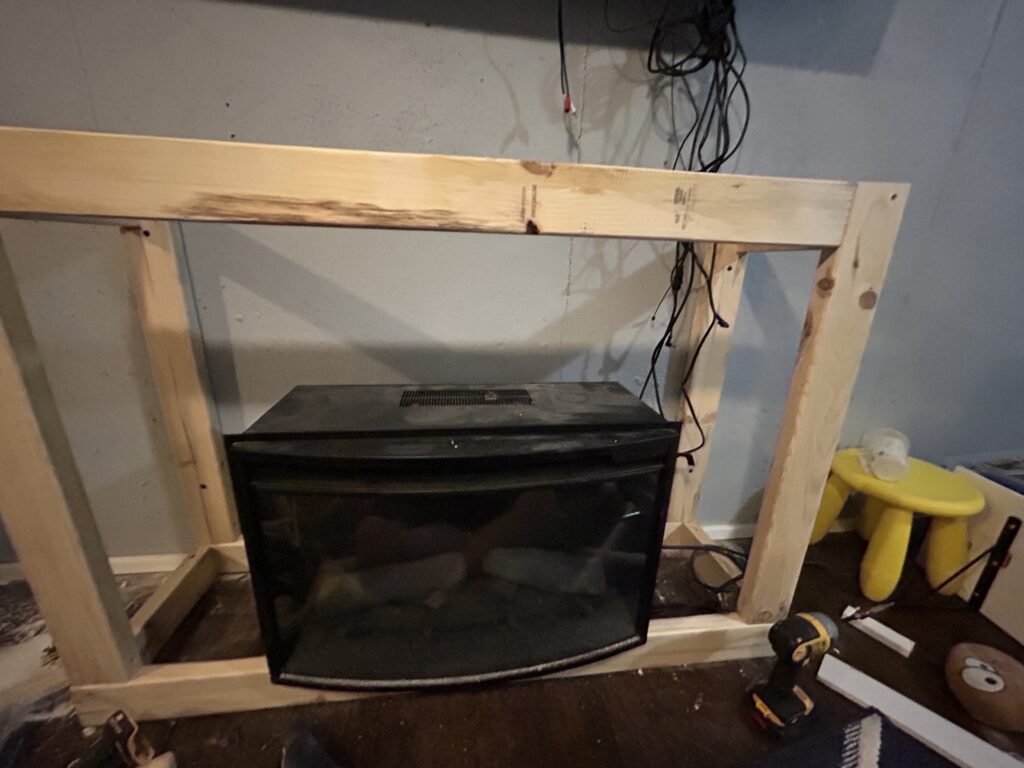
Custom Features for Functionality
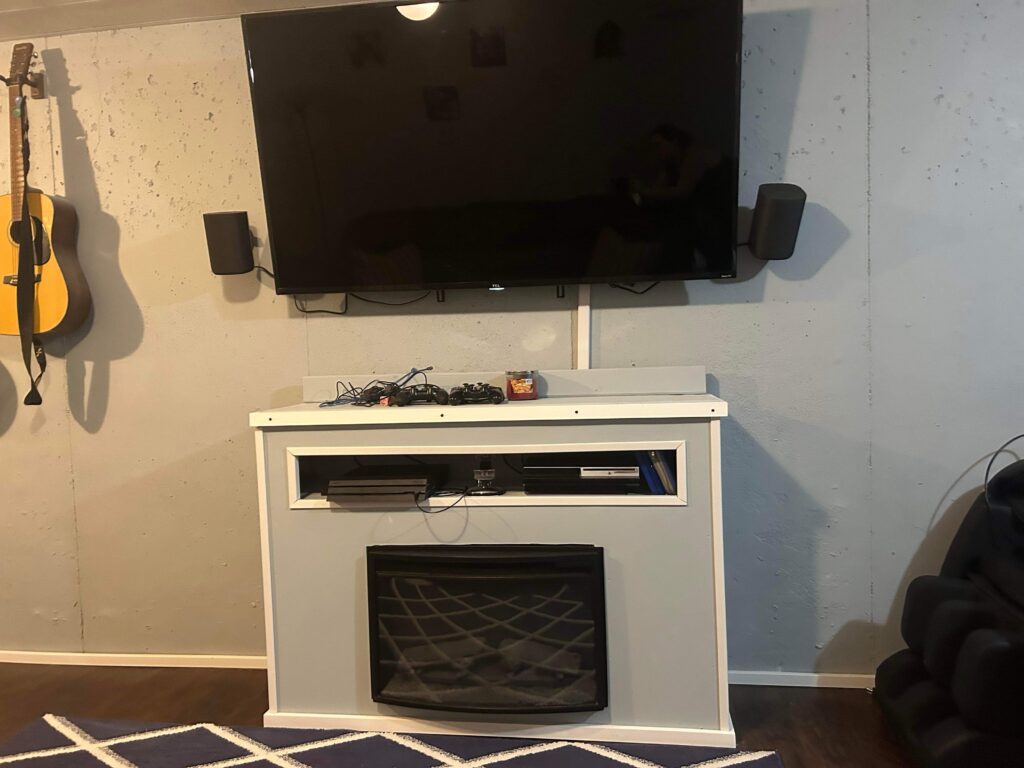
To accommodate your electric fireplace, include a breather hole in the back of the entertainment center. This ensures that the fireplace operates safely and efficiently. Additionally, create a box shelf for extra storage and a top shelf that can serve multiple purposes.
Managing Wires for a Clean Look
One of the key aspects of a great entertainment center is wire management. Strategically plan how to route the wires from your PS4, PS3, and electric fireplace. Keeping the wires hidden not only improves safety but also maintains a clean, uncluttered appearance.
The Importance of Quality Drywall Tape in Your DIY Entertainment Center
When it comes to working with drywall in any DIY project, choosing the right materials is crucial for a professional and durable finish. One such essential material is the drywall tape. For our custom DIY entertainment center project, the LYLTECH Drywall Joint Tape stands out as an exceptional choice.
Why Choose LYLTECH Drywall Joint Tape?
Self-Adhesive and Easy to Use: The LYLTECH Drywall Joint Tape is a game-changer in drywall projects. Its self-adhesive feature makes it incredibly easy to use. You can simply stick it onto the drywall seams without the need for a separate adhesive. This saves time and simplifies the process, especially for DIY enthusiasts who might be working with drywall for the first time.
Ready for Mud Application: Another advantage of this tape is its compatibility with drywall mud. Once the tape is in place, you can directly apply the drywall mud over it. This seamless integration ensures that your entertainment center walls have a smooth and uniform finish, free of cracks and seams.
Durability and Strength: The LYLTECH tape is made from 100% fiberglass and features a 13 MESH design, making it heavy-duty and durable. This means it’s less likely to tear or deteriorate over time, ensuring that the seams and cracks in your entertainment center stay well-covered and resistant to damage.
Versatility: Whether you’re covering joints, patching up cracks, or working on seams, this tape is versatile enough to handle various aspects of drywall finishing. Its strength and ease of use make it suitable for both large surfaces and smaller, intricate areas of your entertainment center.
Application Tips
- Clean Surface: Before applying the tape, ensure that the drywall surface is clean and free from dust. This helps the tape adhere better.
- Measure and Cut: Measure the length of the seam and cut the tape accordingly. It’s always better to cut a slightly longer piece than required to ensure complete coverage.
- Firmly Press Down: When applying the tape, press it firmly along the seam or crack. This removes any air bubbles and ensures a secure bond.
- Apply Drywall Mud: Once the tape is in place, apply the drywall mud over it. Use a drywall knife to spread the mud evenly, feathering the edges for a smooth finish.
Incorporating the LYLTECH Drywall Joint Tape into your DIY entertainment center project can significantly enhance the quality and longevity of your build. Its ease of use, durability, and compatibility with drywall mud make it a highly recommended choice for anyone looking to achieve a professional-grade finish in their DIY projects. Remember, the right materials can make all the difference in the success of your DIY endeavors.


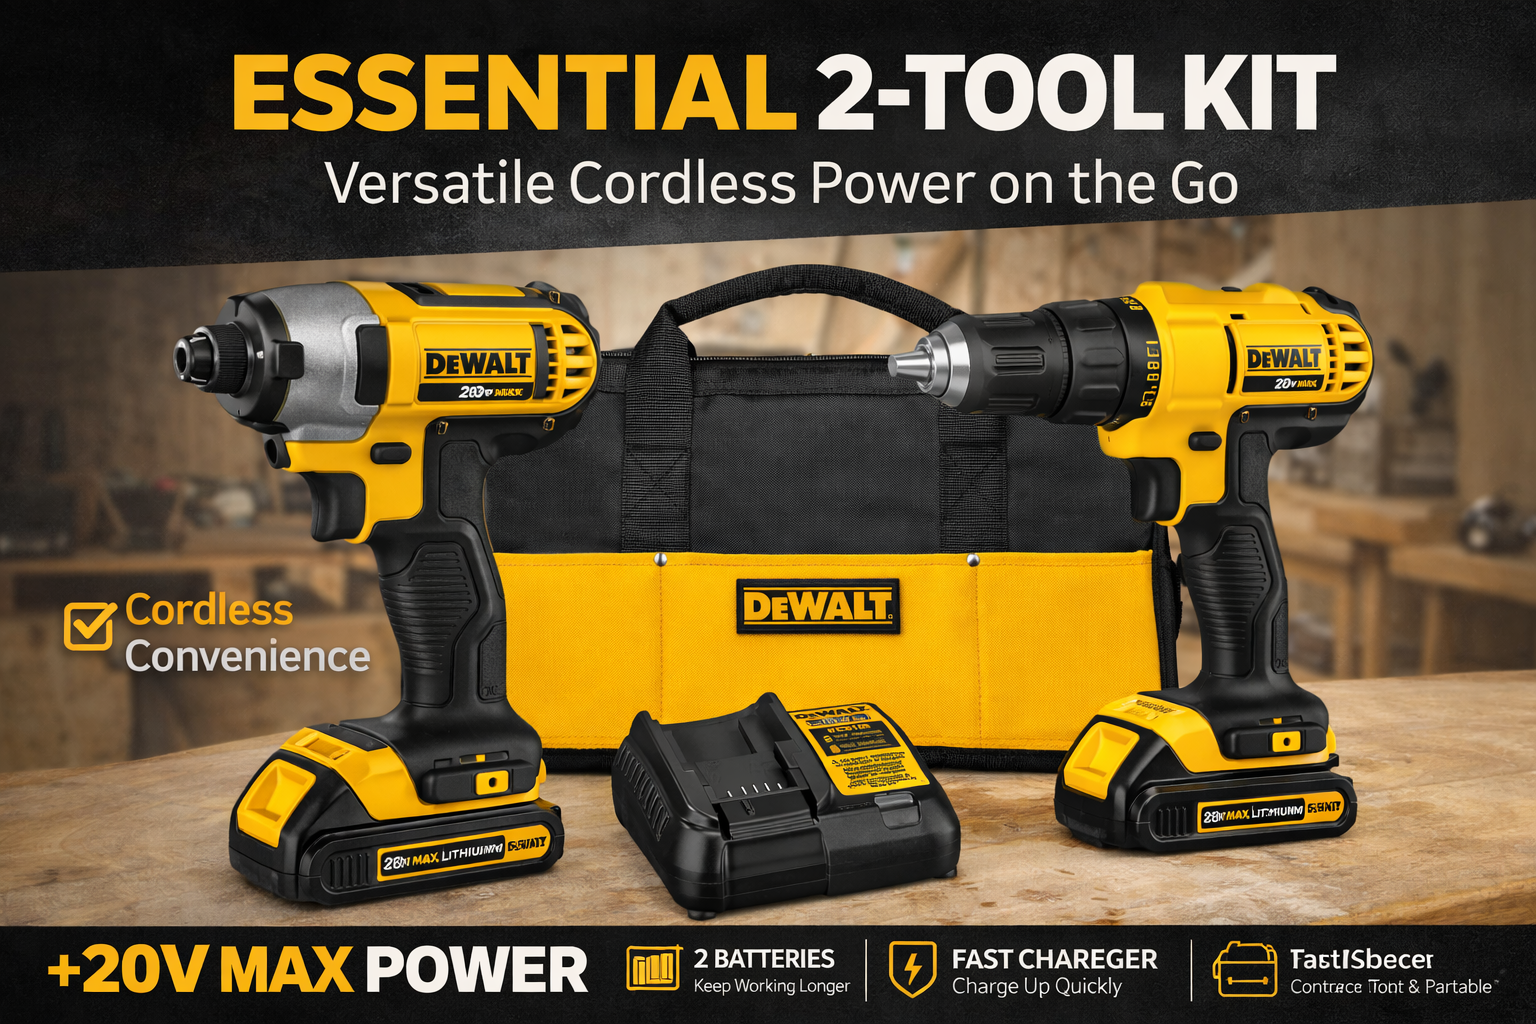
Enhancing Your DIY Project with the DEWALT 20V MAX* XR Oscillating Tool Kit
For anyone taking on a DIY project like building a custom entertainment center, having the right tools is as crucial as having the right materials. When it comes to cutting drywall and trim, the DEWALT 20V MAX* XR Oscillating Tool Kit is an indispensable asset. Let’s explore how this tool can significantly improve your DIY experience.
Precision and Versatility in Cutting
Adaptable for Various Cuts: The DEWALT Oscillating Tool is designed to handle a wide range of cutting tasks, making it perfect for customizing drywall and trim to fit your project’s specific dimensions. Whether you need to make straight cuts, curved cuts, or intricate shapes, this tool offers the precision and control required for detailed work.
Ideal for Trim Work: Trim work often requires careful, precise cuts to ensure a perfect fit and finish. The oscillating tool’s ability to make clean, accurate cuts in tight spaces makes it ideal for trimming tasks, ensuring your entertainment center has a polished and professional look.
User-Friendly Features
3-Speed Selector: The tool comes with a 3-speed selector that allows you to choose the right speed based on the material you’re working with. This feature provides greater control and efficiency, whether you’re cutting through thicker sections of drywall or delicate trim pieces.
Cordless Convenience: Being part of the DEWALT 20V MAX* system, this oscillating tool is cordless, offering ease of movement and flexibility. You can work in any part of your project without being tethered to a power outlet, making your DIY process smoother and more convenient.
Quick-Change Accessory System: The tool’s quick-change accessory system allows for swift and easy blade changes, saving you time and hassle. This feature is particularly useful when working on projects that require multiple types of cuts.
Durability and Reliability
DEWALT’s Trusted Quality: Known for its durable and reliable tools, DEWALT’s oscillating tool is built to withstand the rigors of heavy DIY work. Investing in this tool means you’re getting a product that can handle not just this project but many more in the future.
Application in Your DIY Project
When building your entertainment center, you’ll find the DEWALT Oscillating Tool particularly useful for:
- Cutting Drywall to Size: Easily cut drywall panels to fit the dimensions of your entertainment center.
- Trimming and Detailing: Achieve precise cuts on trim pieces for a clean, finished look around edges and corners.
- Creating Custom Openings: Whether you need openings for cables, electrical outlets, or the electric fireplace, this tool allows for accurate and clean cuts.
Elevating Your DIY Entertainment Center: Creative Ideas and Enhancements
Building a custom DIY entertainment center offers endless possibilities for creativity and personalization. Here are some ideas to take your project to the next level, making it not only a functional piece of furniture but also a standout feature in your home.
Integrating Smart Technology
- Smart Lighting: Incorporate LED strip lights or smart bulbs into your entertainment center. These can be controlled via smartphone or voice assistants, allowing you to adjust the ambiance to match your mood or the content you’re viewing.
- Built-In Wireless Charging: Consider adding a wireless charging pad into the design. This can be a convenient spot to charge smartphones or tablets, keeping your space clutter-free.
- Home Automation Integration: If you’re into home automation, integrate your entertainment center with your home system. Control lights, sound, and even the electric fireplace with a single remote or voice command.
Custom Storage Solutions
- Hidden Compartments: Design hidden compartments or drawers for storing remotes, gaming controllers, and other accessories. This helps maintain a clean and organized look.
- Adjustable Shelving: Incorporate adjustable shelves to accommodate different sizes of books, decorative items, or audio-visual equipment.
- Cable Management System: Design a dedicated cable management system to keep all wires neatly organized and out of sight. This enhances the overall aesthetic and reduces the risk of tangled cables.
Personalized Aesthetic Touches
- Themed Decor: Tailor the look of your entertainment center to a specific theme, like a favorite movie, TV show, or sports team. This could be through the use of colors, logos, or decorative elements.
- Interchangeable Panels: Create panels that can be easily swapped out. This allows you to change the look of your entertainment center without a complete overhaul.
- Artistic Finishes: Experiment with different paint techniques, such as distressing or using chalk paint for a rustic look. You could also use wallpaper or fabric to add texture and pattern.
Enhancing Functionality
- Multi-Purpose Design: Make the top of the entertainment center wide enough to serve as an additional shelf or a display area for photos and plants.
- Swivel TV Mount: Install a swivel mount for your TV. This allows you to adjust the viewing angle, enhancing the viewing experience in different parts of the room.
- Sound System Integration: Design the entertainment center with a built-in soundbar shelf or spaces for surround sound speakers. This can significantly improve your audio experience without compromising on aesthetics.
Eco-Friendly Options
- Sustainable Materials: Use eco-friendly materials like reclaimed wood or bamboo for your project. This not only adds a unique story to your entertainment center but also reduces environmental impact.
- Energy-Efficient Electric Fireplace: If you’re including an electric fireplace, opt for an energy-efficient model. This provides the warmth and ambiance you desire while keeping energy consumption low.
Your DIY entertainment center can be much more than a place to house your TV and gaming consoles. With these creative ideas and enhancements, it can become a focal point of your living space, reflecting your personal style and meeting your functional needs. Whether it’s through smart technology integration, custom storage solutions, personalized aesthetic touches, enhanced functionality, or eco-friendly options, there are numerous ways to make your entertainment center uniquely yours.
What Are the Key Considerations When Building a DIY Entertainment Center?
Planning and Design: Before starting your DIY entertainment center project, it’s crucial to plan the design based on the available space, your storage needs, and the aesthetic you want to achieve. Consider the size of your TV, the dimensions of any other electronics like sound systems or gaming consoles, and how much additional storage or display space you need.
How Do I Choose the Right Materials for My Entertainment Center?
Selecting Materials: The choice of materials will impact both the look and durability of your entertainment center. Common materials include wood (like plywood or MDF), metal for a more industrial look, or even glass elements for shelves. Consider the weight capacity and the ease of working with these materials. For a more eco-friendly approach, reclaimed wood is a popular choice.
What Tools Are Essential for Building an Entertainment Center?
Essential Tools: Basic tools for building an entertainment center include a measuring tape, a saw (hand saw, circular saw, or miter saw), a drill, screws, a level, and a hammer or nail gun. For more intricate designs or finishes, you might need additional tools like sanders, routers, or specialized cutting tools.
Can I Customize My Entertainment Center to Fit Unusual Spaces?
Customization for Unique Spaces: One of the biggest advantages of a DIY entertainment center is the ability to customize it to fit any space, no matter how unusual. Whether you’re working with a narrow area, an awkward corner, or need to build around existing features like fireplaces or windows, you can design your entertainment center to fit perfectly.
What Are Some Effective Ways to Manage Cables and Wires?
Cable Management: Effective cable management is key to ensuring your entertainment center looks tidy and organized. Consider incorporating built-in cable management solutions like conduits or clips to keep cables neatly arranged. You can also design compartments or channels at the back of the unit to hide cables away from view.
How Can I Ensure the Safety and Stability of My Entertainment Center?
Safety and Stability: To ensure the safety and stability of your entertainment center, anchor it securely to the wall, especially if it’s a tall unit or if you have children or pets. Make sure that shelves and mounts can support the weight of the items they’ll hold, and avoid overloading shelves or top-heavy designs.
Are There Any Special Considerations for Integrating Electronics?
Integrating Electronics: When designing spaces for electronics, ensure adequate ventilation to prevent overheating. If you’re including a space for a gaming console or media player, consider ease of access for controls and disc changes. For an electric fireplace, ensure there’s enough clearance and that any materials used are heat-resistant.


Enhancing Your Entertainment Center with the TV Cord Hider
In any home entertainment setup, managing and concealing cords is crucial for both aesthetics and safety. The TV Cord Hider – 39 Inch Cord Covers for Wall Mounted TV is an excellent solution for keeping your entertainment area neat and organized. Let’s delve into how this product can be a valuable addition to your DIY entertainment center build.
Features of the TV Cord Hider
Size and Compatibility: This cord hider kit is 39 inches in length, making it suitable for most wall-mounted TV setups. It’s designed to effectively conceal multiple cords, ensuring your setup looks clean and professional.
Dimensions for Ample Coverage: Each cord hider is 1.5 inches wide and 0.75 inches high, providing enough space to accommodate various types of cables, including HDMI, power cords, and audio/video wires.
Easy Installation: The kit comes with three 13-inch long sections, which can be easily cut to the desired length. The sections snap together for a seamless look and can be mounted on the wall with the included adhesive tape, making the installation process straightforward and tool-free.
Sleek and Unobtrusive Design: Finished in white, these cord covers blend well with most wall colors and decor styles. Their sleek design ensures they are unobtrusive, maintaining the aesthetic appeal of your entertainment center and living space.
Benefits in Your DIY Entertainment Center Build
- Cable Management: The TV Cord Hider is perfect for managing and concealing the cables running from your wall-mounted TV to your entertainment center. This not only enhances the overall look of your setup but also prevents cable tangling and damage.
- Safety Enhancement: By concealing and securing cables, this cord hider minimizes the risk of tripping hazards and accidental unplugging, making your entertainment area safer, especially if you have children or pets.
- Versatility: Whether you’re setting up a gaming console, a streaming device, or a home theater system, this cord hider is versatile enough to accommodate various types of cables, ensuring all your tech needs are neatly organized.
- Complements Your DIY Project: The clean and minimalistic design of the cord hider complements the custom DIY entertainment center, adding to its functionality without detracting from its visual appeal.
Explore More DIY Projects on DIY Home Wizard
If you’re inspired by the idea of building a custom DIY entertainment center and are looking for more home improvement projects, DIY Home Wizard has a variety of articles that can spark your creativity and guide you through your next DIY endeavor. Here are a few articles from the website that you might find interesting:
- Crafting a DIY Circle Cutting Board Table Top for Kitchen Counters: This article guides you through creating a functional and stylish circle cutting board table top for your kitchen. It’s a perfect project for those who love to add a personal touch to their kitchen space.
- Building a DIY Wall-Mounted Spice Shelf: A Simple and Functional Project: If you enjoy woodworking and cooking, this project is a great way to combine these passions. The article provides step-by-step instructions on building a simple yet functional wall-mounted spice shelf.
- Mastering Trim Installation: A Carpenter’s Guide to Effective Techniques: This guide is invaluable for anyone looking to enhance their carpentry skills, especially in trim installation. It covers precision, patience, and the right techniques for a flawless finish.
As an Amazon Associate we earn from qualifying purchases through some links in our articles.