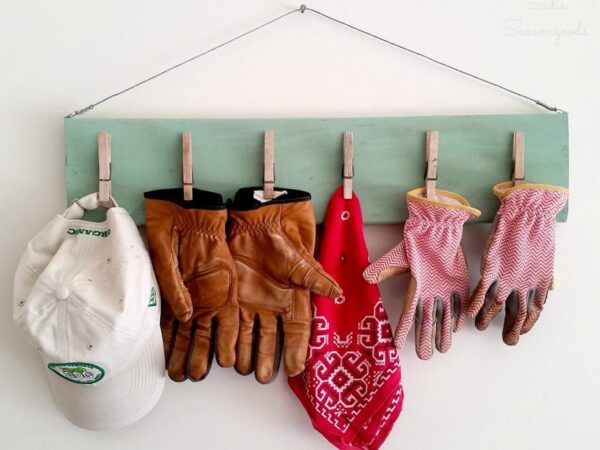
If you find yourself constantly searching for your hats and gloves during the colder months, a DIY hat and gloves hanger might just be the perfect solution to keep your winter accessories organized and easily accessible. With a few simple materials and a touch of creativity, you can create a functional and stylish hanger that helps you keep track of your hats and gloves.
Materials Needed:
- Small wooden board (such as a piece of reclaimed wood or a wooden plaque)
- String or twine
- Clothespins
- Strong adhesive or glue
- Paint or stain (optional)
- Hooks or nails for hanging
Step-by-Step Instructions:
- Prepare the Wooden Board: Start by choosing a small wooden board that will serve as the base for your hanger. You can use a piece of reclaimed wood for a rustic look, or a pre-made wooden plaque for a polished finish. You can also paint or stain the board to match your décor if desired.
- Attach the String: Cut a piece of string or twine to your desired length. This will determine how far down the hats and gloves will hang from the board. Attach the string securely to both ends of the wooden board, creating a loop that allows the hanger to be hung on the wall.
- Attach the Clothespins: Take your clothespins and apply a strong adhesive or glue to the back of each clothespin. Place the clothespins along the length of the wooden board, with the open end of the clothespin facing down. Press the clothespins firmly onto the board, making sure they are evenly spaced.
- Allow the Glue to Dry: Let the glue dry according to the manufacturer’s instructions. This ensures that the clothespins are securely attached to the board.
- Hang the Hanger: Once the glue is fully dry, your DIY hat and gloves hanger is ready to be hung. Use hooks or nails to attach the hanger to the wall at your desired location. Make sure it is secure and can hold the weight of your hats and gloves.
- Organize Your Accessories: Now that your hanger is in place, you can start organizing your hats and gloves. Simply clip each accessory onto a clothespin, allowing them to hang neatly and be easily accessible when you need them.
Benefits of a DIY Hat and Gloves Hanger:
- Organization: This hanger provides a designated spot for your hats and gloves, preventing them from getting lost or scattered around the house.
- Easy Access: With the clothespins, you can easily clip and unclip your accessories, making it convenient to grab them on your way out.
- Space-Saving: The hanger takes up minimal wall space, making it suitable for smaller entryways or closets.
- Customization: You can customize the hanger’s size, design, and color to match your personal style and décor.
Creating a DIY hat and gloves hanger is a simple and effective way to keep your winter accessories organized and within reach. With just a few materials and a little creativity, you can enjoy the benefits of a practical and stylish storage solution that helps streamline your daily routine during the colder months.
As an Amazon Associate we earn from qualifying purchases through some links in our articles.