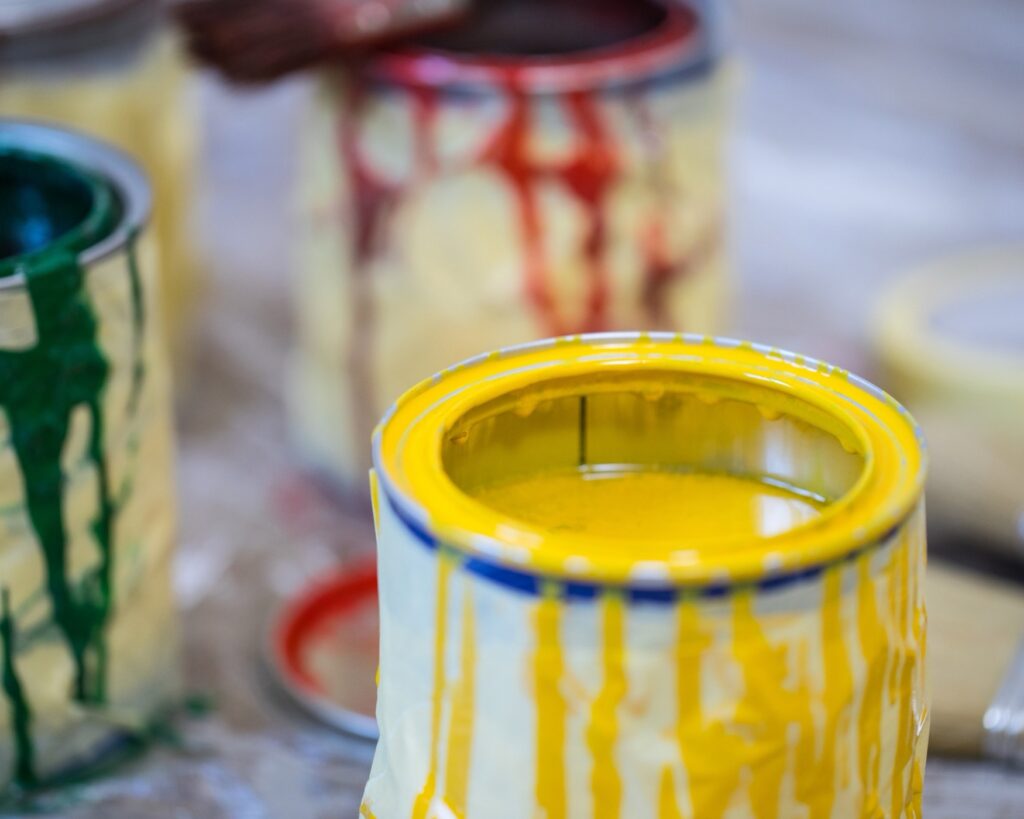
If you’ve ever embarked on a painting project, you’re likely familiar with the arm workout that comes from manually mixing paint. Whether it’s a fresh can from the store or one that’s been sitting on your shelf for months, achieving that perfect, lump-free consistency can feel like a battle. That’s where the concept of a paint can shaker comes into play, a tool designed to make our lives easier by ensuring a smooth, even mix with minimal effort.
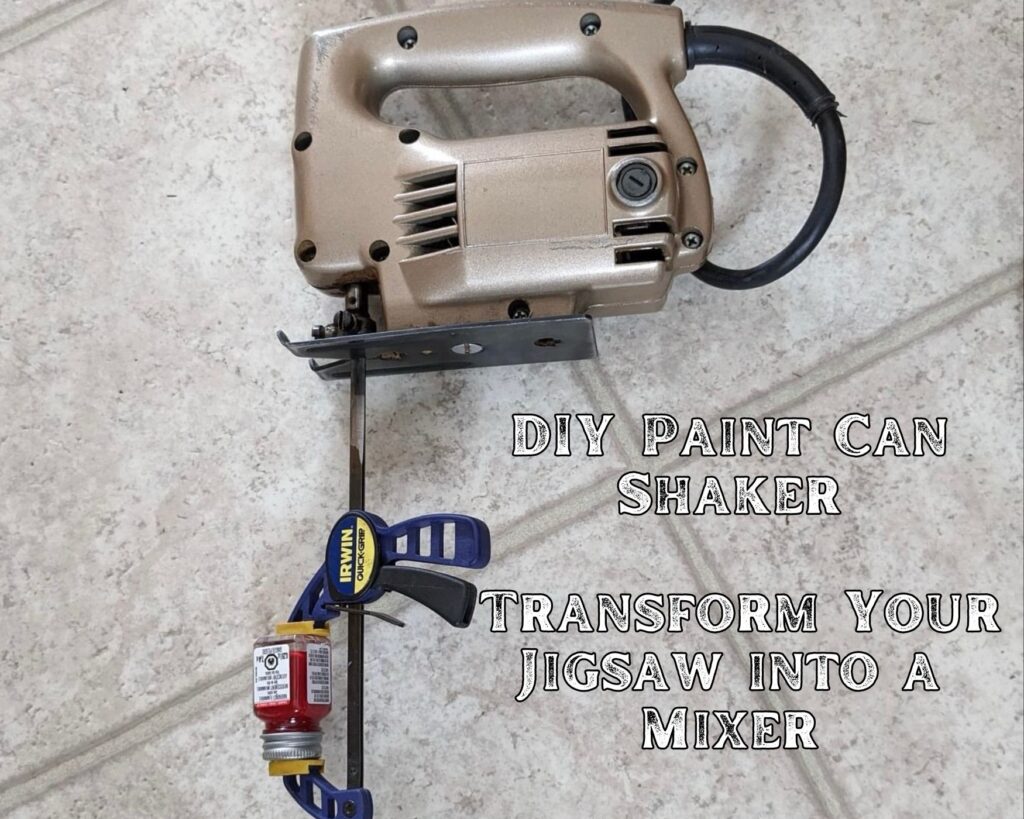
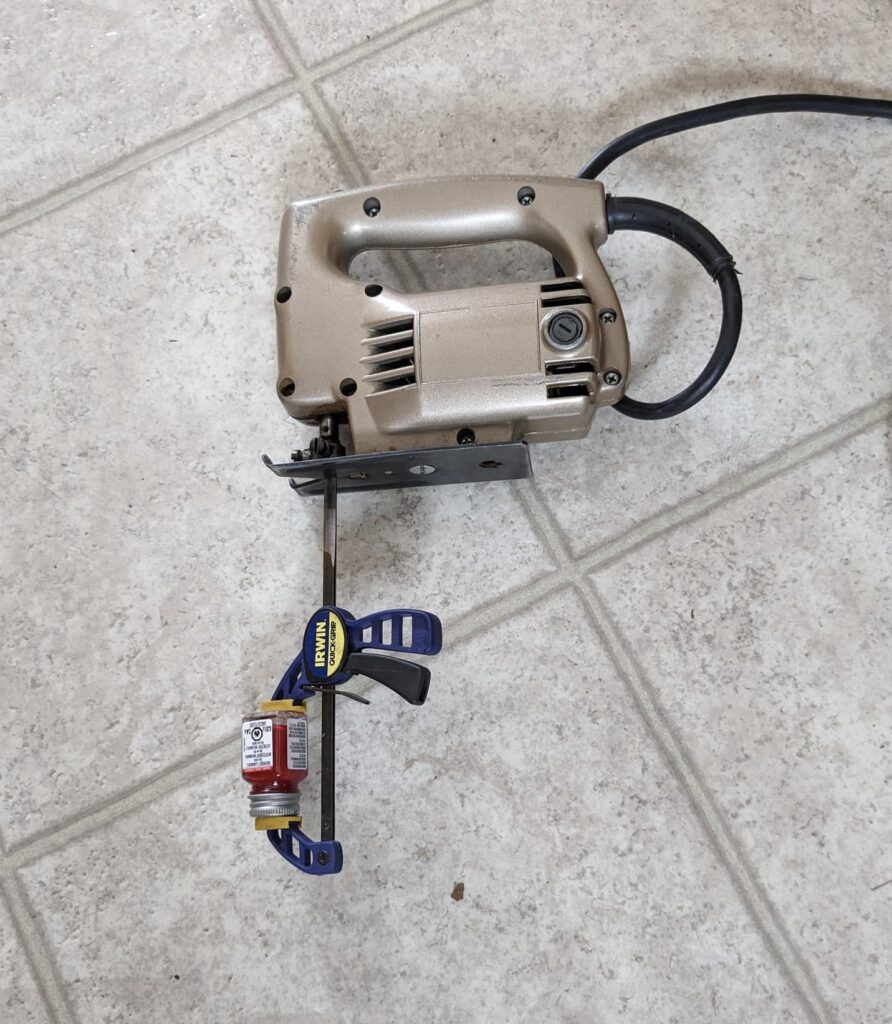
Now, commercial paint can shakers exist, but they’re often geared toward professional settings, leaving DIY enthusiasts and home improvers in a bit of a lurch. That’s why I turned to a bit of ingenuity and my trusty jigsaw. Yes, you read that right—a jigsaw. With the right attachment, specifically a sturdy clamp, this common power tool can be transformed into an effective paint can shaker, perfect for small to medium-sized projects at home.
The idea might sound unconventional, and admittedly, there’s a thrill in repurposing tools for tasks beyond their intended use. But beyond the novelty, there’s a practical appeal. Not only does this DIY solution save you the cost and space of a commercial shaker, but it also adds a layer of satisfaction to your painting projects, knowing you’ve hacked your way to a smoother finish. So, if you’re ready to give your arms a break and your paint cans a thorough mix, let’s dive into how you can set up your own paint can shaker using items you likely already have in your garage.

How Can You Make Your Own Paint Can Shaker?
Turning your jigsaw into a makeshift paint can shaker might sound like a hack straight out of a DIY enthusiast’s handbook, and that’s because it is. It’s a straightforward process that leverages the power and motion of a jigsaw to mimic the vigorous shaking action needed to thoroughly mix paint. Here’s how you can do it safely and effectively at home:
- Safety First: Before we dive into the nuts and bolts, remember, safety is paramount. Ensure your jigsaw is unplugged while setting it up, wear protective eyewear, and work in a well-ventilated area to avoid any paint fumes.
- Choosing the Right Clamp: Not all clamps are created equal for this task. You’ll need a strong, sturdy clamp that can hold the paint can securely without budging. I found the 5 Pcs 4 Inch Bar Clamps for Woodworking to be perfect for this job. They’re designed for woodworking, which means they can handle the weight and force without slipping. Plus, their size is just right for gripping standard paint cans.
- Modifying the Clamp: Depending on your jigsaw model, you might need to make slight modifications to the clamp end to ensure it fits snugly into the blade holder. This might mean filing down the edges or using an adapter. The goal is to have the clamp attached where the blade would normally go, standing in as the “shaker” arm.
- Securing the Paint Can: With the clamp firmly attached to your jigsaw, it’s time to secure the paint can. Open the clamp wide enough to fit around the body of the can, ensuring it’s centered. Tighten the clamp just enough to hold the can firmly in place; too tight might dent the can, too loose, and you risk it flying off mid-shake.
- The Mixing Process: Plug in the jigsaw, hold it steady, and start it on a low-speed setting. The motion of the jigsaw will transfer to the clamped paint can, creating a vigorous up-and-down shaking action. Keep it running for a few minutes, checking the paint consistency periodically.
This DIY project not only exemplifies the spirit of ingenuity but also addresses a practical need in an affordable and satisfying way. By repurposing a jigsaw and utilizing specifically suited clamps like the 5 Pcs 4 Inch Bar Clamps for Woodworking, you can achieve well-mixed paint ready for any home improvement project, without the arm fatigue or the mess of manual mixing.


What Are the Challenges of Mixing Paint at Home?
Mixing paint at home comes with its fair share of challenges, from achieving the right consistency to dealing with the aftermath of a poorly mixed can. Despite the apparent simplicity of stirring with a stick or giving the can a good shake, anyone who’s tackled a DIY paint project knows it’s rarely that straightforward.
One of the primary issues is the potential for uneven mixing. Paint that’s sat for a while tends to separate, and without thorough mixing, you can end up with color and texture inconsistencies. This is especially true for more complex finishes like lacquer, which can be notoriously tricky to work with. The intricacies of using such materials are well-documented in resources like The Challenges of Using Lacquer in Home Projects, highlighting how crucial a proper mix is to the success of your project.
Another concern is the physical effort and time investment required. Manual mixing is not only tiring but can also be inefficient, particularly for larger quantities or thicker paints. The DIY paint can shaker concept addresses these issues by automating the process, ensuring a thorough mix with minimal effort and reducing the risk of inconsistencies.
Moreover, the cleanup process can be daunting. Paint can splatter or spill, especially if you’re attempting to mix vigorously by hand. A mechanical solution like the jigsaw paint can shaker minimizes this risk, containing the action within the can and saving you from potential messes.
In essence, while the art of mixing paint might seem simple, the reality is anything but. It’s a balancing act of ensuring uniformity, managing physical strain, and keeping the workspace clean. By adopting innovative solutions like the DIY jigsaw paint can shaker, you can navigate these challenges more effectively, making your paint projects smoother and more enjoyable.
Beyond Mixing Paint: Other DIY Workshop Hacks
Expanding your DIY toolkit with a homemade paint can shaker is just the beginning. The spirit of innovation doesn’t stop at paint; it extends to every corner of your workshop or garage, transforming it into a haven of efficiency and creativity. Here’s how you can apply the same ingenuity to other aspects of your workspace:
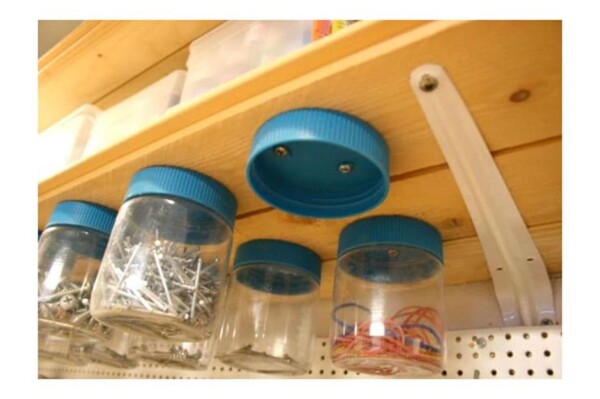
Innovative Storage Solutions: Keeping your workshop organized can be as challenging as any project you take on. One ingenious solution involves repurposing common household items for storage. For example, using peanut butter jars for nails and screws not only recycles what you might otherwise toss but also provides clear, easily accessible containers for small items. This simple yet effective strategy is explored in DIY Workshop or Garage Storage Solution: Peanut Butter Jars for Nails and Screws, demonstrating that great organization doesn’t have to come at a high cost.
Leveraging Technology and Apps: In today’s digital age, technology can be a powerful ally in the workshop. From apps that help you plan and visualize projects to online platforms offering detailed tutorials and community support, integrating technology can streamline your workflow and enhance your DIY experience.
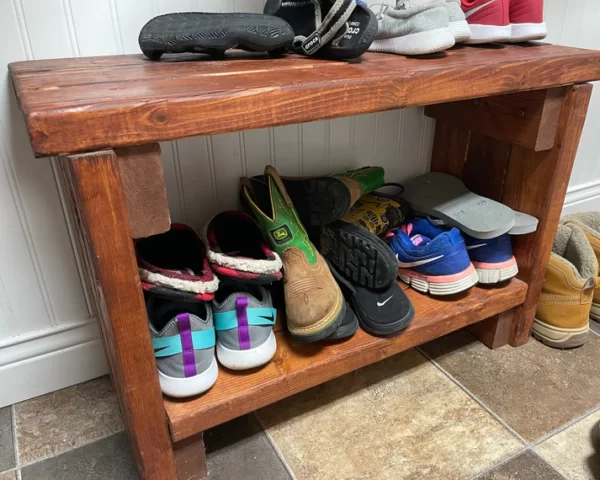
Embracing Resourcefulness: The essence of DIY is making the most of what you have, turning limitations into opportunities for creativity. This might mean finding new uses for old tools, customizing your workspace with handmade accessories, or even building your own workbench tailored to your specific needs.
Continuous Learning: The world of DIY is vast and ever-changing. Keeping abreast of the latest tips, tricks, and hacks can make your projects more enjoyable and successful. Dedicating time to learning, whether through articles like 20 Easy DIY Home Tricks for Homeowners or through hands-on workshops, can pay dividends in your abilities and the quality of your work.

Questions and Answers About the DIY Jigsaw Paint Can Shaker
How safe is it to use a jigsaw as a paint can shaker?
While using a jigsaw as a paint can shaker is an innovative hack, safety should always be your top priority. Ensure the jigsaw is securely fastened, the paint can is tightly clamped, and you’re wearing appropriate safety gear. Always follow the jigsaw’s safety instructions and use common sense to minimize risk.
Will this method work for all sizes of paint cans?
This DIY method is best suited for small to medium-sized paint cans. Larger cans may require a more robust clamping system or may not fit securely in the clamp. Always ensure the paint can is securely held before starting the jigsaw.
Can I use any type of jigsaw for this DIY project?
Most standard jigsaws should work for this project, but ensure yours has a variable speed setting. Being able to control the speed is crucial for safely mixing the paint without causing spills or excessive frothing.
How do I prevent the paint from separating again after shaking?
After thoroughly mixing your paint with the DIY shaker, it’s best to use the paint as soon as possible. If you must store it again, ensure it’s sealed tightly and stored in a cool, dry place. Periodic shaking might be necessary for long-term storage.
Are there any modifications I need to make to the jigsaw or clamp?
Some minor modifications might be necessary to ensure the clamp fits securely in the jigsaw’s blade holder. This could involve adjusting the clamp’s end or using an adapter. Always prioritize safety and ensure any modifications do not compromise the integrity of the tool or clamp.
Remember, while this DIY solution offers a creative way to mix paint, always prioritize safety and consider whether the project matches your skill level and the tools at hand.
Tackling DIY projects, whether mixing paint or organizing your workshop, is about more than just completing a task. It’s about embracing challenges, learning new skills, and making the space around you truly your own. The journey from conceiving an idea to seeing it come to life is filled with opportunities to innovate and adapt, just like transforming a simple jigsaw into a paint can shaker. By approaching each project with curiosity and resourcefulness, you’ll not only achieve your goals but also enjoy the process along the way. Remember, in the world of DIY, the only limit is your imagination.
As an Amazon Associate we earn from qualifying purchases through some links in our articles.