How to Mount a Water Spigot on a Concrete Wall with Surface PEX
When working with outdoor plumbing, mounting a water spigot to a concrete wall can quickly become a challenge—especially when your PEX line runs along the surface of the wall instead of through it. This situation creates two main issues: how to securely mount the spigot to the concrete and how to allow enough space for the PEX line to connect neatly.
I ran into this exact problem during a recent project, and after some trial and error, I came up with a DIY solution that worked beautifully. Using 1″x1″ aluminum square tubing (available at Lowe’s) and 90-degree elbow connectors, I built a small mounting frame that solved both issues. To securely attach the spigot, I used an XFITTING 1/2″ PEX x 3/4″ GHTsillcock, which is specifically designed for PEX connections. Finally, I fastened the frame to the wall with self-drillingTEK screws for a solid and weatherproof hold.
This sturdy yet lightweight frame provided the clearance I needed for the PEX line while creating a secure attachment point for the spigot. If you’re dealing with the same problem, this step-by-step guide will show you how to create a durable and professional-looking setup that’s easy to replicate and built to last.
Why Mounting a Spigot to Concrete Can Be Tricky
Mounting a water spigot to a concrete wall presents unique challenges that many DIYers encounter. Unlike wood or siding, concrete is dense and unforgiving, making it difficult to drill into and secure fixtures properly. Add a surface-mounted PEX line to the equation, and the problem becomes even more complicated.
Here’s why this setup can be tricky:
- Concrete Requires Specialized Tools
Drilling into concrete requires the use of a hammer drill and masonry drill bits, which can be intimidating if you’ve never worked with them before. Without the right tools, getting a secure mount isn’t possible. - PEX Lines Need Clearance
Unlike traditional setups where water lines run through walls, surface-mounted PEX lines require space to connect cleanly to the back of the spigot. If the spigot is mounted flush to the wall, it leaves no room for the PEX connection, which can result in bending or kinking the line. - Durability and Stability Are Key
Since outdoor spigots endure regular use and are exposed to weather, they need to be mounted in a way that ensures they won’t loosen or shift over time. This is especially true for concrete walls, where improper installation can lead to cracks or instability.
To make matters worse, ignoring these challenges can lead to long-term problems. For example, an unstable spigot setup can result in leaks, kinks in the PEX line, or even freezing in colder climates. If you’re worried about protecting your plumbing from freezing temperatures, check out this guide on how to thaw frozen pipes underground.
By creating a secure mounting frame, you can address all these challenges, ensuring the spigot is stable, the PEX line is protected, and your setup is built to last. Next, we’ll dive into the materials you’ll need to make it happen.
Materials You’ll Need for This DIY Spigot Mount
To successfully mount a water spigot to a concrete wall while accommodating a surface-mounted PEX line, you’ll need a few key materials and tools. Each piece plays an important role in ensuring your setup is durable, functional, and visually clean. Here’s what you’ll need:
- 1″x1″ Aluminum Square Tubing
This lightweight yet strong material serves as the frame for mounting the spigot. It provides the necessary clearance for the PEX line while offering a stable base. (Available at most hardware stores like Lowe’s.) - 90-Degree Elbow Connectors
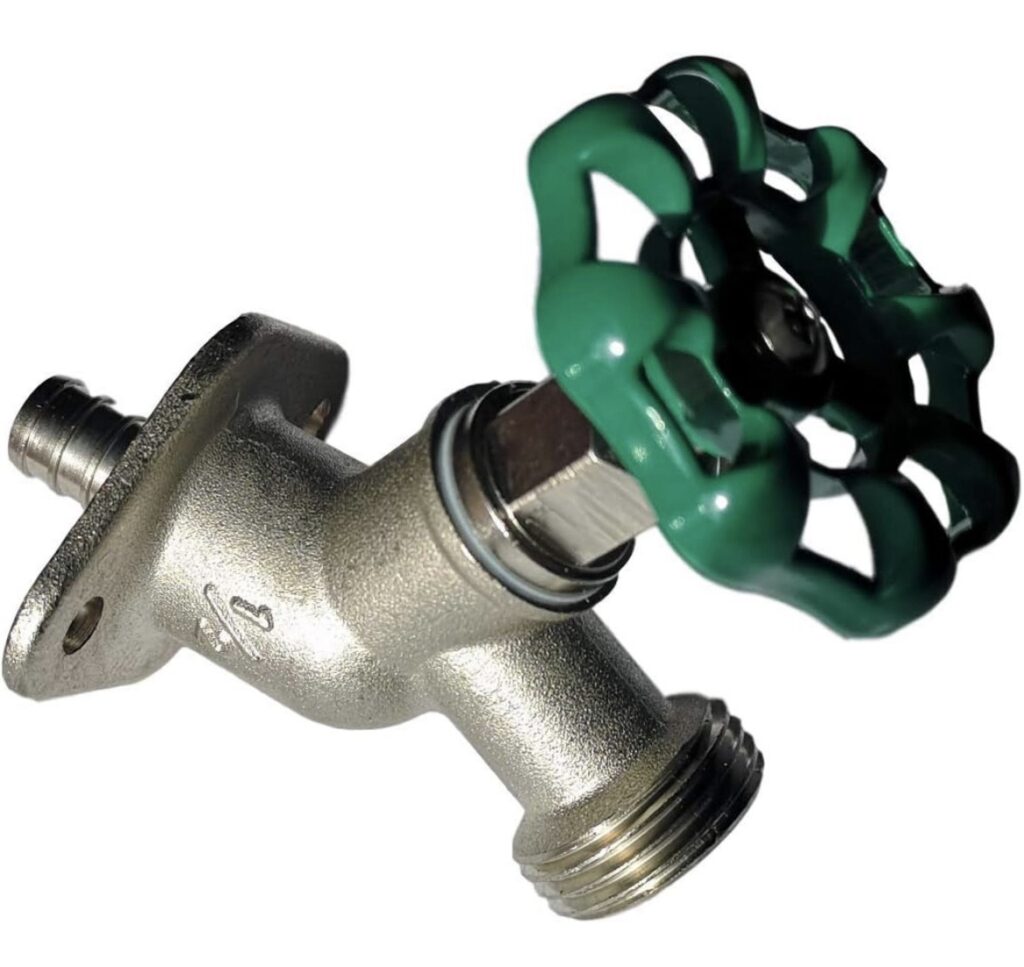
These L-shaped connectors are essential for joining the aluminum tubing pieces and creating a sturdy frame. Their durable design ensures the frame won’t shift or loosen over time. - XFITTING 1/2″ PEX x 3/4″ GHT Sillcock Spigot
This brass sillcock is perfect for outdoor use and connects seamlessly to PEX lines. Its garden hose threading (GHT) also makes it easy to attach hoses for watering or cleaning tasks. - Self-Drilling TEK Screws
These stainless steel screws are designed for use with metal and concrete, making them perfect for attaching the frame securely to the wall. - Drill with Masonry Bits
A hammer drill with masonry drill bits is necessary for drilling into concrete. This tool ensures you create stable pilot holes for mounting the frame. - Measuring Tape and Marker
Accurate measurements and markings are essential to align the frame and spigot properly.
Optional Materials
- Silicone Caulk
To seal around the spigot and prevent water from seeping into the drilled holes. - Zip Ties or Clips
To neatly secure the PEX line along the aluminum tubing, keeping everything tidy and protected.
With these materials in hand, you’re ready to start building a sturdy and functional frame for your spigot. This setup will provide the stability needed for long-term use and protect your PEX line from damage. Up next, we’ll break down the step-by-step process of building the frame.
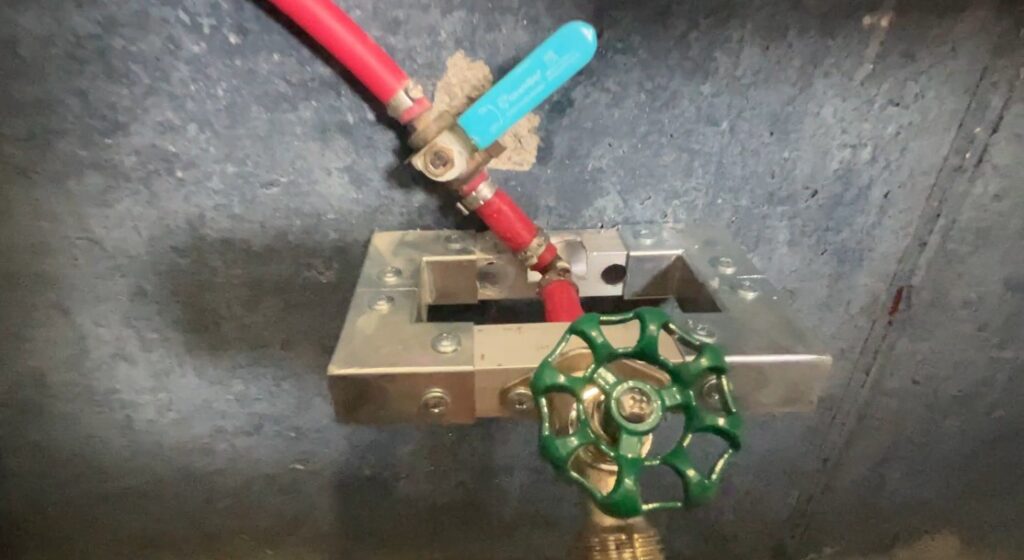
How to Build the Aluminum Frame for the Spigot
The key to mounting a water spigot securely to a concrete wall while accommodating a surface-mounted PEX line lies in the aluminum frame. This frame creates the clearance needed for the PEX line connection while ensuring the spigot is stable and firmly mounted. Here’s how to build it:
Step 1: Cut the Aluminum Tubing
- Measure and cut two pieces of 1″x1″ aluminum square tubing to about 8 inches each. These will serve as the vertical supports for the frame.
- Cut another two pieces for the horizontal sections that connect the supports. Adjust the length based on how much clearance you need for the PEX line to connect to the back of the spigot.
Step 2: Drill Holes for Wall Mounting
- Take one of the vertical tubing pieces and mark spots for drilling mounting holes. These holes will allow you to attach the frame to the concrete wall.
- Using a drill with a masonry bit, carefully create the holes. Ensure the spacing matches the positions where you’ll drill into the wall.
Step 3: Assemble the Frame with 90-Degree Elbow Connectors
- Use 90-degree elbow connectors to join the vertical and horizontal tubing pieces into a rectangular frame.
- Secure the connectors using small screws, ensuring a snug fit. These connectors will give the frame its durability and shape.
Step 4: Test the Fit and Adjust as Needed
- Before mounting the frame to the wall, check that the spigot and PEX line will fit comfortably within the space. Adjust the frame size if necessary.
Why the Aluminum Frame Works So Well
This frame acts as an anchor point for your spigot while providing the extra space needed for the PEX line. Unlike mounting directly to the wall, the frame extends outward slightly, preventing any bending or kinking in the PEX line.
Once the frame is ready, it’s time to move on to securing it to the concrete wall. But before you do, make sure you’ve double-checked the measurements and alignment to avoid drilling errors. For a similar project focused on outdoor functionality, check out this guide on crafting a wooden planter with hidden hose storage.
Attaching the Frame to the Concrete Wall
Once your aluminum frame is built, the next step is mounting it securely to the concrete wall. This is a critical part of the project, as the frame must be stable enough to support the spigot and handle regular use. Here’s how to do it:
Step 1: Mark the Drill Points
- Hold the assembled aluminum frame up to the wall in the desired location.
- Use a marker to mark the spots where the mounting holes in the frame align with the wall. Double-check that the frame is level and positioned correctly.
Step 2: Drill Pilot Holes in the Concrete
- Using a hammer drill fitted with a masonry bit, carefully drill into the marked points on the concrete wall.
- Make sure the pilot holes are deep enough to accommodate the screws, but not so deep that they compromise the integrity of the wall.
Step 3: Attach the Frame to the Wall
- Align the frame’s mounting holes with the pilot holes you drilled in the wall.
- Secure the frame using self-drilling TEK screws. These screws are designed to penetrate both metal and concrete, ensuring a strong, weather-resistant hold. Tighten the screws firmly, but avoid overtightening to prevent damage to the aluminum tubing.
Step 4: Test the Stability
- Once the frame is attached, test its stability by giving it a gentle shake. It should feel solid and not move or wiggle. If it does, double-check the screws and tighten them further if necessary.
Additional Tip for Long-Term Durability
To protect the drilled holes in the concrete and prevent water from seeping in, apply a small bead of silicone caulk around the edges of the screws. This will help seal out moisture and reduce the risk of cracks forming over time.
With the frame securely mounted to the wall, you now have a sturdy and reliable base for your spigot. Next, we’ll walk through how to connect the PEX line and attach the spigot to the frame. For more helpful DIY tips, check out heating it up: selecting and troubleshooting your ideal water heater.

Connecting the PEX Line to the Spigot
With the aluminum frame securely mounted to the concrete wall, it’s time to connect your PEX line to the spigot. This step is where everything comes together, and it’s important to ensure a secure, leak-proof connection that will hold up over time.
Step 1: Drill a Hole in the Aluminum Frame
- Identify the best spot on the aluminum frame for routing the PEX line.
- Use a drill to create a hole large enough for the PEX line to pass through easily. The hole should be positioned so that the PEX can connect directly to the back of the spigot without bending or kinking.
Step 2: Feed the PEX Line Through the Frame
- Push the PEX line through the drilled hole in the frame. Make sure there’s enough slack to comfortably connect it to the spigot.
Step 3: Attach the PEX Line to the Spigot
- Connect the PEX line to the back of the spigot using an XFITTING 1/2″ PEX x 3/4″ GHT sillcock. This brass fitting is specifically designed to work with PEX tubing, ensuring a secure and watertight connection.
- Use a crimp ring and crimping tool to secure the PEX line to the spigot. Make sure the connection is tight and free of leaks.
Step 4: Push the PEX Line Back Into the Frame
- Once the PEX is connected to the spigot, gently push the remaining tubing back into the aluminum frame. This keeps the line protected and gives your setup a clean, professional look.
Step 5: Test for Leaks
- Before proceeding, turn the water on and check for any leaks at the PEX connection. If you notice a leak, tighten the crimp ring or check the fitting to ensure it’s secure.
Why Protecting the PEX Line Matters
By routing the PEX line through the aluminum frame, you shield it from potential damage caused by weather, impact, or UV exposure. This step not only makes your installation look polished but also ensures long-term durability.
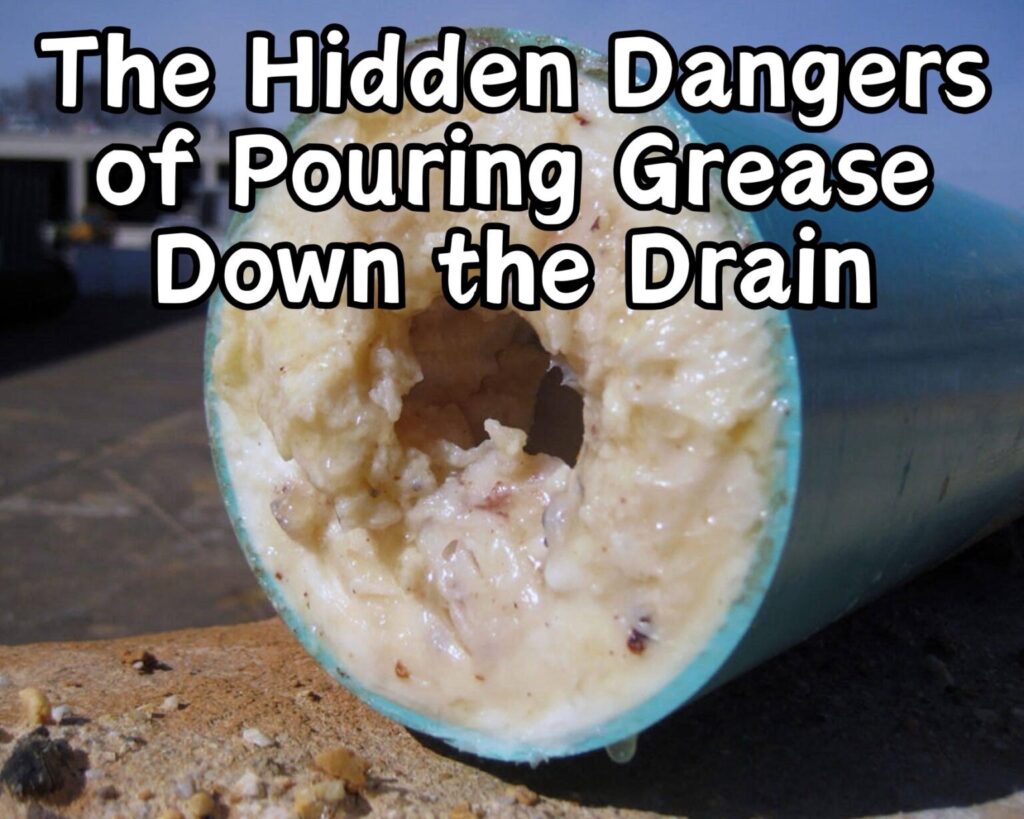
Now that the PEX line is connected and the frame is complete, it’s time to mount the spigot to the frame and finalize your setup. For more ideas on protecting outdoor plumbing and avoiding common DIY pitfalls, check out From Liquid to Blockage: The Hidden Dangers of Pouring Grease Down the Drain.

Securing and Mounting the Spigot
With the PEX line connected and routed through the aluminum frame, the final step is attaching the spigot to the frame itself. This step ensures your spigot is stable, easy to use, and durable enough to withstand regular wear and tear.
Step 1: Position the Spigot
- Align the spigot so the threaded outlet (where you attach a garden hose) is positioned for easy access.
- The back of the spigot, where it connects to the PEX line, should sit flush against the aluminum frame.
Step 2: Secure the Spigot to the Frame
- Using screws, attach the spigot to the edge of the aluminum frame. Most spigots have pre-drilled holes in their base for mounting.
- Be sure to use screws that are long enough to securely fasten the spigot to the frame without piercing all the way through the tubing.
Step 3: Test the Stability
- Give the spigot a firm tug to ensure it’s securely mounted to the frame. It should not wobble or feel loose.
- If the spigot shifts, tighten the screws further until it feels completely stable.
Step 4: Perform a Final Test
- Turn the water supply on and open the spigot to confirm that everything is functioning correctly.
- Check for leaks at the PEX connection, the spigot mounting points, and along the frame. Address any issues immediately by tightening connections or re-sealing with silicone caulk.
Why This Setup Works Perfectly
Mounting the spigot directly to the aluminum frame ensures that:
- The spigot stays securely in place, even with frequent use or heavy hoses attached.
- The PEX line connection remains protected, reducing the risk of damage.
- The overall installation looks neat, professional, and well-designed.
This DIY method not only solves the challenge of mounting a spigot to concrete but also ensures that your plumbing setup is built to last. For more outdoor plumbing inspiration, check out Installing Underground Electric for Your Pool, which pairs well with projects like this for creating a functional backyard space.
With your spigot securely mounted and operational, let’s review why this approach is so effective and how it stands out as a durable, long-term solution.

Why This DIY Solution Works So Well
Mounting a spigot to a concrete wall with a surface-mounted PEX line might seem like a complicated task, but this DIY approach simplifies the process and delivers excellent results. By combining a custom aluminum frame with smart mounting techniques, you create a setup that’s durable, functional, and professional in appearance. Here’s why this solution works so well:
- Provides Clearance for PEX Lines
The aluminum frame extends the spigot outward from the concrete wall, creating enough space to securely connect the PEX line without bending or kinking. This eliminates the strain on the plumbing and ensures smooth water flow. - Stability on Concrete Walls
Concrete walls can be tricky to work with, but using self-drilling TEK screws to anchor the frame ensures a rock-solid mount that won’t loosen over time, even with frequent use or exposure to outdoor elements. - Protects the PEX Line
Routing the PEX line through the aluminum frame shields it from damage caused by weather, impact, or accidental pulls. This adds durability to the setup and keeps the installation looking tidy. - Lightweight but Strong Materials
Using 1″x1″ aluminum square tubing and 90-degree elbow connectors makes the frame lightweight yet strong enough to hold the spigot securely in place. The aluminum is also rust-resistant, which is critical for outdoor use. - Clean and Professional Finish
Unlike makeshift solutions, this approach looks polished and intentional. Whether you’re attaching a garden hose or simply using the spigot regularly, the setup is easy to use and visually appealing.
A Durable Fix for Long-Term Use
This method addresses the two biggest challenges of spigot installation on concrete: secure mounting and PEX connection clearance. Once completed, the setup is not only functional but also built to last, saving you from future headaches.
For more tips on enhancing outdoor plumbing setups and other useful DIY ideas, check out 10 Money-Saving Tips for Homeowners. It’s full of helpful advice to make your home projects more efficient and cost-effective!
Next, let’s explore additional tips and tricks for outdoor plumbing and how you can prevent issues like freezing, leaks, or wear over time.

Additional Outdoor Plumbing Tips and Tricks
Once your spigot is securely mounted and functioning, there are a few additional steps you can take to ensure your setup stays in great condition. These tips not only improve durability but also make maintenance easier and help avoid common outdoor plumbing problems.
Prevent Freezing in Cold Weather
Outdoor plumbing is highly vulnerable to freezing temperatures, which can lead to burst pipes and expensive repairs. To avoid this:
- Use Frost-Proof Spigots: Consider upgrading to a frost-proof sillcock, which is designed to prevent freezing.
- Winterize Your Spigot: Before winter hits, disconnect any attached hoses and drain the spigot to prevent trapped water from freezing.
- Protect Your PEX Line: Insulate any exposed sections of the PEX line to protect it from temperature extremes.
For more insights on preventing winter damage, check out How to Thaw Frozen Pipes Underground.
Keep the Spigot and Frame Clean
Outdoor spigots can accumulate dirt, grime, and rust over time. To maintain a clean and polished setup:
- Wipe down the aluminum frame and spigot periodically to remove debris and prevent corrosion.
- Apply a light coat of silicone spray to metal components to protect against moisture.
Avoid Plumbing Blockages
To ensure your outdoor plumbing system continues to work smoothly, avoid practices that can lead to clogs or damage. For example, always dispose of grease properly instead of letting it wash down drains, which can cause blockages throughout your plumbing system. Learn more about this in The Hidden Dangers of Pouring Grease Down the Drain.
Enhance Functionality with Add-Ons
Take your outdoor setup to the next level by incorporating functional upgrades, such as:
- Hose Organizers: Install a wall-mounted hose reel or use a hidden storage solution like the one in Crafting a Wooden Planter with Hidden Hose Storage.
- Splitters: Attach a hose splitter to your spigot to run multiple hoses or watering systems from a single water source.
Regular Maintenance for Longevity
Inspect your setup every few months for any signs of wear or damage. Tighten loose screws, check for leaks at the PEX connection, and address any issues immediately to prevent them from escalating.
These small but impactful steps can keep your outdoor plumbing in excellent condition, saving you time and money in the long run. By being proactive, you’ll enjoy a hassle-free setup that’s both functional and durable for years to come.
Simple Fix for a Frustrating Problem
Mounting a water spigot to a concrete wall, especially when dealing with a surface-mounted PEX line, can seem like an impossible task at first. But with the right materials, tools, and a little creativity, you can create a setup that’s both durable and professional-looking.
By building a custom aluminum frame using 1″x1″ aluminum square tubing and 90-degree elbow connectors, you provide the necessary clearance for the PEX line while securing the spigot to the concrete wall with self-drilling TEKscrews. Routing the PEX line through the frame protects it from damage, while the final installation offers a polished, functional design that stands up to regular use and harsh outdoor conditions.
This method solves several common problems DIYers face, including:
- Mounting securely to concrete.
- Providing enough clearance for the PEX connection.
- Creating a stable, weather-resistant, and visually clean installation.
If you’re tackling a similar project, take your time to plan and follow these steps. With this setup, you’ll not only solve a frustrating problem but also end up with a reliable solution you can be proud of.
For more DIY tips, tricks, and ideas, be sure to explore these helpful resources:
- 10 Money-Saving Tips for Homeowners
- How to Thaw Frozen Pipes Underground
- Stylish and Functional: Crafting a Wooden Planter with Hidden Hose Storage
With your spigot installed and ready to use, you’ve taken one more step toward building a backyard setup that’s as functional as it is durable. Whether you’re watering plants, filling buckets, or just enjoying an outdoor project, your new spigot installation is built to last.
As an Amazon Associate we earn from qualifying purchases through some links in our articles.