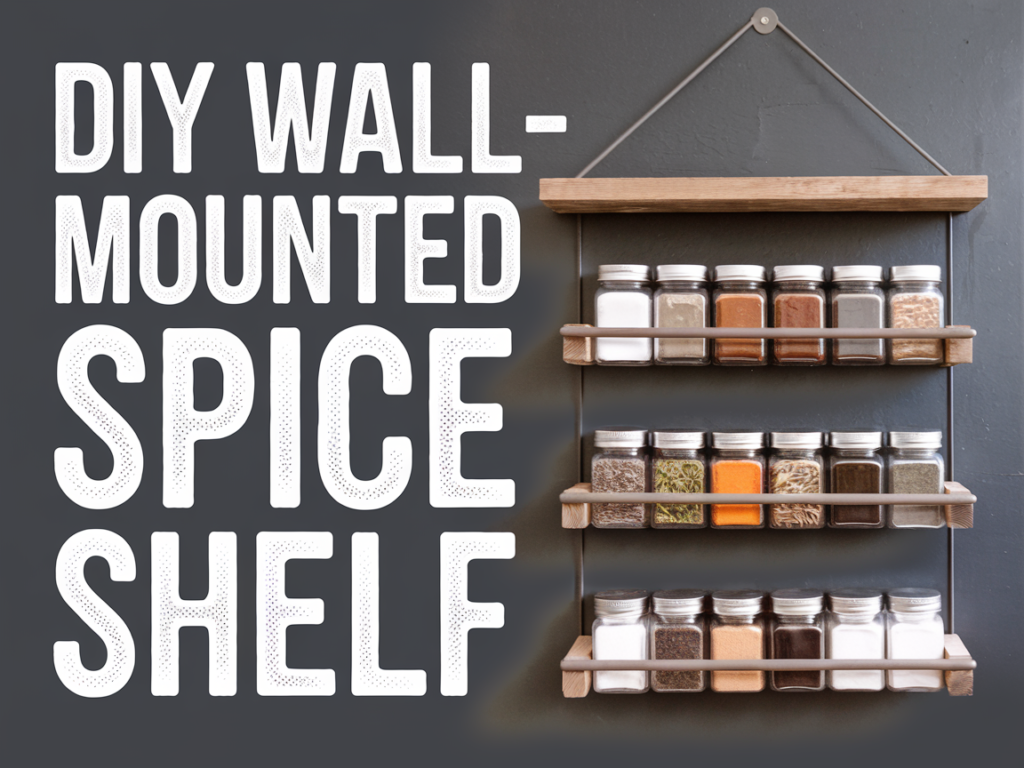
As someone who enjoys both woodworking and cooking, I found the perfect project to combine these passions: a DIY wall-mounted spice shelf. This simple yet functional shelf is designed to hold seasonings and spices, making it a great addition to any kitchen. Here’s how I built it:
Materials and Tools Needed
- 1×4 wood boards (for the shelves)
- 1×2 wood boards (for the front lip of each shelf)
- Wood screws
- Sandpaper or a sanding block
- Wood glue
- Paint or wood stain (optional)
- DEWALT 20V Max Cordless Drill / Driver Kit (for drilling and driving screws)
Steps to Build the Spice Shelf
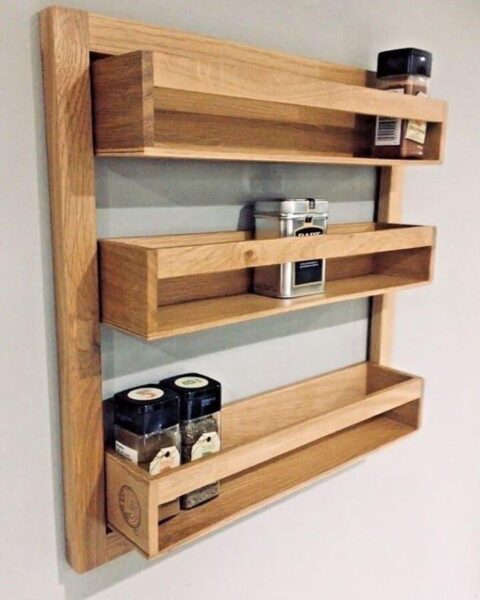
- Cut the Wood to Size: Each shelf is about 18 inches wide. Cut three 1×4 boards to this length for the shelves. Also, cut three 1×2 boards to the same length for the front lip of each shelf.
- Assemble the Shelves: Attach the 1×2 boards to the front edge of each 1×4 board using wood glue and screws. This front lip will prevent spices from falling off. The DEWALT 20V Max Cordless Drill is perfect for driving these screws efficiently.
- Create the Frame: Cut four pieces of 1×4 board for the sides of the frame that will connect and encase the shelves. The height of these pieces will depend on the desired spacing between each shelf.
- Attach the Shelves to the Frame: Position the shelves between the frame pieces and secure them with screws. The compact and powerful DEWALT 20V Max Cordless Drill makes this step quick and easy.
- Sand and Finish: Sand the entire shelf to smooth out any rough edges. Then, apply paint or stain if desired to match your kitchen decor.
- Mount the Shelf: Choose a suitable location in your kitchen and securely mount the shelf to the wall. Ensure it’s level and firmly attached.
This DIY spice shelf is not only a practical storage solution but also a charming addition to any kitchen. Its simple design and the satisfaction of building it yourself make it a worthwhile project. For the assembly and installation, a reliable tool like the DEWALT 20V Max Cordless Drill / Driver Kit is invaluable, providing the power and precision needed for such DIY projects.
Ensuring Strength, Squareness, and Aesthetics for Your DIY Spice Shelf

Building a sturdy, well-aligned, and visually appealing spice shelf is crucial, especially since it will be a functional showpiece in your kitchen. Here’s how to ensure that your DIY spice shelf meets all these criteria:
Ensuring Strength and Stability
- Quality Materials: Start with high-quality wood that is free from warping or cracks. This ensures the shelf’s longevity and ability to hold weight.
- Solid Joinery: Use strong joinery techniques when attaching the shelves to the frame. Wood glue provides an initial bond, but for added strength, reinforce with screws. The DEWALT 20V Max Cordless Drill is perfect for driving screws securely and efficiently.
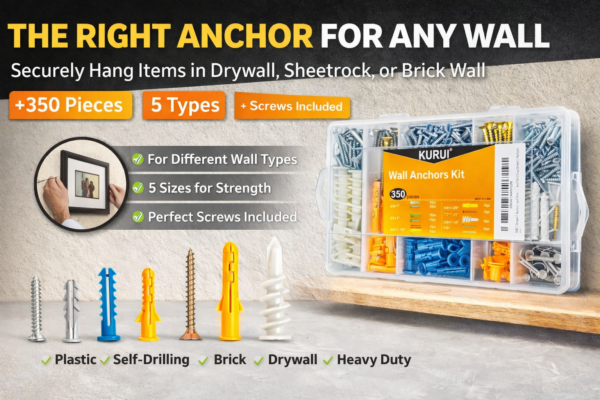
- Adequate Wall Support: When mounting the shelf, make sure to attach it to wall studs or use appropriate wall anchors. This is crucial for supporting the weight of the shelf and its contents.
Ensuring Squareness
- Accurate Measurements and Cuts: Use a reliable measuring tape and a square to ensure all your cuts are precise. Consistency in measurement is key to keeping the shelf square.
- Check Squareness During Assembly: Regularly check the squareness of the shelf with a carpenter’s square during assembly. Adjust as necessary before the glue sets or before fully tightening the screws.
- Clamping: Use clamps to hold the pieces together while you’re working. This not only keeps the shelf square but also frees up your hands to make adjustments or drive screws.
Aesthetic Considerations
- Sanding for Smoothness: Thoroughly sand the shelf to remove any rough spots or splinters. This not only makes the shelf safer to handle but also prepares it for a cleaner finish.
- Consistent Finish: Apply a uniform coat of paint or stain to give your shelf a professional, polished look. Choose a color or finish that complements your kitchen’s decor.
- Hide Screw Heads: For a cleaner look, consider countersinking the screws and covering the heads with wood filler. Once the filler is dry, sand it down and apply your finish. This technique leaves a smooth, unblemished surface.
- Level Installation: When mounting the shelf, use a level to ensure it’s perfectly horizontal. An uneven shelf can be an eyesore and might not function properly.

Questions and Answers About Building a DIY Spice Rack Shelf
What type of wood is best for building a spice rack shelf? For a spice rack shelf, you want wood that is sturdy yet easy to work with. Pine is a popular choice due to its affordability and workability. If you’re looking for something more durable or with a finer grain, hardwoods like oak or maple are excellent options, though they can be more expensive.
How do I ensure the shelves are evenly spaced? To ensure even spacing, first decide on the total height of the rack and the number of shelves. Divide the total height by the number of shelves to determine the spacing. Use a tape measure and a pencil to mark where each shelf will go, and double-check with a level or a ruler for accuracy.
Can I build this shelf without a power drill? While a power drill, like the DEWALT 20V Max Cordless Drill, makes the job easier and faster, you can build the shelf using manual tools. You’ll need a screwdriver and possibly a hammer, but be prepared for the process to take longer and require more effort.
What’s the best way to mount the shelf to the wall? The best way to mount the shelf depends on the wall type. For drywall, you’ll need wall anchors that can support the weight of the shelf and its contents. If you can mount directly into wall studs, that’s even better for stability. Always use a level to ensure your shelf is straight.
How can I customize the design of my spice rack shelf? You can customize your spice rack shelf in many ways. Consider adjusting the size to fit your space, adding decorative molding, or using different stains or paints for a unique finish. You can also design the shelf layout to accommodate containers of various sizes.
Is it necessary to treat or finish the wood? Treating or finishing the wood is recommended, especially in a kitchen environment where moisture and stains are common. A finish like polyurethane or a simple coat of paint can protect the wood and make cleaning easier.
What safety precautions should I take while building the shelf? Always wear safety glasses when cutting or drilling wood to protect your eyes. Work in a well-ventilated area, especially when painting or staining. Keep your workspace organized and free of hazards, and be cautious with power tools.


Further Reading on DIY Home Improvement at DIY Home Wizard
For those passionate about DIY home improvement and looking to expand their knowledge and skills, DIY Home Wizard offers a variety of informative articles. Here are some that you might find particularly enlightening:
- DIY Improved Air Quality at Home: Activated Carbon Air Vent Filters for Enhanced Dust Control: This article explores the benefits of using activated carbon air vent filters in your home to enhance air quality and control dust, offering a practical solution for maintaining a healthier living environment.
- Mastering Trim Installation: A Carpenter’s Guide to Effective Techniques: Dive into the world of trim installation with this comprehensive guide. It covers various techniques and tips to ensure precision and aesthetic appeal in your trim work.
- The Challenges of Using Lacquer in Home Projects: If you’re considering using lacquer for your next project, this article discusses the potential challenges and how to overcome them, ensuring a successful and attractive finish.
As an Amazon Associate we earn from qualifying purchases through some links in our articles.