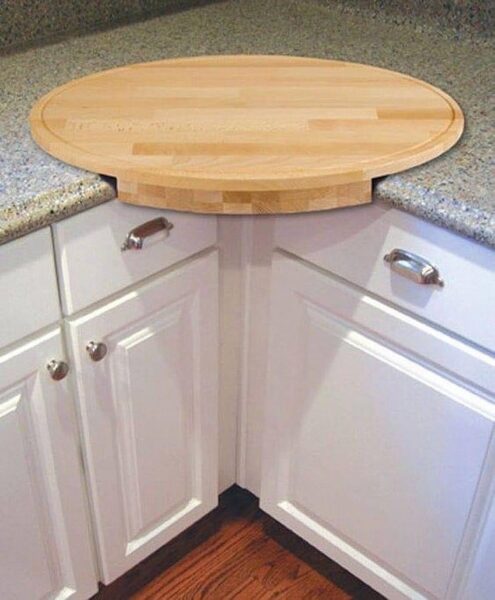
As a DIY enthusiast, I recently embarked on a project to create a functional and stylish addition to my kitchen: a circle cutting board table top. Designed to fit snugly on the inner corner of kitchen counters, this piece not only adds extra room for food preparation but also serves as an easily cleanable cutting board. Here’s how I created this versatile kitchen accessory:
Materials and Tools Needed
- A circular piece of butcher block or hardwood (like maple or walnut)
- Sandpaper (various grits)
- Food-safe wood sealer or mineral oil
- Jigsaw or band saw (for shaping)
- Measuring tape and pencil
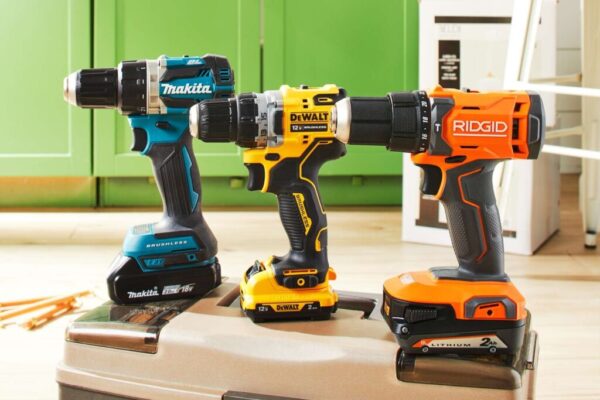
- DEWALT 20V Max Cordless Drill / Driver Kit (for any drilling needs)
Designing the Table Top
- Measure the Counter Space: The first step was to measure the inner corner of my kitchen counter where the table top would sit. This ensured that the circle would fit perfectly in the available space.
- Cutting the Circle: Using a jigsaw or band saw, I cut the butcher block into a circle. The diameter was based on my counter measurements, ensuring it would fit neatly into the corner.
- Shaping the Underneath: To make the table top stay in place, I designed a groove or lip underneath that aligns with the counter edges. This design allows the table top to hold itself in place securely.

Finishing the Cutting Board
- Sanding: I sanded the entire piece, starting with a coarse grit and working up to a fine grit for a smooth finish. This step is crucial, especially for a cutting board, to prevent splinters and ensure a flat surface.
- Sealing the Wood: After sanding, I applied a food-safe wood sealer to protect the wood and make it safe for food preparation. Alternatively, mineral oil can be used for a natural finish.
Using the Table Top
The beauty of this DIY circle cutting board table top is its versatility and convenience. It provides additional counter space for chopping, slicing, and food prep. After use, it can be easily lifted, cleaned, and even stored away if needed.

DIY vs. Buying a Corner Countertop Cutting Board: Weighing Your Options
When it comes to adding a corner countertop cutting board to your kitchen, you might find yourself torn between making one yourself or purchasing a ready-made option like the Navaris Corner Countertop Cutting Board. Both choices have their merits, and the decision often comes down to factors like budget, time, and personal preference.
Reasons to DIY a Corner Countertop Cutting Board
- Customization: Building your own allows you to tailor the size, shape, and type of wood to perfectly fit your kitchen’s specific needs and aesthetics.
- Satisfaction of Crafting: There’s a unique satisfaction that comes from creating something with your own hands. It adds a personal touch and story to your kitchen space.
- Potential Cost Savings: Depending on the materials you use, DIYing can be more cost-effective, especially if you already have the necessary tools and skills.
- Quality Control: When you make it yourself, you have complete control over the quality of the materials and the build process.

Reasons to Buy a Corner Countertop Cutting Board
- Convenience: Buying a ready-made cutting board, like the Navaris Corner Countertop Cutting Board, is undeniably more convenient. It’s a quick, hassle-free option that doesn’t require any crafting skills or tools.
- Time-Saving: If you’re short on time or not inclined towards DIY projects, purchasing a cutting board is a practical choice. It saves you the time and effort involved in sourcing materials and building.
- Professional Finish: Ready-made cutting boards often come with a professional finish and are crafted to be durable and aesthetically pleasing, like the beautifully designed Navaris board made from acacia wood.
- Immediate Use: When you buy a cutting board, it’s ready to use right out of the box, which is ideal for those who need an immediate solution.
Whether you choose to DIY or buy depends on your individual circumstances and preferences. If you enjoy woodworking and have the time, making a corner countertop cutting board can be a rewarding project. However, if you prioritize convenience and immediate use, purchasing a high-quality option like the Navaris Corner Countertop Cutting Board is a great choice. Both paths lead to the same goal: enhancing your kitchen’s functionality and style.
Understanding the Essentials of DIY vs. Buying a Corner Countertop Cutting Board
How much woodworking skill is needed to DIY a corner countertop cutting board? DIYing a corner countertop cutting board requires basic to intermediate woodworking skills. You should be comfortable with measuring, cutting, sanding, and finishing wood. If you’re a beginner, it might be a challenging but achievable project.
What tools are necessary for making a cutting board myself? To make a cutting board, you’ll need a saw (hand saw, jigsaw, or band saw), sandpaper or a sander, a drill for any holes or handles (a DEWALT 20V Max Cordless Drill is a great option), and possibly clamps for gluing pieces together. You’ll also need wood finishing supplies like mineral oil or a food-safe sealer.
Can I achieve the same quality as a store-bought cutting board if I make it myself? Yes, with the right tools, materials, and attention to detail, you can achieve a high-quality cutting board. The key is to use good-quality wood and ensure a smooth, well-sanded finish. Applying a proper food-safe sealant is also crucial for durability and safety.
Is it more cost-effective to build or buy a cutting board? This depends on several factors, including the cost of materials and tools you already own. If you have to purchase all the tools and materials new, it might be more cost-effective to buy a pre-made cutting board like the Navaris Corner Countertop Cutting Board. However, if you already have the tools and can source materials inexpensively, DIY could be more economical.
How long does it take to make a cutting board compared to buying one? Making a cutting board can take several hours to a few days, depending on your skill level and the complexity of the design. Buying a cutting board is instant, especially if you order online, like purchasing the Navaris Corner Countertop Cutting Board.
What are the benefits of a corner countertop cutting board like the Navaris model? The Navaris Corner Countertop Cutting Board is designed to fit snugly into corner spaces, maximizing kitchen counter space. It’s made from high-quality acacia wood, known for its durability and aesthetic appeal. The convenience of having a ready-to-use, professionally finished product is a significant advantage.
Are there any special care instructions for a DIY wood cutting board? Yes, both DIY and store-bought wood cutting boards require regular maintenance. This includes cleaning after each use, regular oiling to prevent drying and cracking, and avoiding prolonged exposure to water. Always use a food-safe oil or wax for maintenance.
Enhancing and Simplifying Your DIY Corner Countertop Cutting Board Project
Creating a DIY corner countertop cutting board can be both a fun and rewarding project. To make your build fancier or to simplify the process, here are some tips and ideas:
Making Your Cutting Board Fancier
- Incorporate Mixed Woods: Using a combination of different woods can create a striking visual effect. Consider a mix of light and dark woods like maple and walnut for an elegant contrast.
- Add a Juice Groove: Carving a juice groove around the perimeter of the cutting board can add functionality and style. It’s perfect for cutting fruits or meats and keeps the juices from spilling onto the counter.
- Engraving and Decorative Elements: Personalize your cutting board with engraved designs or patterns. This could be anything from simple geometric patterns to more intricate designs, depending on your skill level and tools available.
- Edge Detailing: Adding a beveled or rounded edge to the cutting board can enhance its appearance. This small detail can make a big difference in the overall look of the piece.
Simplifying Your Build
- Pre-Cut Wood: Purchase pre-cut wood to the dimensions you need. Many hardware stores offer cutting services, which can save you time and ensure precision.
- Sanding Tools: Invest in a good quality sander. A power sander can significantly reduce the time and effort required to get a smooth finish.
- Use Templates: For consistent and precise shapes, especially if you’re making multiple cutting boards, create or use a template. This can be particularly helpful for any intricate designs or patterns.
- Quality Adhesives: Use high-quality wood glue for any joints or inlays. This ensures a strong bond and a smoother finish.
- Simplify the Design: If you’re new to woodworking, start with a simple design. A basic round or square cutting board without additional decorative elements can still be highly functional and aesthetically pleasing.
- Assembly Aids: Tools like clamps can hold your work in place as you assemble or glue pieces, making the process easier and more accurate.
Further Reading on DIY Home Improvement at DIY Home Wizard
For those who love diving into DIY projects and enhancing their living spaces, DIY Home Wizard offers a wealth of resources. Here are some articles that you might find particularly useful:
- Building a DIY Wall-Mounted Spice Shelf: A Simple and Functional Project: This article guides you through creating a wall-mounted spice shelf, perfect for adding extra storage and organization to your kitchen.
- DIY Improved Air Quality at Home: Activated Carbon Air Vent Filters for Enhanced Dust Control: Learn how to improve the air quality in your home with activated carbon air vent filters, a simple yet effective way to control dust and allergens.
- Mastering Trim Installation: A Carpenter’s Guide to Effective Techniques: This comprehensive guide offers valuable tips and techniques for installing trim, ensuring precision and a professional finish.
These articles provide practical tips and creative ideas for a range of home improvement projects. Whether you’re looking to tackle a specific challenge or seeking inspiration for your next DIY endeavor, DIY Home Wizard has the resources you need. Explore these articles and more at DIY Home Wizard for a wealth of information on enhancing your home with your own hands.
As an Amazon Associate we earn from qualifying purchases through some links in our articles.


