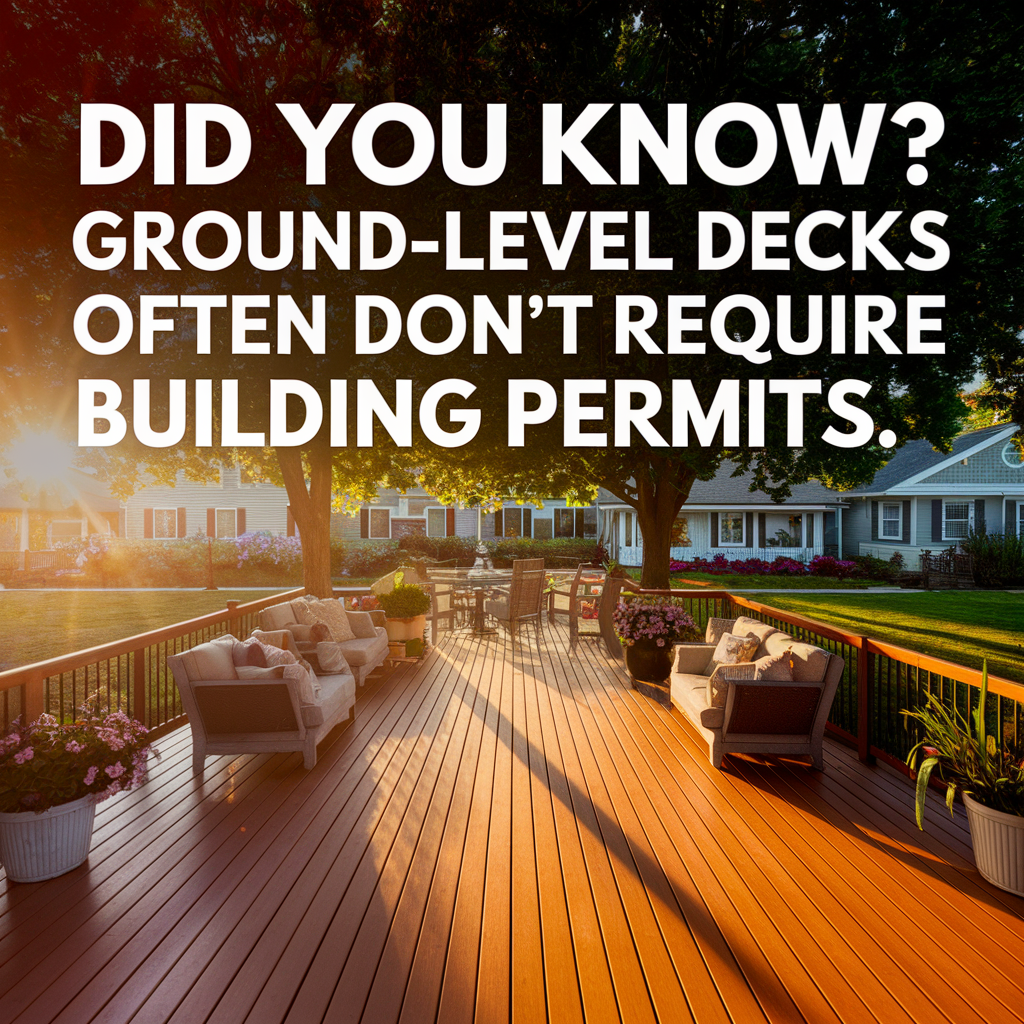

Why Ground-Level Decks Are a Favorite Among DIYers
I’ve tackled a lot of home projects, but few gave me the satisfaction (and chill factor) that a ground-level deck did. It instantly transformed a plain backyard into a cozy hangout zone—without needing to hire a contractor, rent big tools, or deal with building permits.
In many places, ground-level decks under a certain height don’t require permits, which makes this one of the most headache-free ways to upgrade your outdoor space.
If you’re not sure about the rules in your area, this article on building permits breaks it all down.


No Elevation, No Problem: What Makes These Decks So Appealing
Let me be clear—this isn’t some complex, raised structure with guardrails and staircases. Ground-level decks are generally built low to the ground, around 8 inches to a foot off the dirt, or even directly on top of gravel or patio blocks.
Here’s what makes them such a win:
- No digging holes for posts (unless you want to)
- No need for expensive materials
- Easier to build in a weekend
- Doesn’t usually need railings or inspections
And if you want to avoid digging altogether, check out this version I built without digging a single hole.
What to Check Before You Build (Permit Talk, But Chill)
Even though most ground-level decks fly under the permit radar, double-check your local rules. Many cities allow decks under 30″ high and under a certain square footage without permits.
But here’s what I always do before starting:
- Call your local planning office — just to be safe.
- Check your property lines and easements — don’t build where you can’t.
- Review HOA rules if you’ve got one (they can be stricter than the city).
Again, this permit guide really helped me sort it out.

How I Planned My Layout Without Overcomplicating It
The key is keeping it simple. I wanted a space for my grill, a few chairs, and a small table. So I marked off a 10×12 area in the yard, made sure it was level-ish, and started planning the frame.
Here’s how I handled it:
- Used landscaping string and stakes to outline the space
- Measured diagonals to make sure it was square
- Cleared out any sod, weeds, and rocks
- Laid down landscape fabric to keep weeds away (optional but helpful)
And if you want to keep it super budget-friendly, these $50-and-under DIY ideas are great for adding finishing touches later.


Framing It Right: What I Used and Why
I kept my framing super basic: 2×6 pressure-treated lumber for the joists, and 4x4s placed on concrete deck blocks as support.
Why 2x6s? They’re strong enough for a low deck, but easy to work with. And I spaced my joists 16” apart, which is standard for deck boards.
Quick tips:
- Make sure the wood is rated for ground contact
- Use galvanized screws or deck fasteners
- Don’t skip gravel under deck blocks—it helps with drainage
This simple setup was inspired by the techniques in this clean, no-dig ground-level deck guide—which honestly saved me a ton of time.
Deck Boards: Go Budget or Go Beautiful
I had to decide between pressure-treated wood and composite boards. I went with wood for now to save money (you can always upgrade later).
Here’s what I learned:
- Wood is cheaper upfront, but needs sealing or staining yearly
- Composite lasts longer and needs less maintenance, but costs more
- Either way, use spacers for airflow between boards
If you plan to clean your deck without using a pressure washer, you’ll love this guide:
👉 How to clean a deck without a pressure washer — it works surprisingly well!

Sealing, Staining & Waterproofing (Yes, You Gotta)
Once my deck boards were down, I sealed it with a clear waterproofing sealant. If you’re using pressure-treated lumber, let it dry for a few weeks before sealing or staining.
Why seal it?
- Prevents cracking and splinters
- Helps resist water and mold
- Keeps your deck looking fresh longer
While you’re at it, grab a good cordless pressure washer like this one to keep it clean throughout the year without the hassle.


Add Your Finishing Touches
Once the deck is done, make it your own. I added:
- Solar post cap lights (cheap and awesome)
- A DIY garden arbor entrance for style (see how I made mine for under $50)
- A few planter boxes and comfy outdoor chairs
The best part? Sitting out there with a drink in hand, knowing I built the whole thing myself.
This Deck Project Is The Real Weekend Upgrade
A ground-level deck is one of the most rewarding DIY projects I’ve ever tackled. It doesn’t just add value to your home—it gives you a place to relax, host friends, or just enjoy the outdoors without stepping in the mud.
If you’re thinking about starting your own, do yourself a favor and dive into this step-by-step walkthrough:
👉 Simple and Inviting: Your Guide to Building a DIY Ground-Level Deck
Seriously—this guide gave me the confidence to go for it. You can do it too.
As an Amazon Associate we earn from qualifying purchases through some links in our articles.