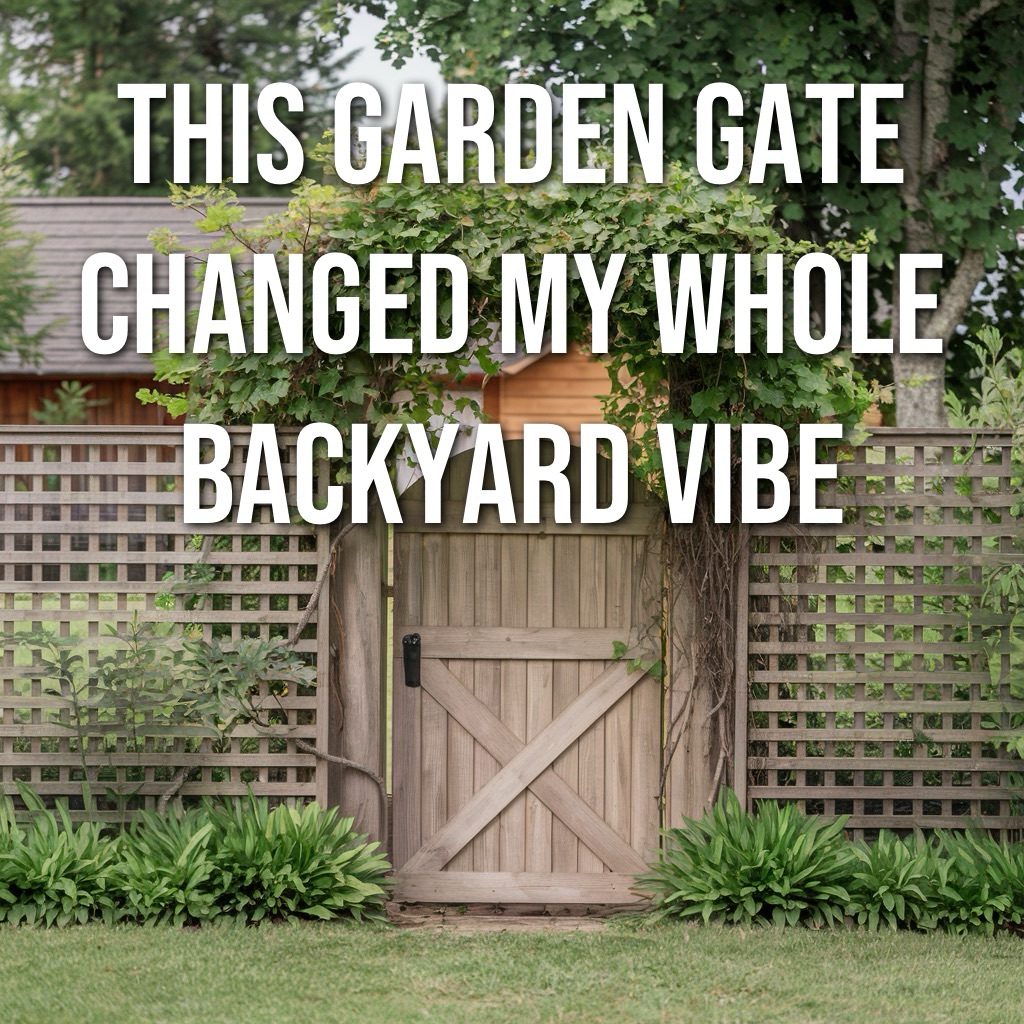

Trellis, Vines, and a Gate That Feels Like a Storybook
You know those garden moments that feel like something out of a storybook? For me, it was the first time I stepped through the wooden gate I built with a trellis wrapped in green.
There’s just something peaceful and inviting about walking through a gate covered in climbing vines. It doesn’t have to be fancy—and it’s actually one of the simplest DIY upgrades you can do in your yard.
I used a basic wooden frame, added a trellis to one side, planted some climbing clematis, and within a few weeks, it started turning into something magical.
👉 See how I designed and built my gate with trellis vines here 🌿

Why Add a Wooden Gate with a Trellis?
There’s nothing wrong with a plain fence gate—but adding a trellis and a few climbing plants changes everything. It gives your outdoor space structure, charm, and a sense of arrival.
Here’s why I’ll never skip this again:
- Instant Curb Appeal – It elevates your entire garden or backyard space.
- Privacy Without Walls – Plants create a soft, green screen that still feels open.
- Functional Entry Point – Great for separating garden areas, pathways, or just hiding the compost bin.
- Budget-Friendly Upgrade – You can build this with scrap wood, basic tools, and a couple of plant starts.
Best Plants for a Trellis Gate
If you’re wondering what kind of vines or climbing plants to pair with your DIY wooden gate design, here’s what worked for me and what might fit your climate:
- Clematis – Fast-growing, gorgeous flowers, easy to train on a trellis.
- Morning Glory – Quick climbers with bold color (great for summer).
- Climbing Roses – More commitment, but the payoff is huge.
- Trumpet Vine – Good for attracting hummingbirds, but give it space.
- Wisteria – Heavy but stunning—only use with a strong support structure.


Build Tip: Keep It Simple
Don’t overthink it. My gate was literally four pieces of treated wood, a few screws, and a pre-made trellis panel. You don’t need a degree in carpentry to make something beautiful.
For more inspiration, peek at my full process here 👉 🌼 Transform Your Garden With These Wooden Gate Designs


How to Make Your Wooden Gate Last
If you’re going to take the time to build a charming garden gate with a trellis, protect it! Here’s what I did to keep mine looking great:
- Use pressure-treated or cedar wood – both are great for outdoor use.
- Seal or stain – A simple weatherproof stain makes a big difference.
- Use galvanized or outdoor-rated screws – to prevent rust and rot.
Want more budget-friendly tips like this? Check out 👉 50 DIY Home Improvement Projects Under $50 for other ideas you can pair with your gate.
More Ways to Enhance Your Garden Space
Once you’ve got the gate in place, you’ll probably start dreaming up other ways to cozy up your yard. Here are a few that go hand-in-hand with a storybook-style entry:
- Add a DIY garden arbor 👉 How I Built a Garden Arbor for Under $50
- Create zones in your yard using pathways and planters
- Try a deck border with flowers 👉 How to Build a Ground-Level Deck Without Digging Holes
- Install solar lights along the fence or gate edges for nighttime charm

It’s Not Just a Gate—It’s a Feeling
That’s the thing about small DIY upgrades like this—they seem simple, but they change how you feel in your space. Every time I walk through our wooden gate with climbing vines, it’s like I’ve stepped into my own little garden retreat.
It’s peaceful. It’s personal. And it all started with a simple gate and a little green.
✨ Get inspired and see all my favorite wooden gate designs here ✨


Where to Place a Wooden Garden Gate for Maximum Effect
You don’t need a big space to make this work. In fact, smaller yards benefit even more from a standout gate.
Here are a few clever places to install one:
- Between your yard and garden
- Leading to a hidden corner or fire pit
- As an entry to a deck or patio
- Near the pool area for a beachy feel
- At the start of a stone path or arbor
Pair it with a budget-friendly arbor build like I did here 👉 How I Built a Garden Arbor for Under $50 and you’ve got something magical.
How to Make It Last: Weatherproofing Your Gate
This is important. You don’t want to spend hours building a beautiful gate just to watch it warp, split, or sag within the year.
Here’s what I always do:
- Use pressure-treated lumber or cedar
- Apply outdoor wood sealant or stain immediately after building
- Re-stain or seal every 1-2 years
- Make sure your posts are sunk deep or anchored with brackets
- Use galvanized hardware so nothing rusts out
Pro tip: if you’re using pre-treated wood, let it dry for a few days before staining. It holds better.
💦 Want to keep your deck or gate clean long-term? Try this 👉 How to Clean a Deck Without a Pressure Washer — it works on wood gates too!


Add Some Finishing Touches to Your Entry
Once you’ve got your DIY wooden gate installed, you’ll want to spruce up the area around it. A few of my favorite touches:
- Solar lights or lanterns on either side
- Rustic welcome sign or hanging plant hook
- Flagstone path leading through the gate
- Potted herbs or lavender flanking the entrance
- A nearby 2-person hot tub if you’re going for that full retreat vibe 👉 Choosing the Best 2-Person Hot Tub
These small extras make a big impact and make your space feel finished and peaceful.


Get the Most Out of Your Outdoor Space
Pairing your gate with other backyard upgrades turns your yard into a relaxing escape. If you’re dreaming of a peaceful, practical backyard you actually want to spend time in, consider these projects too:
- Deck build without needing permits 👉 Ground-Level Deck Guide
- Pressure washing made easy 👉 Cordless Pressure Washer Review
- Affordable DIY upgrades 👉 50 Projects Under $50
- Backyard privacy tips 👉 Why Backyard Privacy Matters More Than Ever


Why I’ll Never Skip This Feature Again
Out of all the things I’ve built or fixed up around our home—and there have been a lot—this simple wooden gate with a trellis is still one of my favorite projects.
It’s small. It’s affordable. And yet it completely changed how I feel walking into the yard. It created a little sense of peace, privacy, and welcome that no other feature could.
If you’re on the fence about adding one (pun intended), take it from someone who did it the hard way first: start with the gate.
🌿 Check out the designs that gave me my “storybook” yard vibe here 🌿
As an Amazon Associate we earn from qualifying purchases through some links in our articles.