
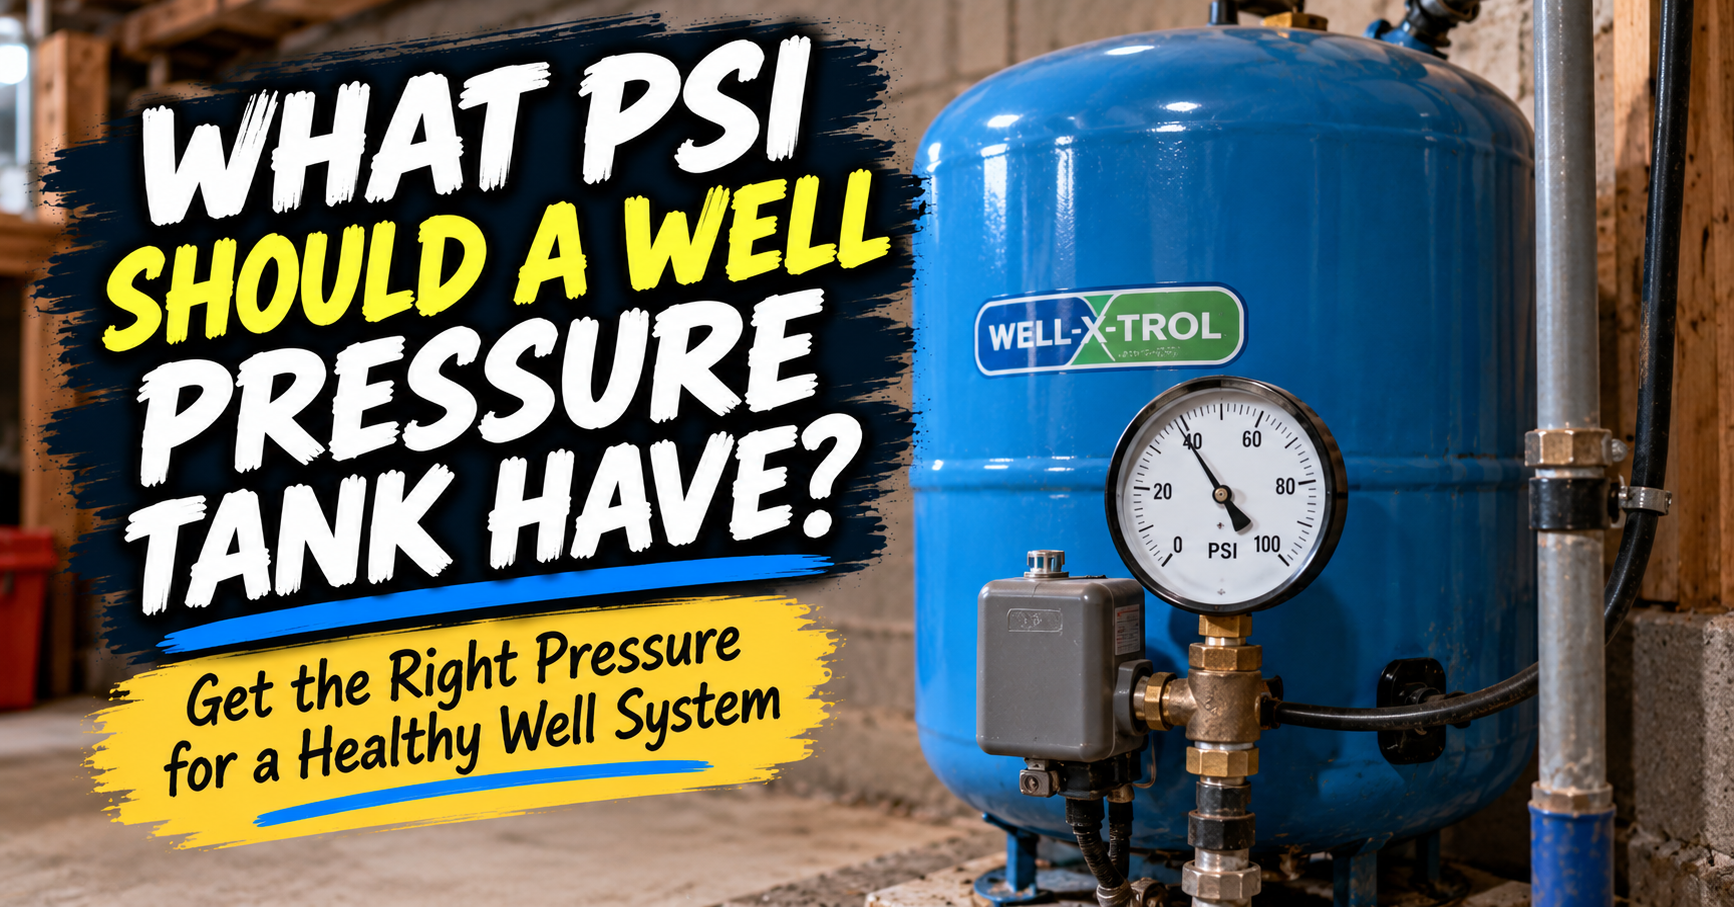
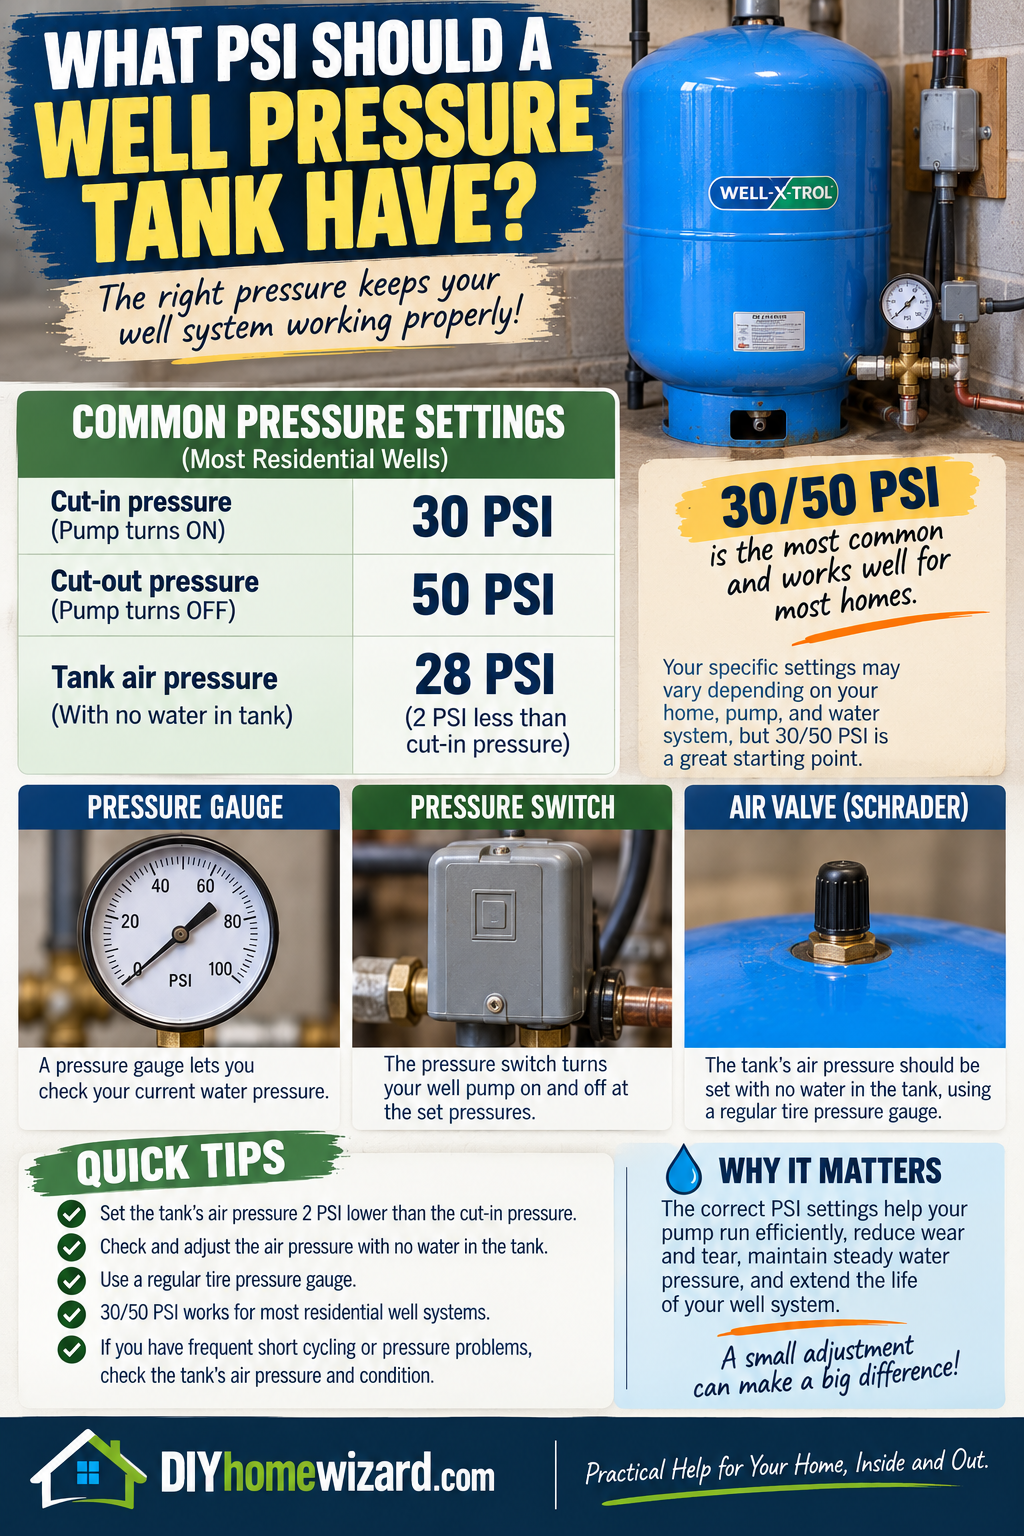
A well pressure tank should usually be set about 2 PSI below the pressure switch’s cut-in setting when the tank is completely empty of water. That normally means 28 PSI for a 30/50 system and 38 PSI for a 40/60 system.
The words “empty of water” are important. If I check the tank while the plumbing is still pressurized, I am not measuring the true air precharge. I am mostly confirming that the water system currently has pressure, which the gauge on the pipe could have told me without all the extra effort.
I also do not automatically add air because the tank seems low. First, I identify the actual pump settings, safely drain the tank, and make sure I am dealing with a modern bladder or diaphragm tank.
The Quick Answer for Common Well-Tank Settings
Most residential well systems use one of two common pressure-switch ranges.
A 30/50 pressure switch starts the pump at approximately 30 PSI and shuts it off at approximately 50 PSI. The pressure tank is commonly set to 28 PSI when empty.
A 40/60 pressure switch starts the pump at approximately 40 PSI and shuts it off at approximately 60 PSI. The pressure tank is commonly set to 38 PSI when empty.
Here is the basic relationship:
| Pressure Switch Setting | Pump Starts | Pump Stops | Empty Tank Precharge |
|---|---|---|---|
| 20/40 PSI | 20 PSI | 40 PSI | 18 PSI |
| 30/50 PSI | 30 PSI | 50 PSI | 28 PSI |
| 40/60 PSI | 40 PSI | 60 PSI | 38 PSI |
| 50/70 PSI | 50 PSI | 70 PSI | 48 PSI |
These are common starting points, not permission to change every system to whichever row looks best.
The tank manufacturer’s instructions, pump capability, pressure-switch specifications, plumbing condition, and equipment ratings still matter.
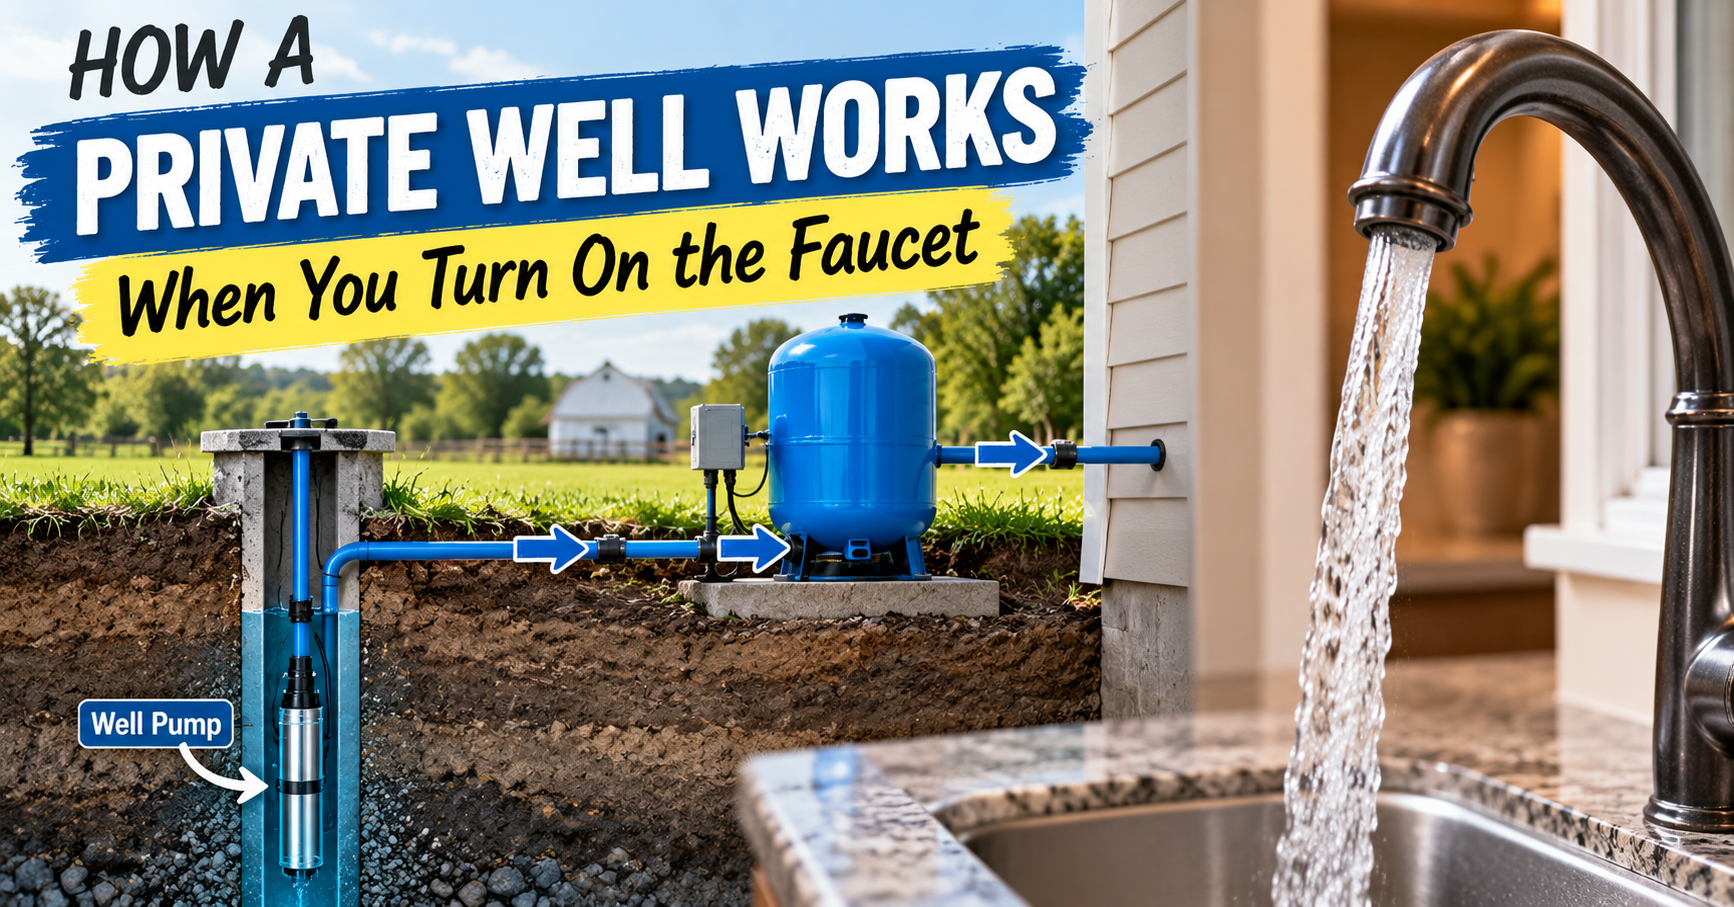
If you are new to private wells, our guide explaining how the pump, pressure tank, and switch work together makes these numbers much easier to understand.
What Does 30/50 or 40/60 Actually Mean?
The two numbers describe when the pressure switch starts and stops the well pump.
The lower number is called the cut-in pressure. This is the point where the switch tells the pump to start.
The higher number is called the cut-out pressure. This is the point where the switch tells the pump to stop.
With a 40/60 switch, the system normally works like this:
- The pressure tank is full enough for the system to reach about 60 PSI.
- I open a faucet and use stored water.
- System pressure gradually falls.
- Pressure reaches approximately 40 PSI.
- The pressure switch turns on the pump.
- The pump supplies water and refills the tank.
- Pressure climbs back to approximately 60 PSI.
- The pressure switch turns the pump off.
The pressure tank’s air precharge supports this operating range. It is not supposed to match the cut-out pressure, and it is not supposed to be randomly set somewhere between the two numbers.



Why Is the Tank Set 2 PSI Below Cut-In Pressure?
The tank needs to retain a small amount of water when the pump reaches its cut-in setting.
Setting the empty tank approximately 2 PSI below cut-in pressure helps the tank deliver water smoothly until the switch starts the pump.
If the tank precharge is too high, the tank can run out of water before the pressure switch activates the pump. This can create a sudden hesitation, pressure drop, or brief interruption in water flow.
If the precharge is too low, the tank may accept too much water and provide less useful drawdown than intended. The bladder can also operate outside its preferred position.
The 2 PSI relationship keeps the air charge and switch setting working together instead of fighting each other.
I think of it like arriving at the gas station shortly before the tank is completely empty. I want the pump to start before the water side of the pressure tank reaches nothing but good intentions.
Precharge and Water Pressure Are Not the Same Reading
This is where many people get tripped up.
The pressure gauge on the plumbing shows water-system pressure. The air valve on the tank allows me to measure the tank’s air precharge.
Those readings interact, but they are not checked under the same conditions.
When the pump is on and the tank contains water, the air inside is compressed by the system. A tire gauge placed on the air valve may show a number similar to the water-pressure gauge.
That does not tell me the tank’s true precharge.
The true precharge is measured when:
- Electrical power to the well pump is off.
- A faucet or drain has been opened.
- All water pressure has been relieved.
- The plumbing gauge reads zero PSI.
- The tank has emptied as completely as the system allows.
Only then can I measure the tank’s resting air pressure accurately.


How I Find My Well Pump’s Actual Pressure Settings
I do not rely entirely on a label or the numbers printed inside a pressure-switch cover.
Those markings tell me what the switch was designed or originally set to do. They do not prove it still operates at those exact pressures.
A previous homeowner may have adjusted it. The switch may be worn. The pressure gauge may be inaccurate. Mineral buildup may also affect the small passage that supplies pressure to the switch.
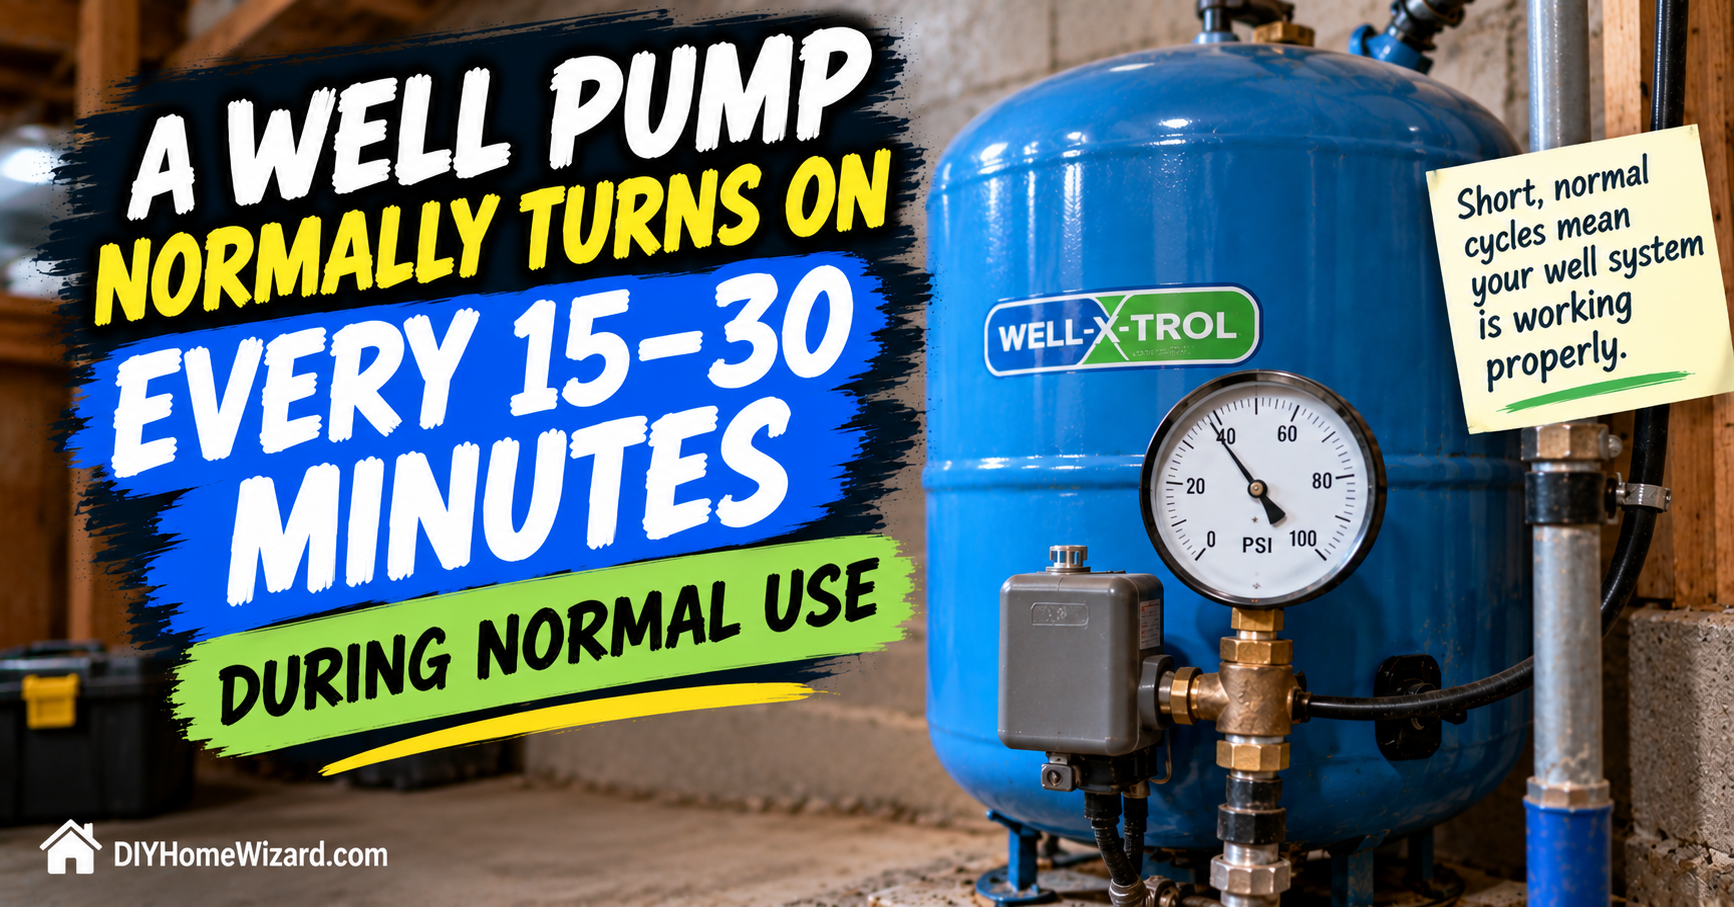
I find the operating settings by watching the system complete a normal cycle.
First, I make sure the pump is on and no unusual water demand is occurring. Then I open one faucet and watch the pressure gauge.
I record the pressure where the pump starts. That is the approximate cut-in pressure.
I continue watching while the pump refills the system. The pressure where the pump stops is the approximate cut-out pressure.
Our existing walkthrough for testing water pressure with a gauge explains what I watch for while pressure rises and falls.
If the needle sticks, jumps, or never returns to zero when the system is drained, I question the gauge before adjusting anything else.
How to Check Well Pressure Tank PSI Correctly
Checking the tank is not difficult, but the order matters.
Shut Off Power to the Pump
I turn off the correct breaker or disconnect serving the well pump.
I verify that the pump cannot start while I am draining the system. I do not assume a silent pump means the power is off.
If I cannot confidently identify the correct circuit or disconnect, I stop and call someone who can.
Open a Faucet or Drain Valve
I open a faucet or use the system’s drain connection to release water pressure.
Water will continue flowing while the pressure tank empties. I wait until the flow stops and the plumbing pressure gauge reads zero.
I leave a faucet open while checking and adjusting the tank. This prevents pressure from becoming trapped in the plumbing.
Measure Air at the Tank Valve
I remove the cap from the tank’s air valve and use an accurate tire-pressure gauge.
A digital gauge is easy to read, but an ordinary pencil-style gauge can work if it is accurate and in good condition.
I take more than one reading. If they vary wildly, I try another gauge before changing the tank.
Compare the Reading With Cut-In Pressure
I subtract approximately 2 PSI from the pump’s actual cut-in setting, unless the manufacturer specifies otherwise.
For a measured 40 PSI cut-in, I would generally expect about 38 PSI of empty-tank precharge.
For a measured 30 PSI cut-in, I would generally expect about 28 PSI.
Restore the System Carefully
After any approved adjustment, I replace the air-valve cap, close the drain or faucet as appropriate, and restore pump power.
I then watch the system complete at least one full cycle. I check for leaks, normal pump operation, and reasonable cut-in and cut-out pressures.
If anything behaves strangely, I shut the system back down rather than continuing to adjust random parts.


What Type of Pressure Tank Do I Have?
The 2 PSI guideline normally applies to precharged bladder or diaphragm pressure tanks.
These tanks contain a flexible barrier that separates water from compressed air. Most modern residential systems use this general design.
Older air-over-water tanks do not have the same internal bladder. Water and air occupy the same tank, and the air can gradually dissolve into the water.
Those older systems may use an air-volume control or another method of maintaining the correct air cushion.
If I see a large galvanized tank without an obvious modern bladder-tank design, I do not immediately apply instructions meant for a newer tank.
I look for the manufacturer, model number, data label, and installation information. If the tank cannot be identified, I have a well professional check it.
Following the right procedure on the wrong type of tank is a wonderful way to turn a five-minute job into an all-day mystery.
What Happens If the Tank Pressure Is Too Low?
A low precharge means the tank does not contain enough compressed air when it is empty.
The tank may accept more water than intended, but it can provide less efficient drawdown through the proper pressure range. The bladder may also stretch or move in ways it was not designed to do.
Possible symptoms include:
- The pump runs more frequently.
- Water pressure fluctuates.
- The tank feels unusually full of water.
- Pump cycles become shorter.
- The system does not provide the expected drawdown.
- The bladder may experience additional stress.
Low pressure does not automatically mean the tank is bad. Air can escape through the valve or another small leak.
If I restore the correct precharge and the tank holds it, the tank may continue operating normally.
If the pressure keeps disappearing, I look for a leaking air valve or failed internal bladder.



What Happens If the Tank Pressure Is Too High?
Too much precharge can also create poor water delivery.
If the air pressure is at or above the pump’s cut-in setting, the tank may empty of water before the pressure switch starts the pump.
I may notice a sudden pressure drop, hesitation, or brief loss of water just before the pump starts.
The system may behave as though the tank is too small because very little water is being stored and released through the usable pressure range.
A high precharge can happen when someone adds air without draining the tank first. The reading looks low or confusing, so more air gets added. Then more gets added because nothing seems to improve.
Eventually, the tank has enough air to launch a weather balloon, yet the shower still acts terrible.
I always drain the water pressure first. Without that step, I am adjusting a number I have not actually measured.
Can I Check Tank Pressure While the Pump Is Running?
No. That will not provide the true precharge reading.
While the system is running, water pressure compresses the air inside the tank. The air valve will reflect the current system pressure rather than the tank’s empty resting charge.
For example, a correctly precharged 40/60 tank may show close to 60 PSI at the air valve when the system is full. That does not mean the precharge is 60 PSI.
Once the pump is off and the water is completely drained, the same tank should commonly measure around 38 PSI.
I can watch the plumbing pressure gauge while the pump operates to find cut-in and cut-out settings. I check the air precharge only after safely shutting down and draining the system.
Two different readings, two different conditions.



Why Does My Tank Still Read the Wrong PSI After Draining?
If the air pressure is lower than expected after the water side is completely drained, several things may be happening.
The tank may simply need its precharge corrected. The air valve could also be leaking slowly.
I apply soapy water around the valve and look for bubbles, provided the tank manufacturer allows this basic external check. A leaking valve core may need replacement by someone familiar with servicing pressure tanks.
The internal bladder may also be failing.
If water comes from the air valve, the bladder or diaphragm has probably ruptured. Adding air will not repair the separation between the air and water sides.
If the tank will not accept air, will not hold pressure, or behaves strangely after adjustment, I stop there.
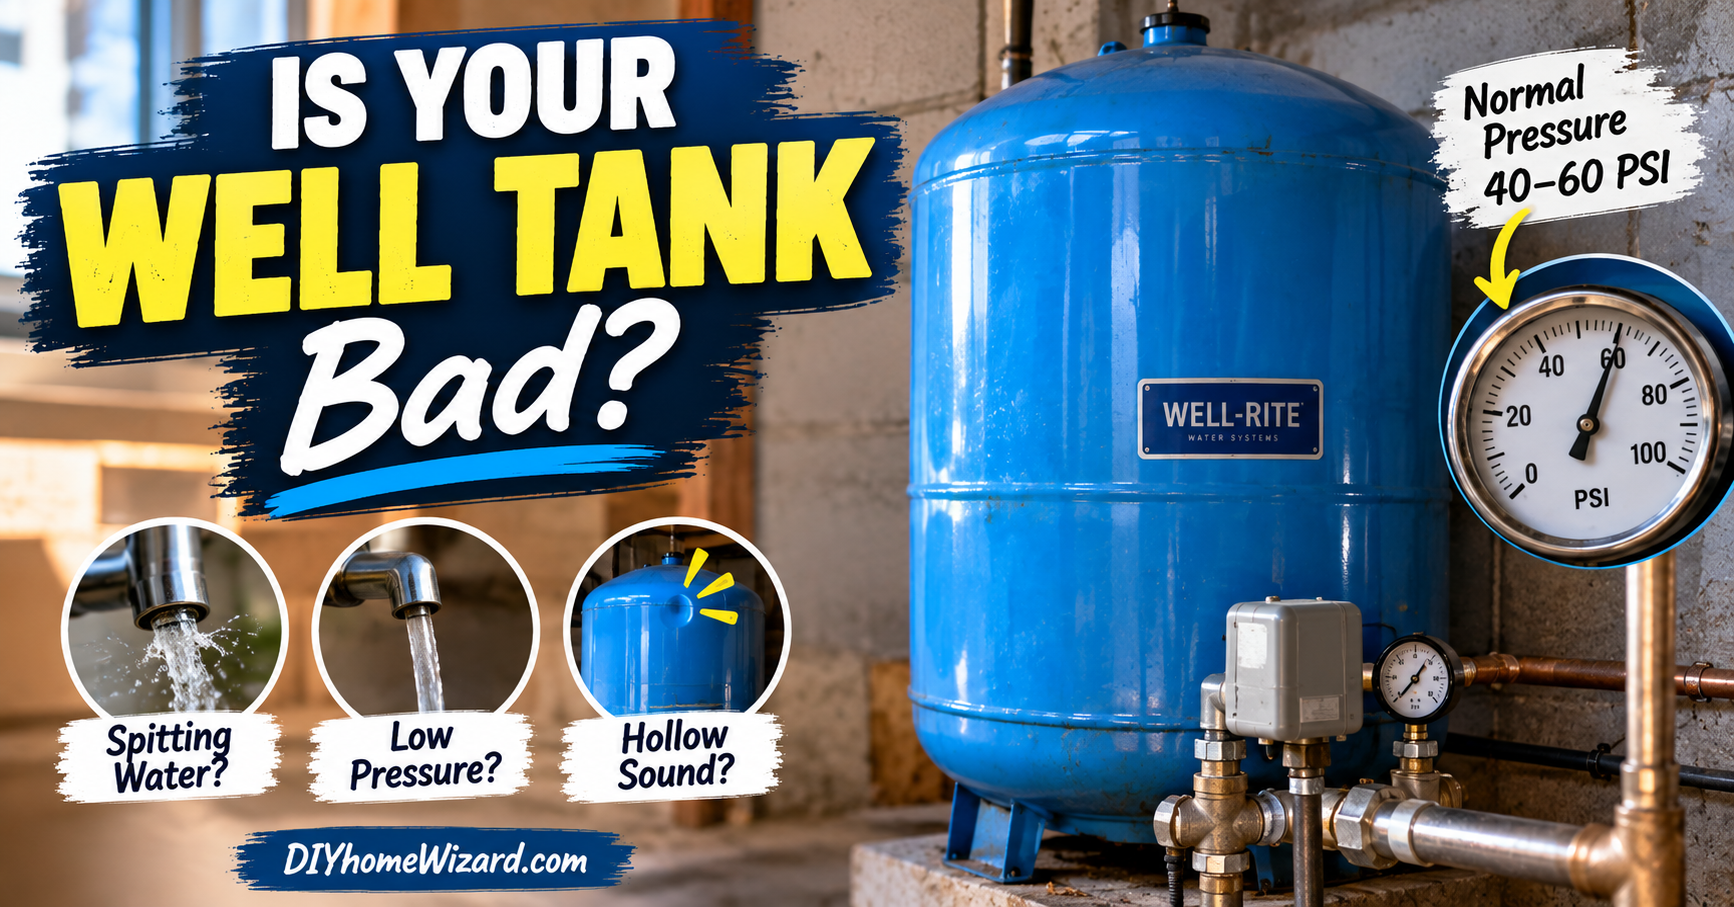
Our guide on how to recognize a failing well pressure tank covers the other symptoms that help separate a simple air-charge problem from a tank that needs replacement.
Can I Use an Air Compressor to Add Pressure?
An air compressor can be used carefully on many bladder-style tanks, but I add air slowly.
A large compressor can raise pressure faster than expected. I add a small amount, stop, and check the gauge.
I do not rely only on the compressor’s built-in regulator or gauge. I verify the final pressure with a separate, accurate tire gauge.
A portable inflator is slower but can be easier to control. A manual bicycle pump can also work, although it may provide an unexpected workout on a large tank.
I never exceed the tank’s rated pressure. I also never assume the goal is to reach the pressure switch’s upper number.
For a typical 40/60 system, the common empty precharge is around 38 PSI, not 60 PSI.
The manufacturer’s label and instructions take priority over a general online guideline.
Should I Change From 30/50 to 40/60 PSI?
Moving from 30/50 to 40/60 can provide stronger household pressure, but it is not automatically the right upgrade.
The well pump must be capable of reaching the higher cut-out pressure while providing usable flow.
The pressure tank precharge must be adjusted to match the new cut-in setting. The pressure switch, plumbing, filters, fixtures, water heater, and treatment equipment must also be rated for the higher pressure.
An older or weak pump may take much longer to reach 60 PSI. In some cases, it may never reach it, causing the pump to run continuously.
Higher pressure can also expose weak fittings and existing leaks.
Before increasing the settings, I want to know why the pressure feels low. A clogged sediment filter, restricted pipe, undersized plumbing, weak pump, or low-producing well will not necessarily be fixed by turning two adjustment nuts.

Our article on improving water pressure throughout the house explains why I diagnose the restriction before increasing system pressure.
Is 40/60 Better Than 30/50?
Neither setting is universally better.
A 40/60 system generally provides stronger pressure at fixtures and may feel more like municipal water. It can be helpful in multi-story homes or homes with treatment equipment that creates a pressure drop.
A 30/50 system places less pressure demand on the pump and household plumbing. It may be appropriate for a pump that cannot efficiently reach higher pressure.
The right setting depends on:
- Well depth.
- Pump type and horsepower.
- Pump performance curve.
- Elevation between the pump and house.
- Number of floors.
- Household water demand.
- Pipe size and condition.
- Filtration and treatment equipment.
- Pressure-tank rating.
- Plumbing and appliance limits.
Changing the switch setting because 60 is a bigger number than 50 is not much of a plan.
I want the pump to reach cut-out pressure without struggling and the entire system to remain within its safe ratings.
Why Does the Pressure Change During a Shower?
A conventional pressure-tank system naturally operates across a range.
On a 40/60 system, the pressure may begin near 60 PSI and gradually fall toward 40 PSI as water leaves the tank. The pump starts and pressure rises again.
Some change in shower strength can therefore be normal.
A dramatic surge every few seconds is not normal. That can indicate a waterlogged tank, failed bladder, incorrect precharge, small tank, or another short-cycling problem.
If the gauge moves normally but the shower pressure becomes weak, I look for flow restrictions such as a clogged filter, showerhead, valve, or pipe.
Pressure and flow are related, but they are not identical. A gauge may show reasonable static pressure while a dirty cartridge makes actual water flow miserable.
I watch the gauge while the shower or another steady fixture is running. The timing of the pressure change often tells me more than the highest number alone.
Why Does My Pump Start Before Reaching the Listed Cut-In PSI?
A small difference between the marked setting and actual operation is not unusual.
Pressure gauges have tolerances. Switches can also drift slightly with age, and the scale printed inside the cover is not a precision calibration tool.
Larger differences deserve attention.
Possible causes include:
- An inaccurate pressure gauge.
- A clogged pressure-gauge opening.
- Sediment in the pressure-switch nipple.
- Worn pressure-switch components.
- Previous switch adjustments.
- Electrical contacts that are sticking or chattering.
- Pressure changes occurring too rapidly for the gauge to display clearly.
The switch’s sensing connection is often narrow. Iron, rust, and sediment can partly block it, causing the switch to react late or inconsistently.
The switch contains live electrical contacts. I can observe the outside and record the pressure behavior, but I do not remove the cover or touch the contacts while power is on.
Should the Tank Have the Same PSI as the Water Gauge?
When the system is pressurized, the air side and water side of a bladder tank will often show similar pressure because the bladder transfers pressure between them.
That does not mean the tank’s precharge should be set to whatever the plumbing gauge currently reads.
If the system is sitting at 55 PSI, the tank air valve may also read close to 55 PSI. That is operating pressure.
Once the pump is shut off and all water is drained, the plumbing gauge should read zero. The remaining pressure at the tank’s air valve is the precharge.
This is the number I compare with the pressure-switch cut-in setting.
The difference between operating pressure and precharge sounds fussy until someone accidentally adds 20 PSI to an already correct tank. Then the difference becomes very noticeable at the faucet.
How Often Should I Check Well-Tank Pressure?
I do not check it every week. A pressure tank that is working properly should not require constant attention.
Checking the precharge about once a year can be reasonable, especially when performing other well-system maintenance. I also check it when cycling behavior or water pressure changes.
Reasons to check it sooner include:
- The pump begins short cycling.
- Pressure starts surging.
- The tank seems to provide very little drawdown.
- The pump starts after only a small amount of water is used.
- The tank has recently been installed or replaced.
- The pressure switch has been changed.
- Air was recently added.
- The system was drained for another repair.
The National Ground Water Association’s maintenance guidance recommends paying attention to pressure cycling and having the overall well system inspected regularly.
I record the date and reading. That makes it easier to spot a slow air loss instead of trying to remember whether the tank was at 38 PSI or “somewhere around fortyish” last year.
Is the Factory Precharge Already Correct?
A new tank may arrive with a common factory precharge, but that does not guarantee it matches the system where it will be installed.
For example, several residential Amtrol tanks list a 38 PSI factory precharge. That is convenient for many 40/60 installations.
A 30/50 system would commonly require a lower empty-tank precharge. The new tank would need to be adjusted before normal operation.
Shipping, storage, temperature changes, or small leaks can also affect the pressure between manufacturing and installation.
I always verify the precharge before putting a new tank into service.
The installation instructions for the actual model matter more than the fact that the tank arrived with air inside it.
“Factory set” means it left the factory with a setting. It does not mean the factory knew which pressure switch was waiting in my basement.
Can the Wrong PSI Damage the Pressure Tank?
Operating with the wrong precharge can reduce performance and place unnecessary stress on the bladder or diaphragm.
Too little air can allow excessive water into the tank and may cause the bladder to stretch improperly.
Too much air can leave little usable water in the tank and create a sudden pressure drop before the pump starts.
Either condition may contribute to more frequent pump cycling. Repeated cycling can then wear the pump motor and pressure-switch contacts.
The tank also must never be operated above its maximum working pressure. Its data label should list the pressure rating.
If the system pressure rises beyond the switch’s normal cut-out setting, I shut off the pump and call a professional. That may indicate a stuck switch, clogged pressure connection, incorrect adjustment, or another control failure.
I do not release random amounts of air as a way to control dangerously high water pressure. The cause needs to be found.
When the Pressure Is Correct but the Pump Still Short Cycles
Correct precharge does not rule out every tank problem.
The bladder may be damaged in a way that still allows an air reading. The tank may be too small for the pump, or it may have much less drawdown than expected.
The problem may also be elsewhere.
I consider:
- A leaking toilet or fixture.
- A failed check valve.
- An underground water-line leak.
- A clogged pressure-switch connection.
- A faulty pressure switch.
- A badly restricted filter.
- An incorrectly sized pressure tank.
- A variable-speed pump control problem.
- A pump that is oversized for the tank.
- A pressure gauge giving inaccurate readings.
I watch whether pressure falls while every fixture is closed.
If it does, water may be leaking from the system or flowing backward. A healthy pressure tank cannot maintain pressure when water is escaping somewhere else.
If pressure remains steady with everything closed but the pump cycles rapidly during use, the tank’s drawdown and sizing deserve more attention.
When I Call a Well Professional
Checking a tank’s air precharge can be a manageable homeowner task when the system has a clear shutoff, drain, readable gauge, and identifiable bladder tank.
I stop when the situation involves more than a straightforward pressure check.
I call for help when:
- Water comes from the tank’s air valve.
- The tank will not hold air.
- The pump breaker repeatedly trips.
- The pressure switch chatters or sparks.
- There is a burned electrical smell.
- The pump cannot reach cut-out pressure.
- Pressure continues rising beyond the normal setting.
- The tank or fittings are badly corroded.
- Water leaks near electrical components.
- The system cannot be safely isolated and drained.
I never adjust the electrical pressure switch with power on. I also do not bypass the switch to force the pump to run.
A pressure setting is only helpful when the rest of the system can operate safely at that pressure.
The Number I Use and the Checks I Make First
For a conventional bladder-style well tank, I usually start with the 2 PSI rule.
A 30/50 system commonly needs 28 PSI in the empty tank. A 40/60 system commonly needs 38 PSI.
Before touching the air valve, I verify the actual cut-in pressure. Then I shut off pump power, drain the water pressure completely, confirm the plumbing gauge reads zero, and measure the tank with an accurate air gauge.
I follow the tank manufacturer’s instructions if they specify a different procedure or setting.
The correct well pressure tank PSI is not whichever number produces the strongest shower. It is the pressure that matches the pump’s cut-in setting and lets the tank provide proper drawdown without starving the plumbing or forcing the pump to cycle constantly.
Calder Voss writes for DIY Home Wizard about private wells, pressure tanks, water-pressure problems, and the practical checks that help homeowners avoid replacing the wrong equipment.